 Bity

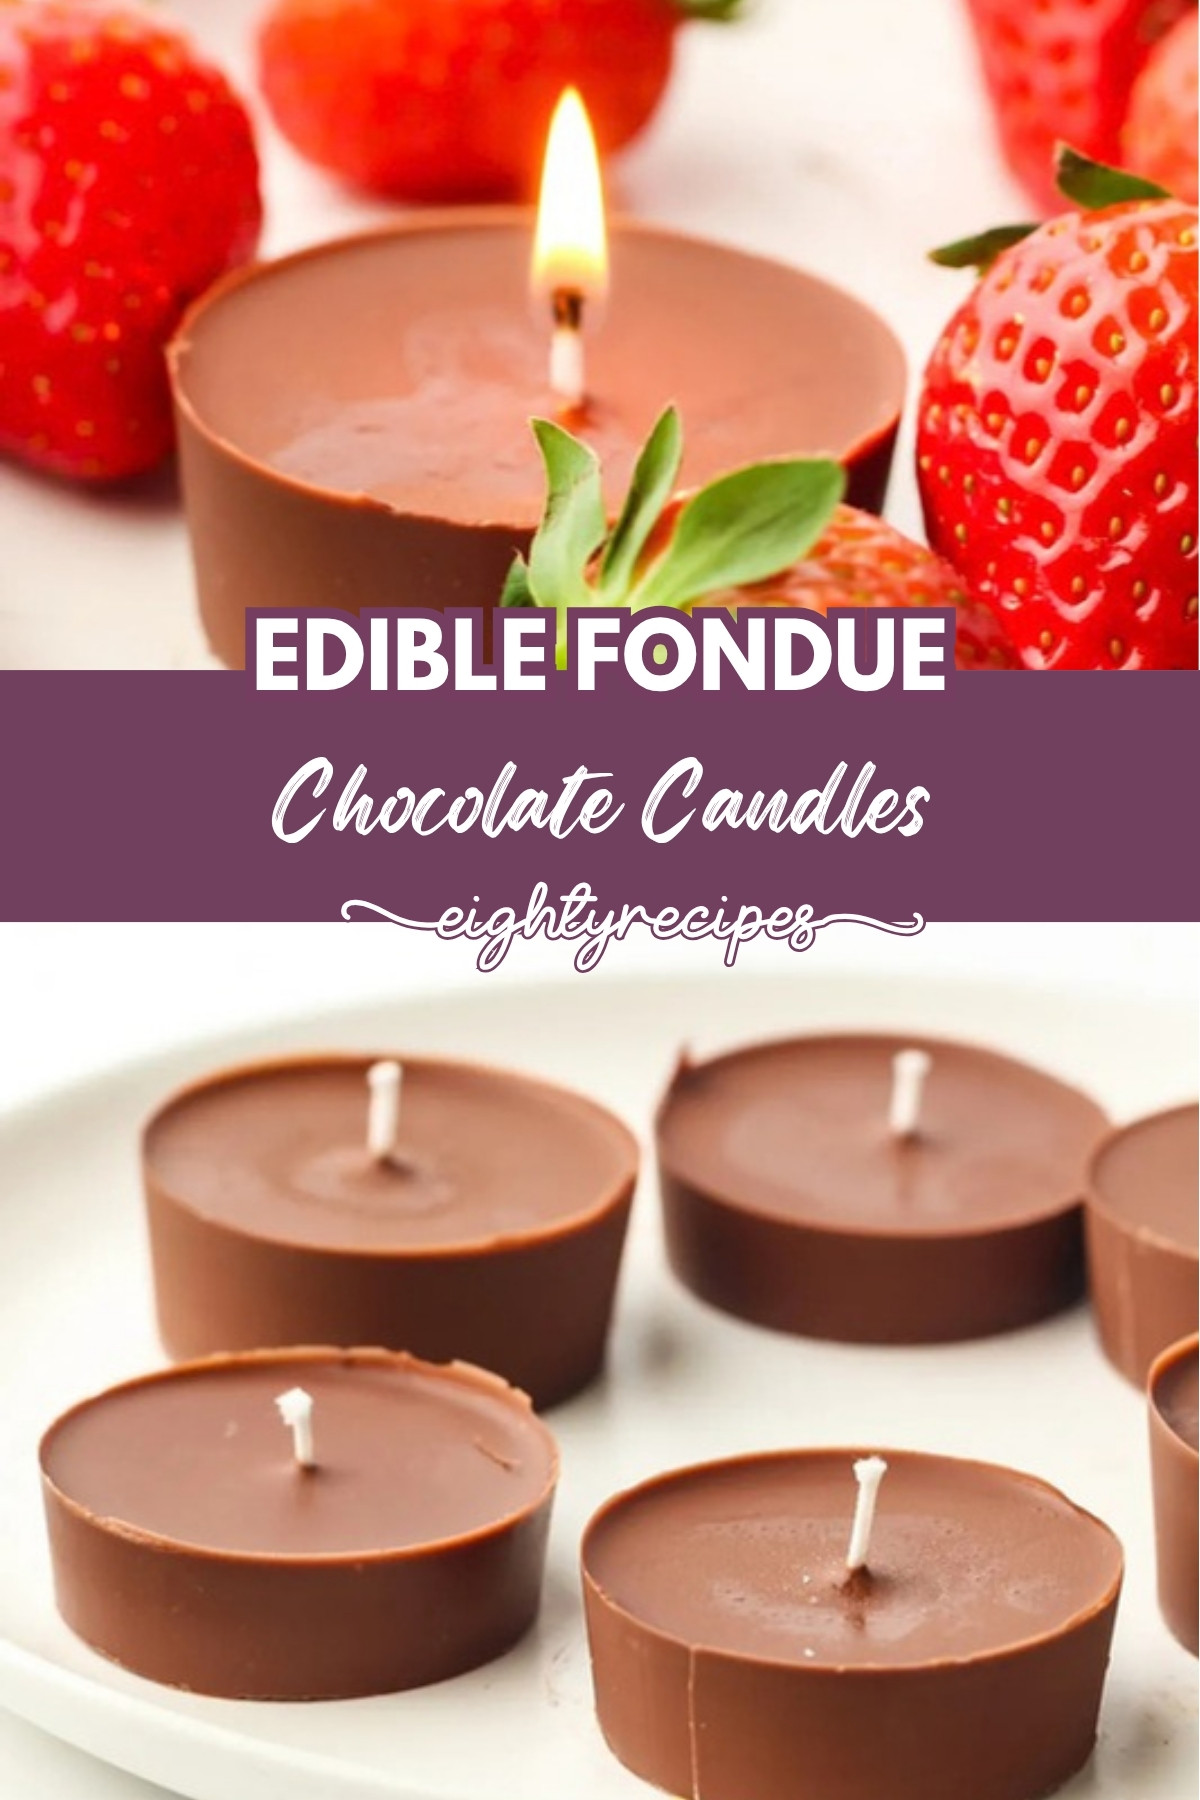
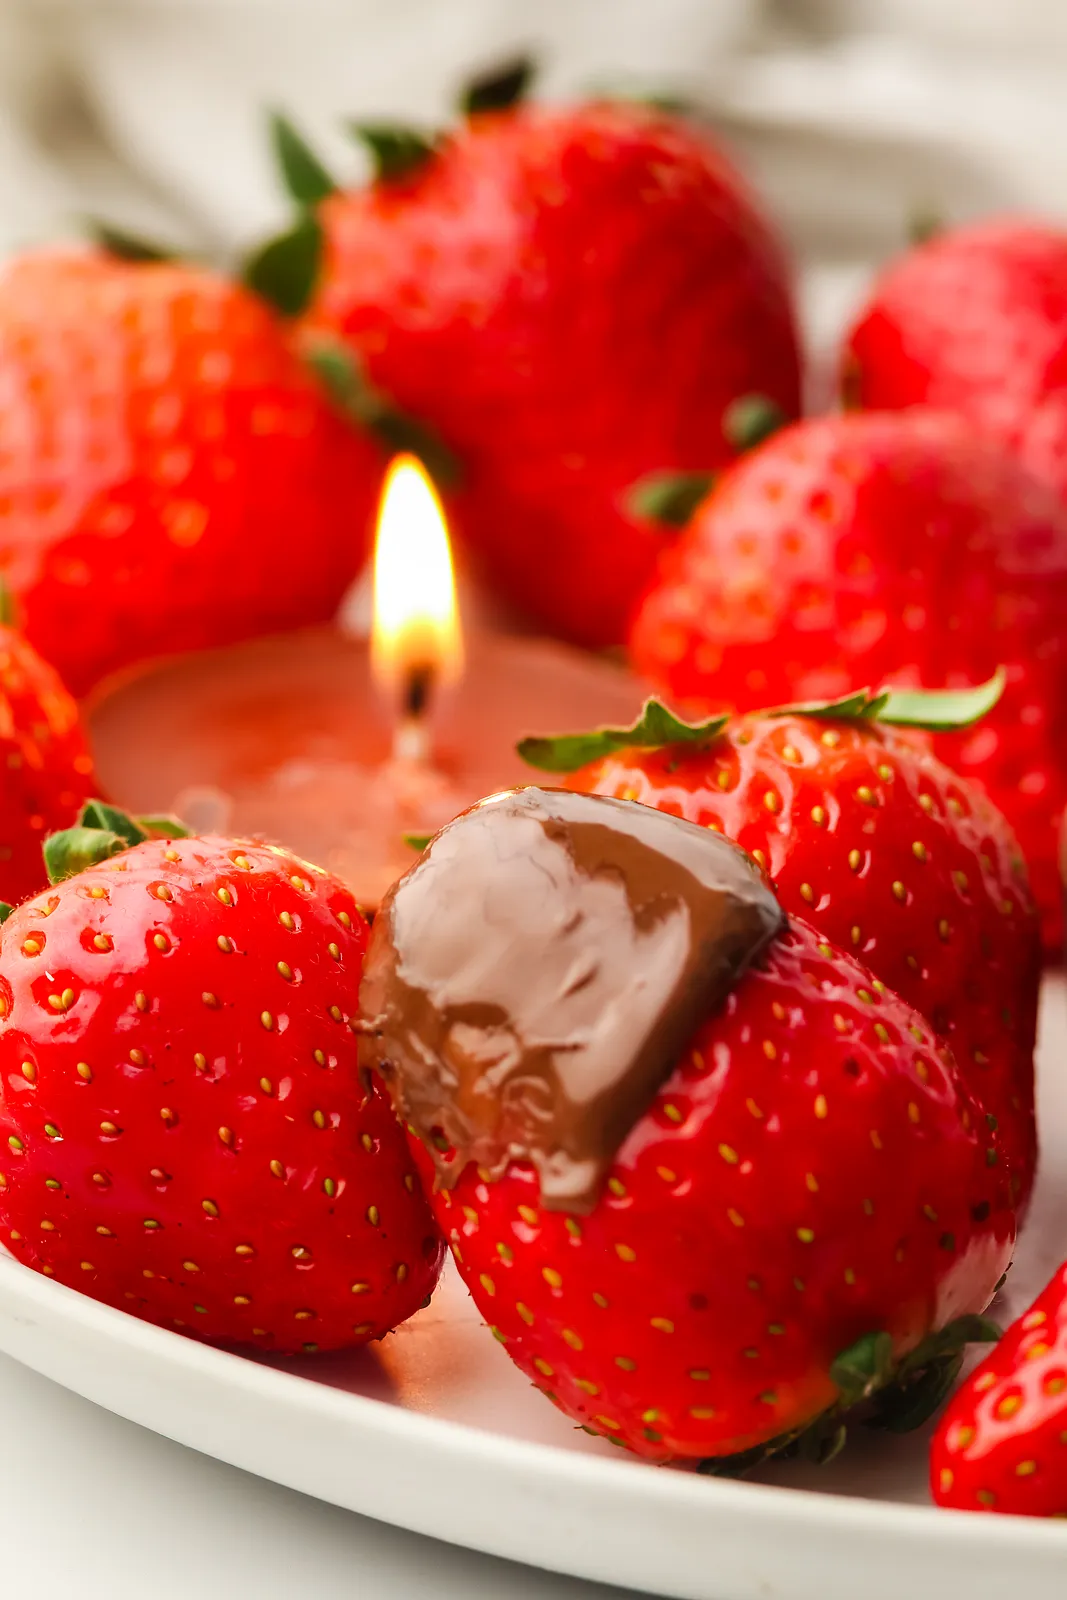
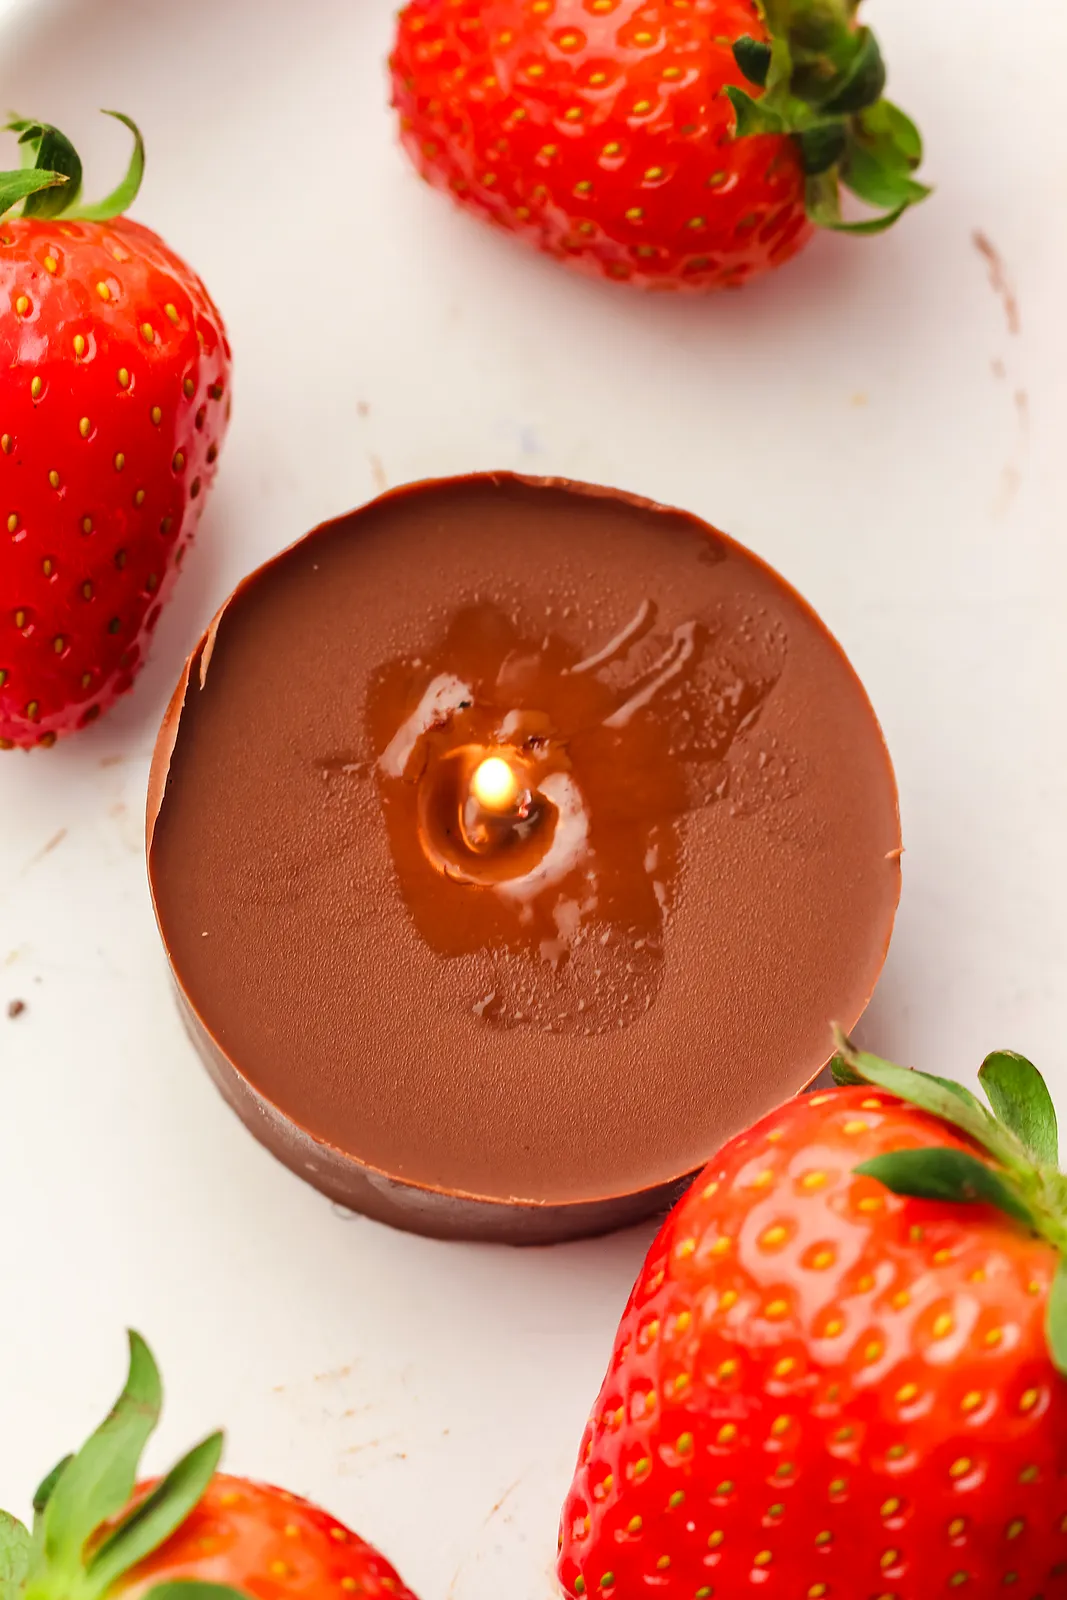
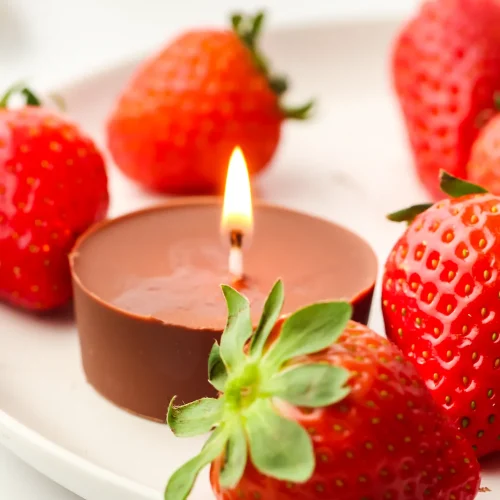
These edible chocolate candles are the most fun I’ve had with a bar of chocolate in years. You pour melted chocolate into paper cups, stand a food-grade wick in the middle, chill them, and then light one at the table. As it burns, a little pool of warm, molten chocolate forms around the flame, ready for dunking strawberries.
In short, edible chocolate candles are melted chocolate poured into paper cups, set around a food-grade wick in the fridge, then lit briefly at the table so the flame melts a small pool of chocolate for dipping fruit. They take about 70 minutes in total, ten minutes of work plus about an hour of chilling, and 400 to 600 g (14 to 21 oz) of chocolate makes two or three large candles or six small ones.
I made a batch for a cosy night in, and my husband thought I’d bought him a scented candle until I handed him a strawberry. It’s a tiny bit of theatre that costs almost nothing, and it doubles as a gorgeous homemade gift.
Quick Breakdown
Why You’ll Love These Edible Chocolate Candles
- Chocolate fondue without the pot. The candle melts its own dipping pool, so there’s no burner or bowl to clean.
- Only a few things to buy. Chocolate, paper cups and food-grade wicks. Strawberries for dipping.
- Ten minutes of work. Then the fridge sets them in about an hour.
- A showstopper for date night. Light one after dinner and watch everyone’s face.
- Brilliant gifts. Wrapped in cellophane with a ribbon, they look shop-bought.
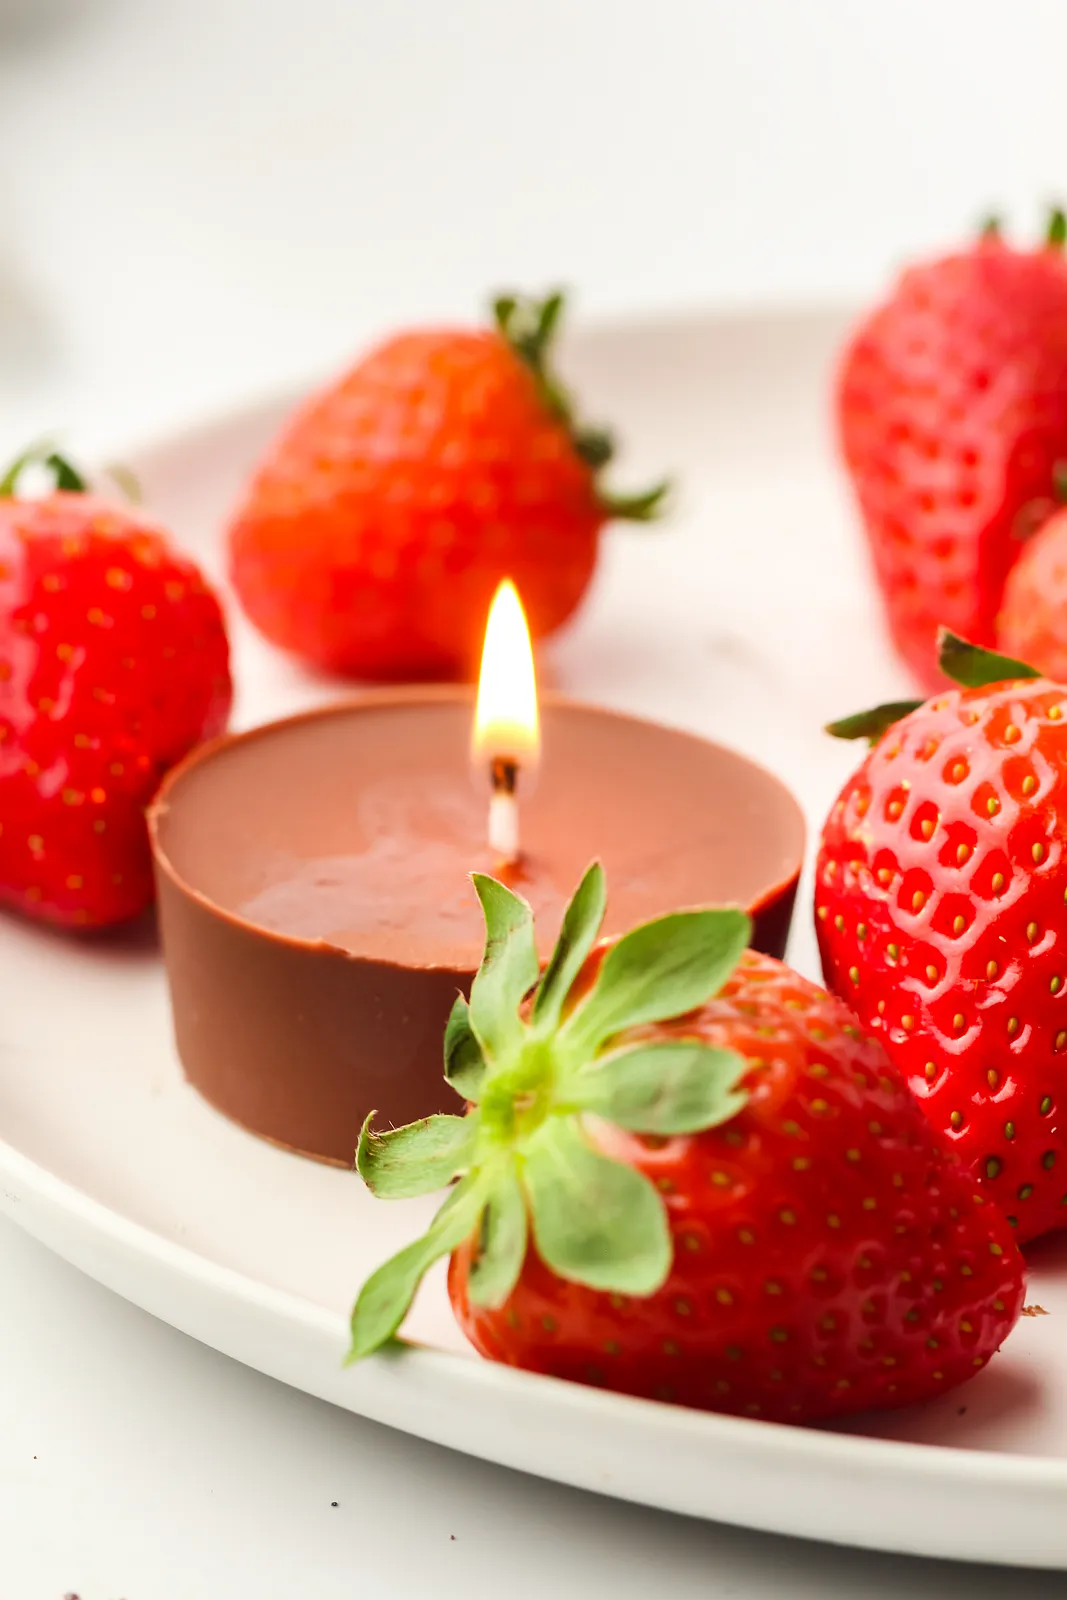
Ingredient Notes
- Chocolate. 14 to 21 oz, or 400 to 600 g. I used milk chocolate, but dark and white both work. Good quality bars melt more smoothly than cheap ones, which can turn grainy.
- Food-grade candle wicks. Two or three for large candles, or one per cup if you make smaller ones. This is important: only use wicks sold as food safe. Ordinary craft wicks can be coated with things you don’t want near your food.
- Paper cups. Two or three standard paper cups make large candles. For the smaller tealight shapes in my photos, I poured a shallower layer into six cups.
- Fresh strawberries. For dipping. Dry them really well, because water and melted chocolate don’t mix.
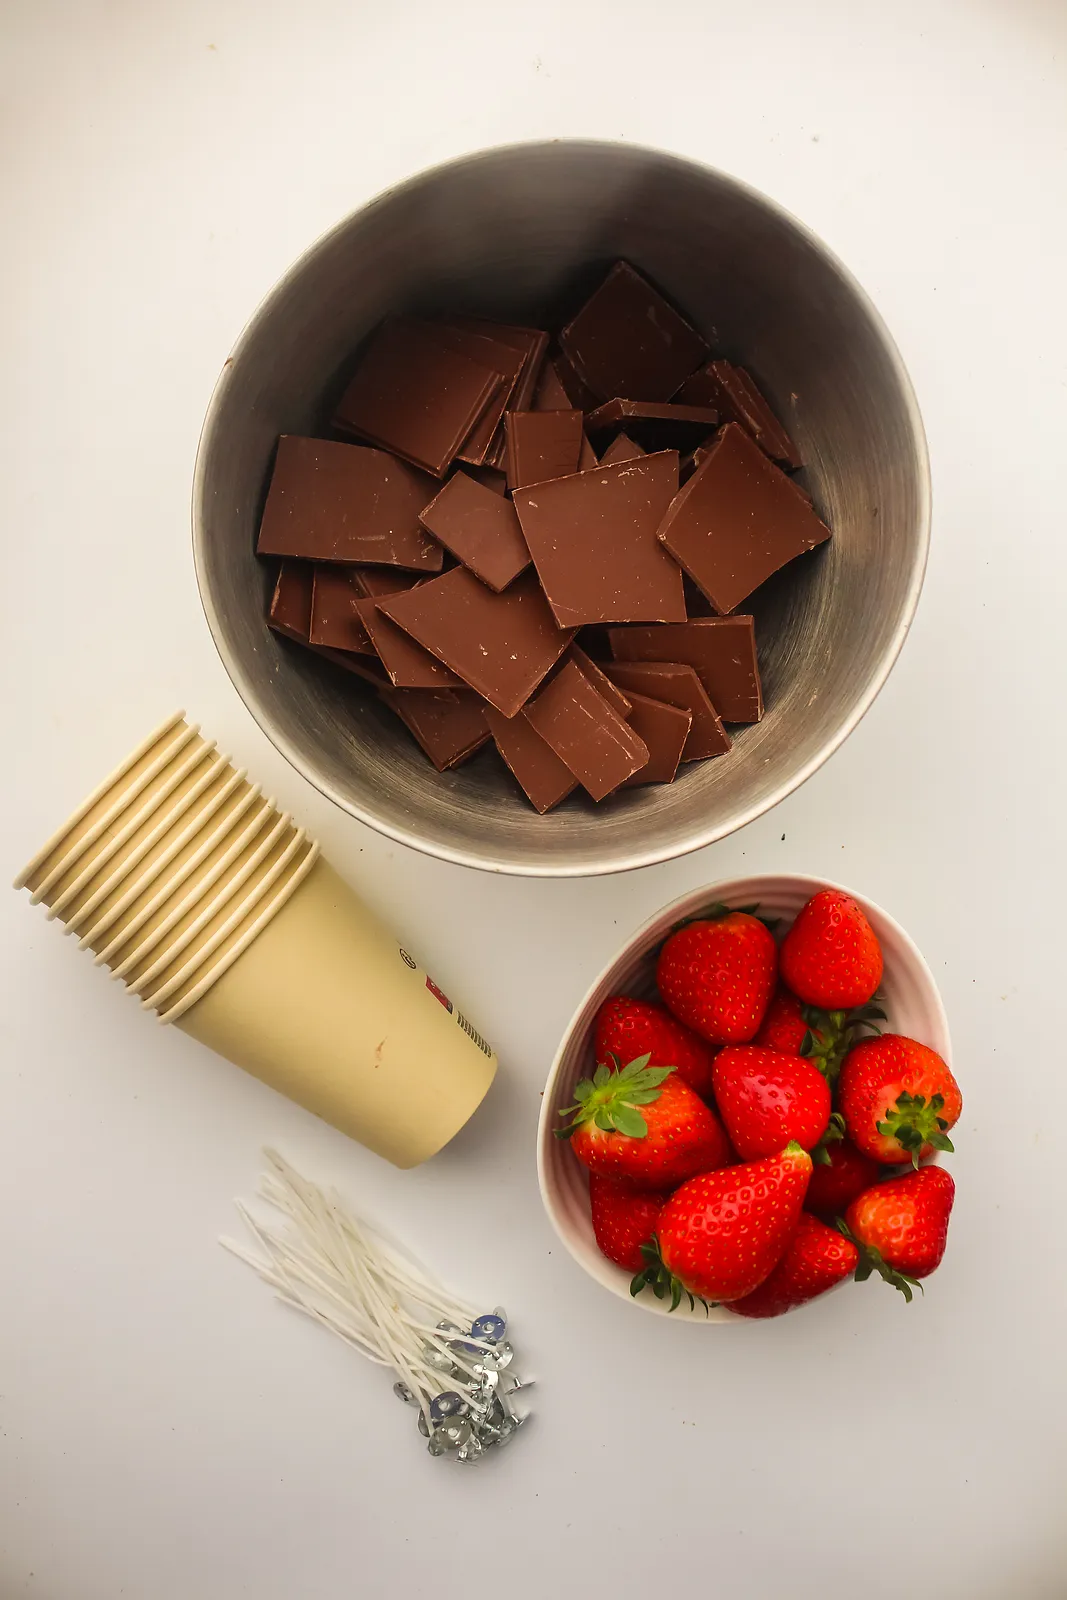
Choosing an Edible Candle Wick
The wick is the one part of this recipe you can’t improvise. Look for wicks labelled food grade or food safe, usually unwaxed cotton or hemp, ideally with a small metal tab at the base so they stand up on their own. Nobody eats the wick itself, of course; it simply carries the flame. Still, because it sits in something you’re going to eat, it needs to be made for that job.
Avoid wicks pre-coated in paraffin or zinc-cored wicks meant for wax candles. If you can’t find food-grade ones, skip the flame and simply warm the candle on a plate over a mug of hot water instead.
Are Edible Chocolate Candles Safe?
Yes, edible chocolate candles are safe as long as you use food-grade wicks and treat them like any real candle. Never leave one burning unattended, keep it away from children and curtains, and set it on a heatproof plate. Burn it only long enough to create a pool of melted chocolate for dipping, then blow it out before everyone tucks in.
The other risk is to the chocolate itself. Chocolate scorches easily, so melt it gently. ThermoWorks has a clear guide to melting chocolate without burning or seizing it, which is well worth a read before you start.
How To Make Edible Chocolate Candles
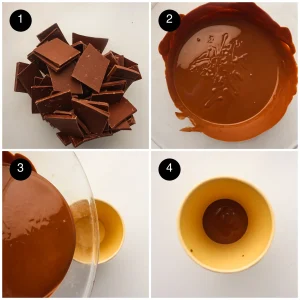
1. Melt the chocolate. First, chop the chocolate and melt it gently in short bursts in the microwave or over a pan of barely simmering water, stirring until completely smooth.
2. Pour into cups. Next, pour the melted chocolate evenly into the paper cups.
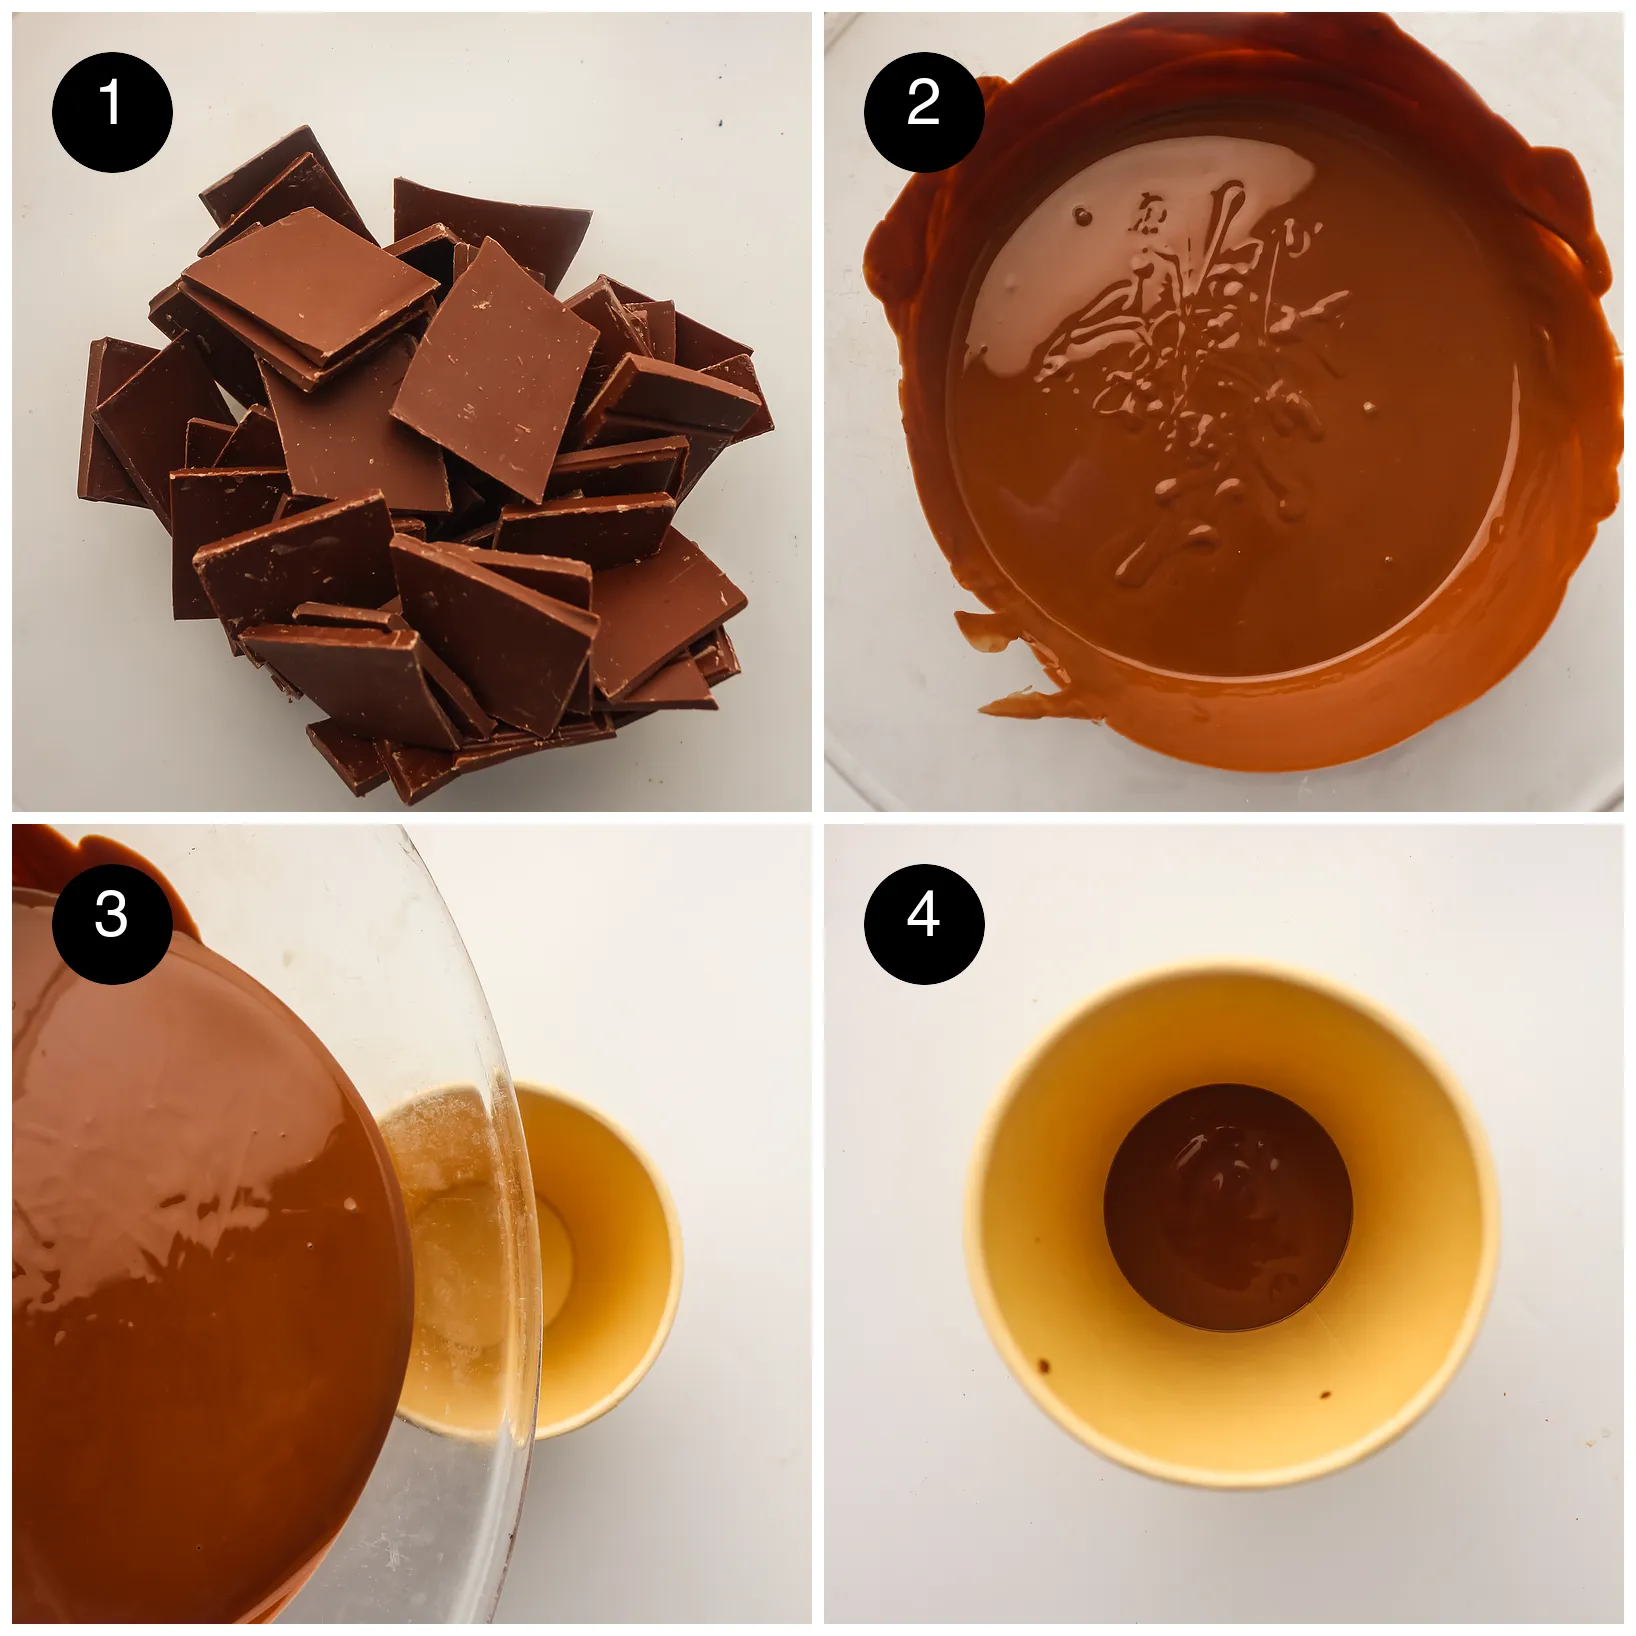
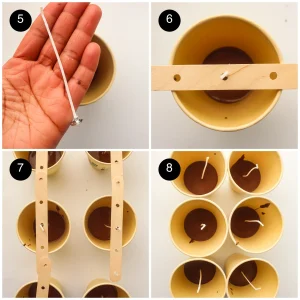
3. Add the wicks. Then place a food-grade wick into the centre of each cup, pushing the tab down to the bottom.
4. Hold them upright. Keep each wick straight while the chocolate starts to set. You can hold it by hand, but I thread mine through a wooden wick holder laid across the top of the cup, which keeps it perfectly centred.
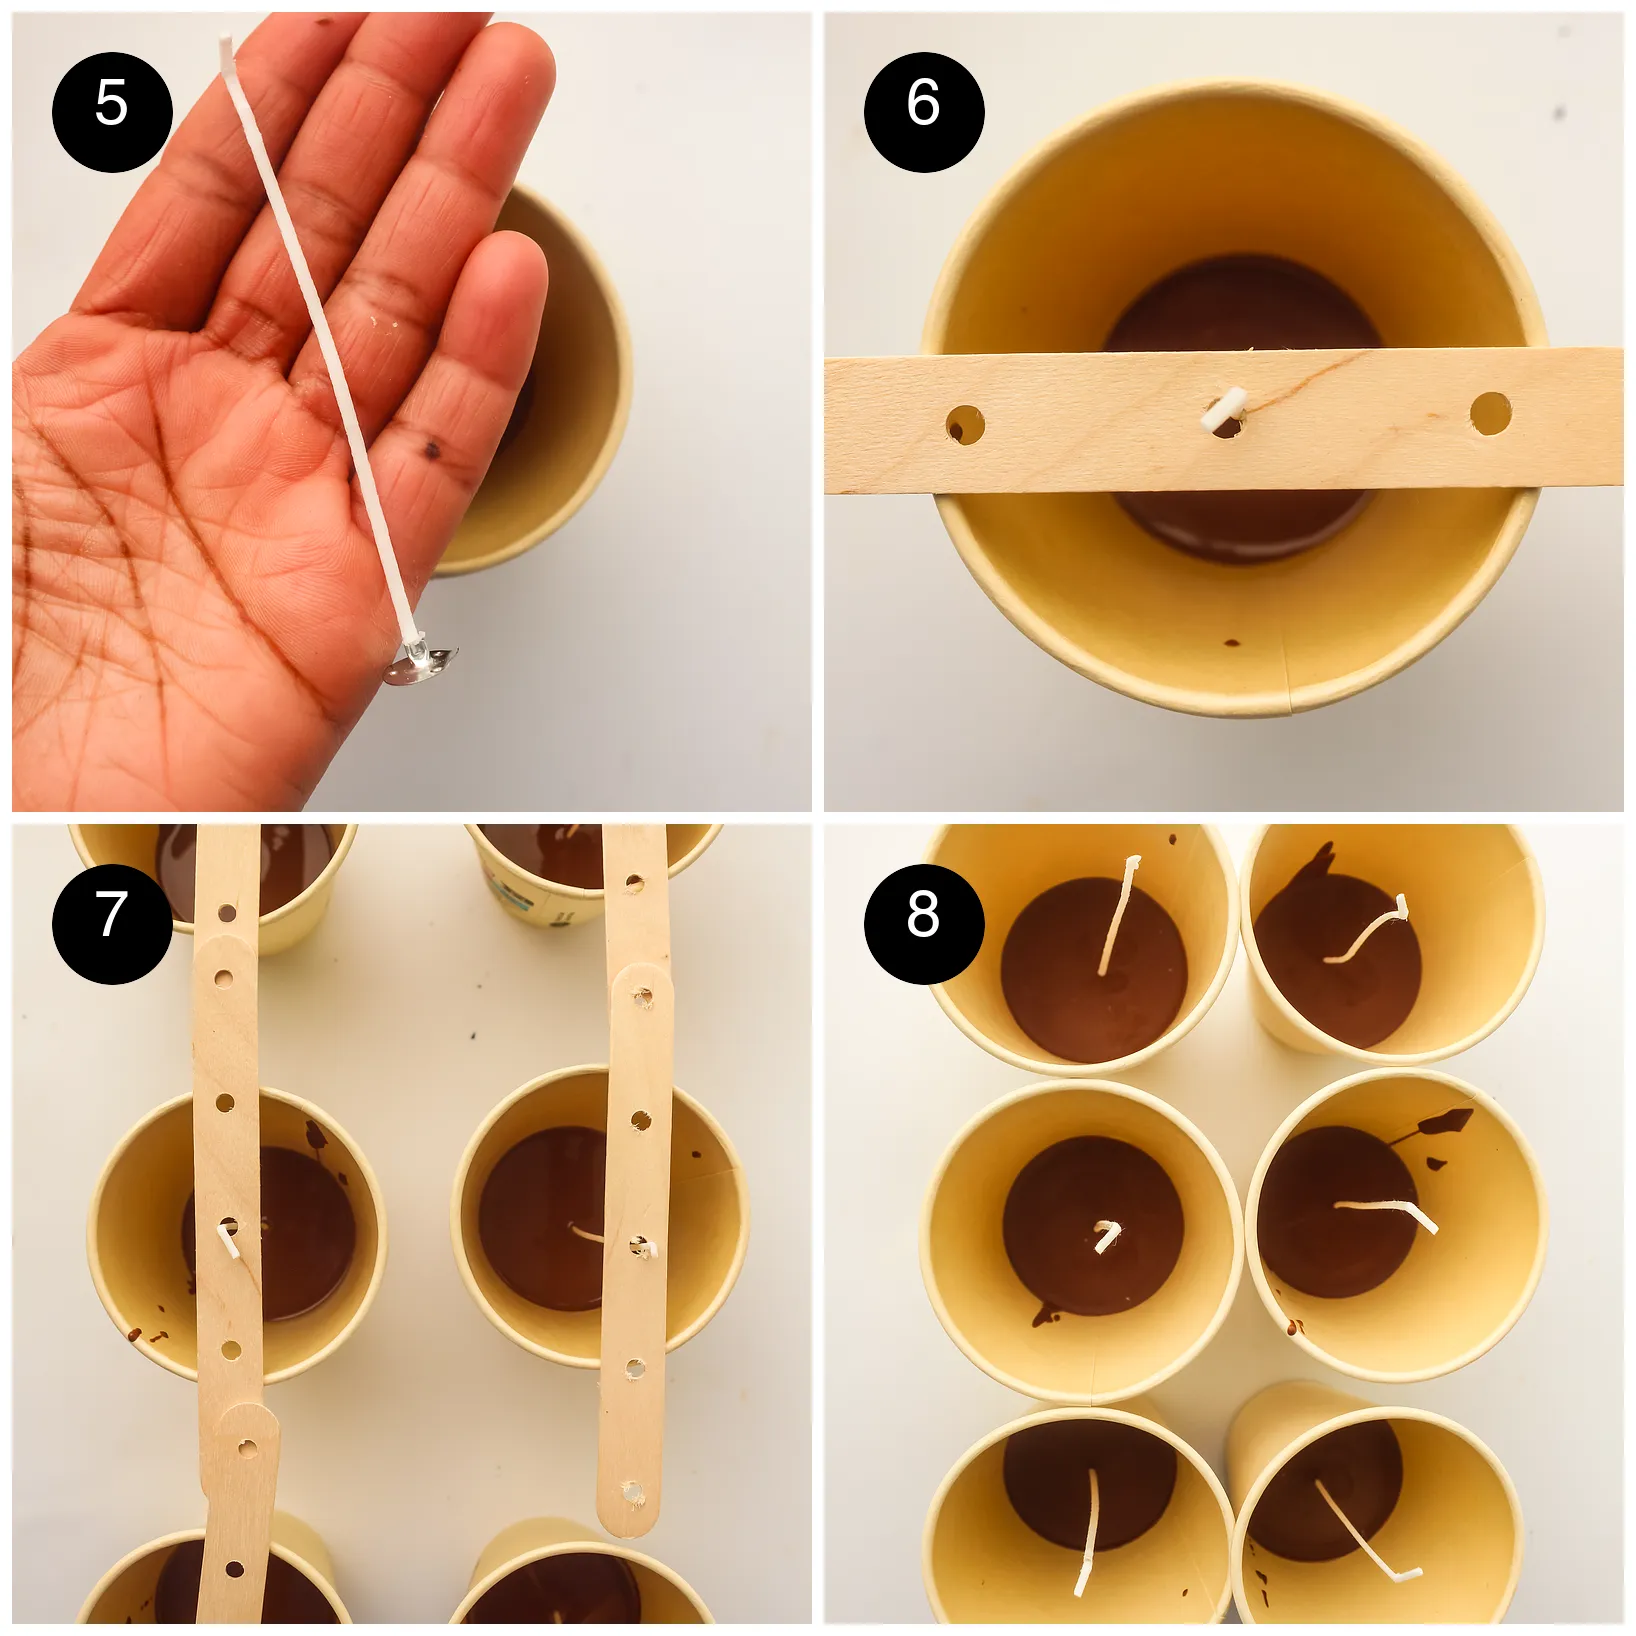
5. Chill until firm. After that, refrigerate for about an hour, until fully set.
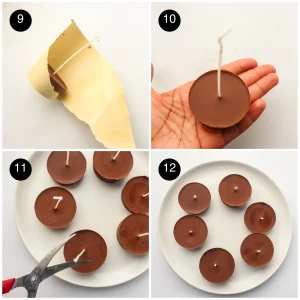
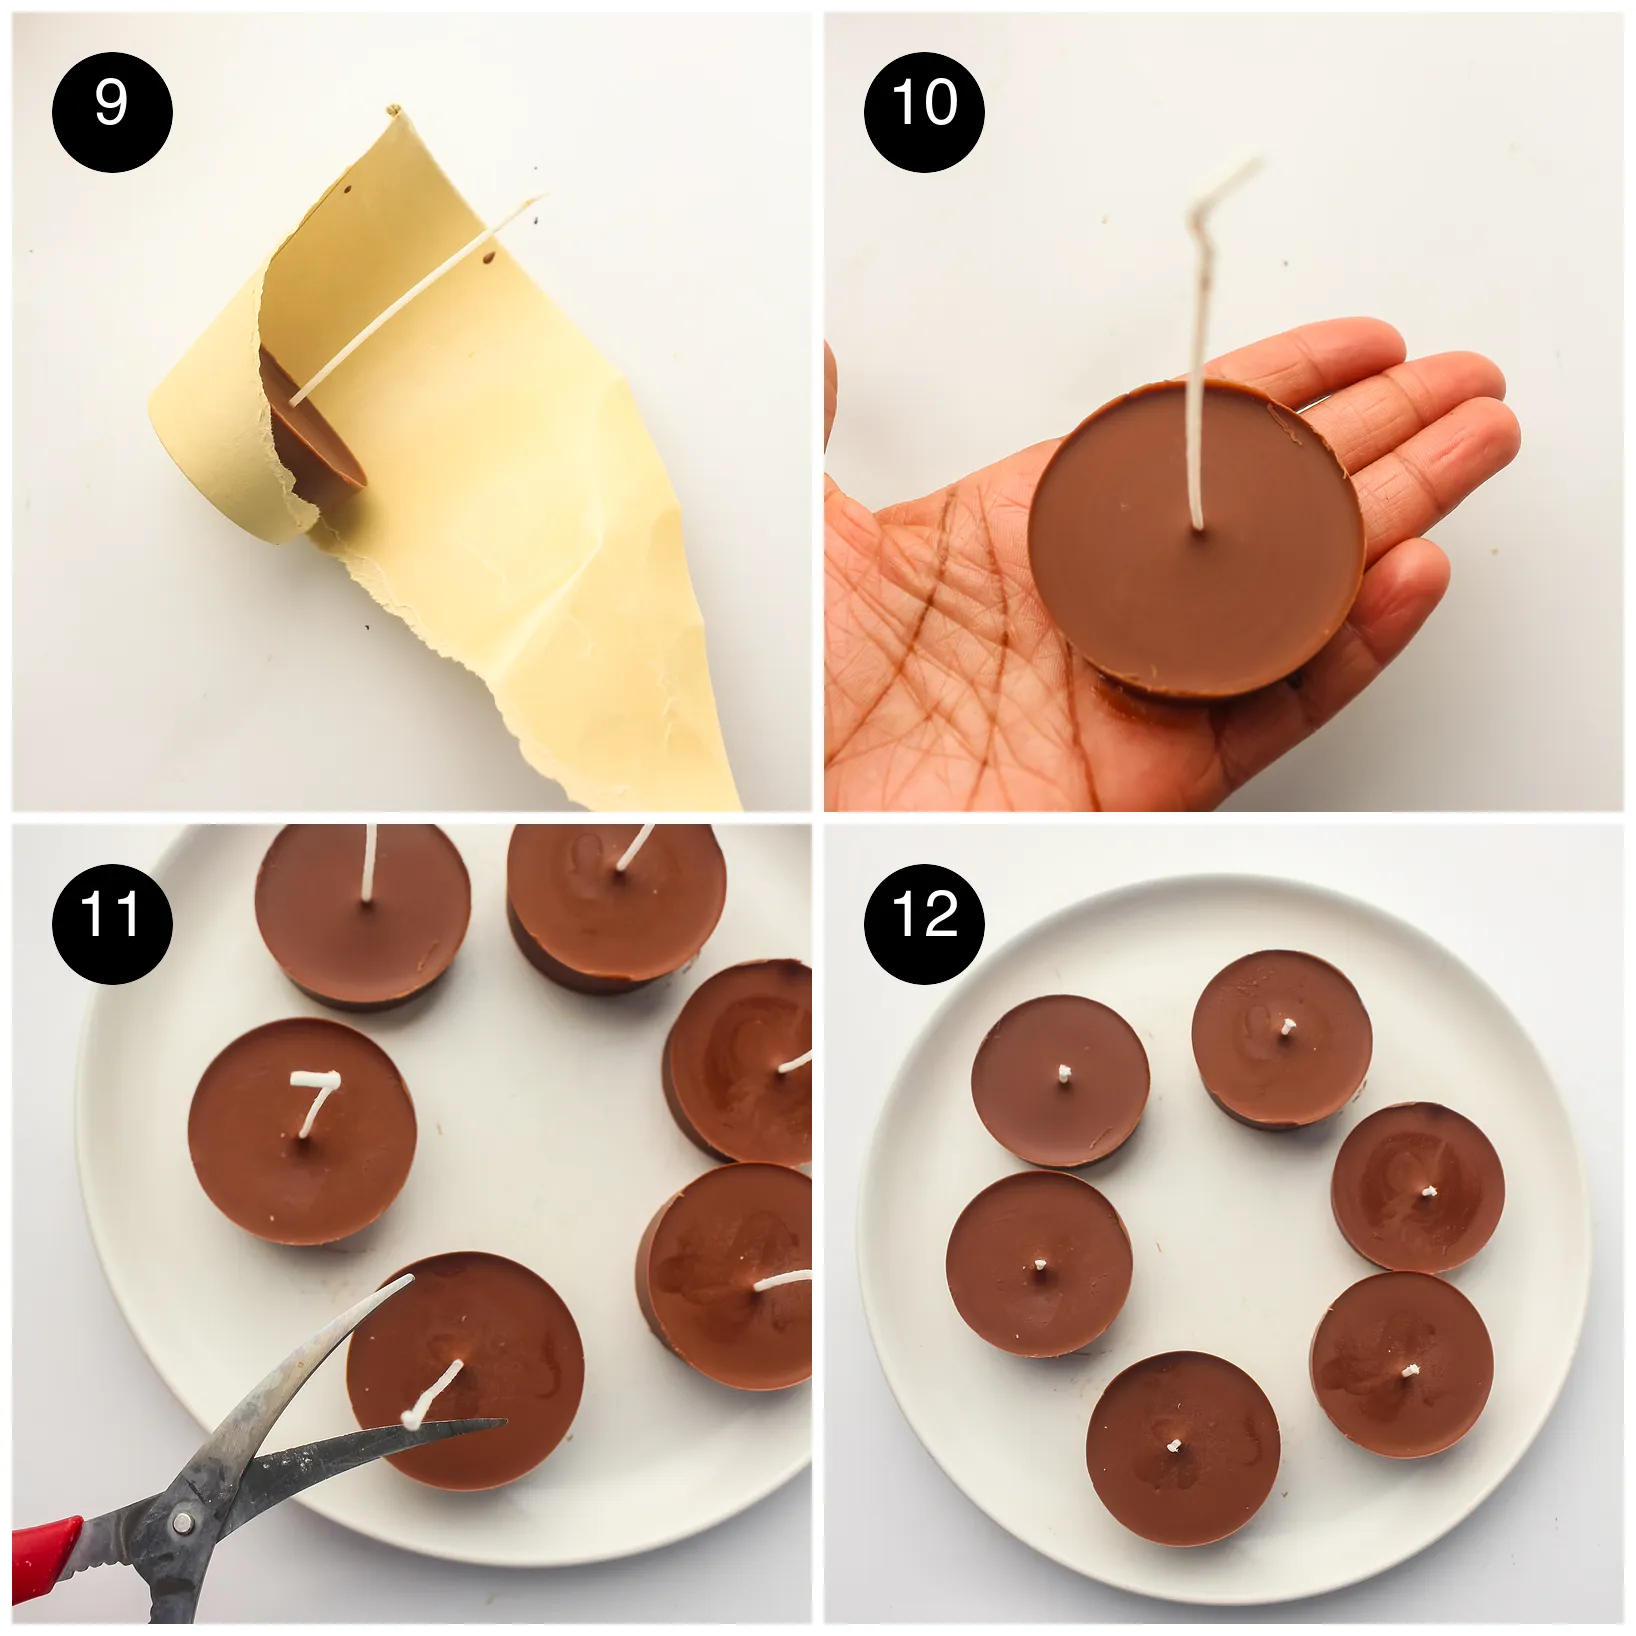
6. Peel away the cups. Carefully tear and peel the paper away from each one.
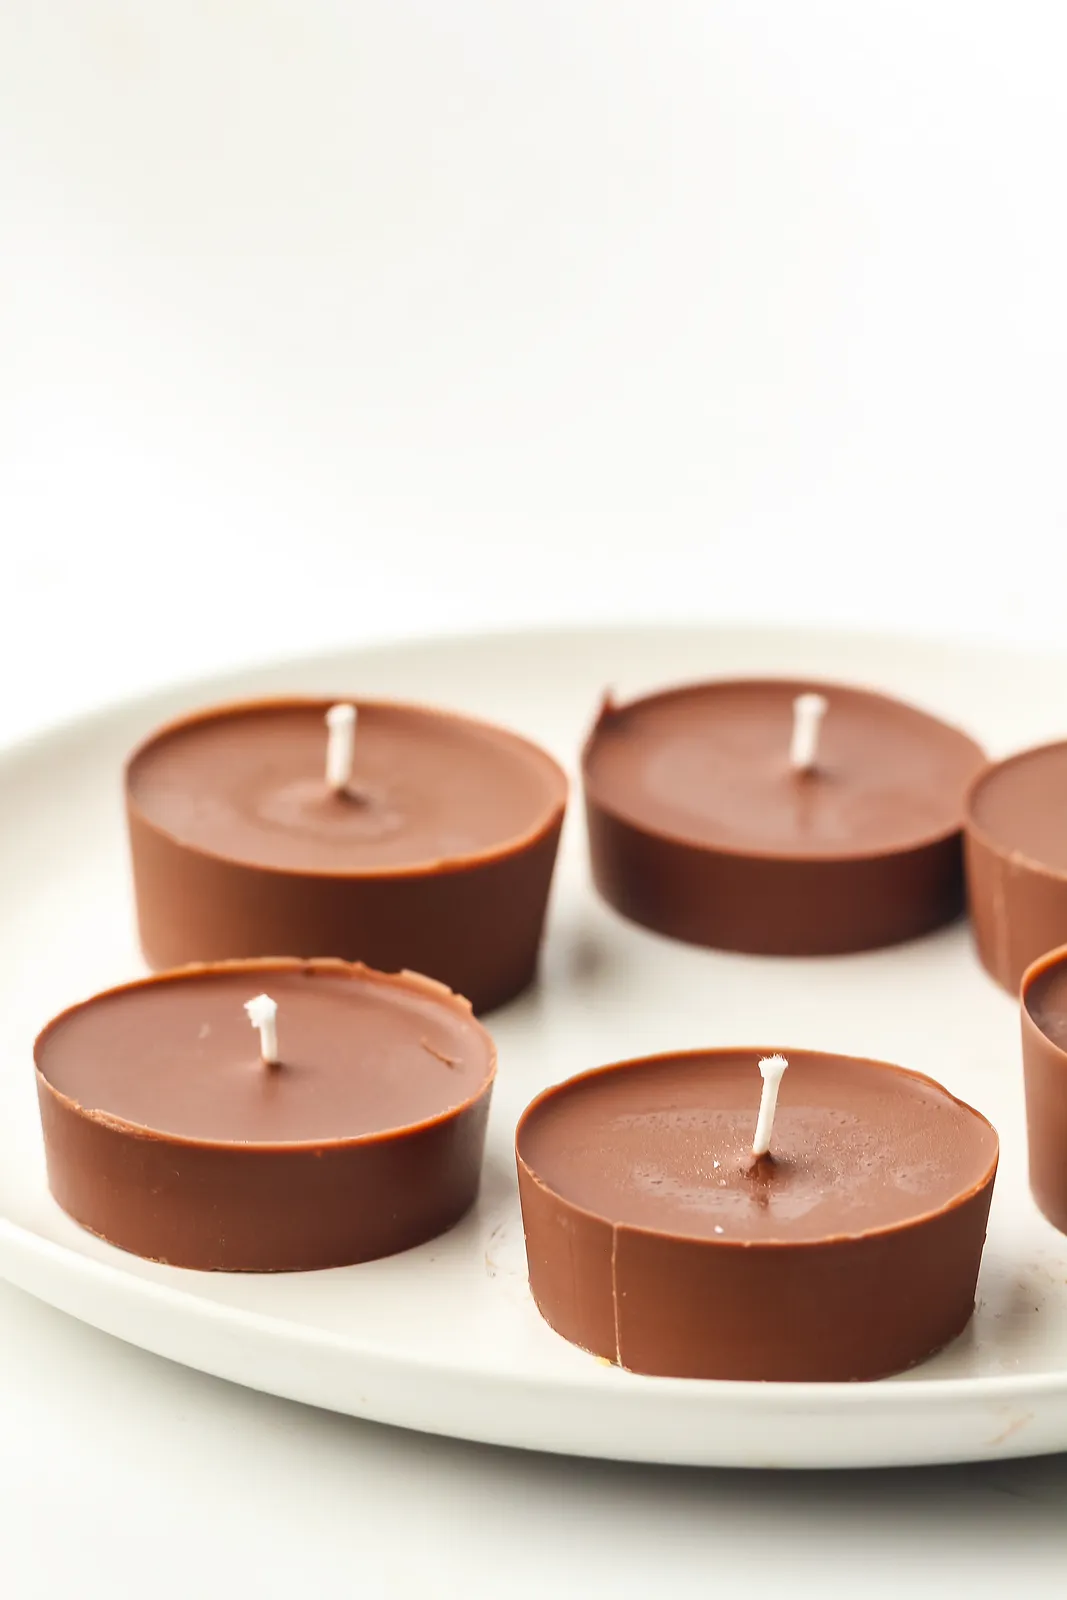
7. Trim and light. Finally, trim the wicks to your preferred size. Don’t cut them too short, or the flame will drown in chocolate and burn out quickly. Light the wick briefly just before serving.
If you plan to make a few batches for gifts, an electric chocolate melting pot keeps the chocolate at a low, steady heat, which takes the worry out of scorching it.
Troubleshooting
- The wick leaned over. It moved while the chocolate was setting. Hold it in place, or use a holder, until the chocolate firms.
- The chocolate went thick and grainy. It overheated or caught a drop of water. Start again with fresh chocolate and a dry bowl.
- The flame keeps going out. The wick is too short. Leave about 1 cm above the surface.
- White streaks on the surface. That’s bloom from temperature changes. It’s harmless and melts away once lit.
Tips for the Best Edible Chocolate Candles
- Use paper cups rather than plastic. The paper peels away cleanly once the chocolate is cold.
- Shallow, wide candles create a bigger dipping pool than tall, narrow ones.
- Let the chocolate cool for a few minutes before adding the wick, so it stays upright more easily.
- Light them only for a few minutes at a time, then blow out and dip while it’s warm.
Storage
- Cool and dry. Store edible chocolate candles in an airtight container in a cool, dry place, away from sunlight and heat.
- Warm kitchens. If your kitchen runs warm, keep them in the fridge until you need them.
- How long. For the best flavour and shine, enjoy them within two weeks.
Variations and Substitutions
- Dark or white chocolate. Both make lovely edible chocolate candles. White chocolate scorches most easily, so melt it extra gently.
- Swirled. Drop spoonfuls of white chocolate onto milk chocolate and drag a cocktail stick through.
- Flavoured. Stir in a drop of orange or peppermint extract before pouring.
- Topped. Scatter freeze-dried raspberries or flaky salt over the surface before it sets.
- Better dipping. For a glossier finish on your fruit, ThermoWorks covers the exact temperatures for chocolate-dipped strawberries.
What to Serve With Edible Chocolate Candles
Strawberries are the classic, but banana slices, marshmallows, pretzels, pound cake cubes and cookies are all great dippers. For a full dessert board, I add a bowl of strawberry cheesecake ice cream and some warm strawberry shortcake on the side.
For a party, they look lovely next to a tray of sprinkle-topped dot cake cups, and a scoop of s’mores ice cream dunked into the warm pool is pure joy.
Frequently Asked Questions
Wicks and Chocolate
Do edible chocolate candles need special wicks?
Yes. Use only wicks labelled food grade or food safe, usually unwaxed cotton or hemp with a small metal tab. Avoid paraffin coated or zinc-cored craft wicks, which are made for wax candles, not food.
What chocolate is best for chocolate candles?
Milk, dark or white chocolate all work, and you need 400 to 600 g (14 to 21 oz). Good-quality bars melt more smoothly than cheap ones, and white chocolate scorches most easily, so melt it extra gently.
Why won’t my chocolate candle wick stay upright?
The wick probably moved while the chocolate was setting. Hold it straight, or thread it through a wooden wick holder across the cup, until the chocolate begins to firm up.
Burning and Serving
How long should you burn an edible chocolate candle?
Only a few minutes, just long enough to create a pool of melted chocolate around the wick for dipping, then blow it out. Never leave it burning unattended, and set it on a heatproof plate.
What can you dip in chocolate fondue candles?
Fresh strawberries are the classic; dry them well first. Banana slices, marshmallows, pretzels, pound cake cubes and cookies are all great options too.
How long do edible chocolate candles keep?
Up to two weeks for the best flavour and shine. Store them in an airtight container in a cool, dry place away from sunlight, or in the fridge if your kitchen runs warm.
How long do chocolate candles take to set?
About an hour in the fridge, until fully set. The hands-on work of melting, pouring and placing the wicks takes around ten minutes.
Can you make chocolate candles without food-grade wicks?
Yes, by skipping the flame. Warm the set candle on a plate over a mug of hot water to soften it for dipping, and never use ordinary craft wicks instead.
Ingredients
- 14-21 oz chocolate 400 to 600 g, milk, dark or white
- 2-3 food-grade candle wicks important: food safe only; one per cup for smaller candles
- 2-3 paper cups or 6 for smaller candles
- fresh strawberries for serving
Instructions
- Melt the chocolate until completely smooth.

- Pour the melted chocolate evenly into the paper cups.
- Place a food-grade wick into the centre of each cup.
- Hold the wick upright while the chocolate starts setting, by hand or with a wick holder.
- Chill until fully firm, about 1 hour.
- Carefully peel away the paper cups.
- Trim the wick to your preferred size, not too short or it will burn out too quickly. Light the wick briefly before serving.