

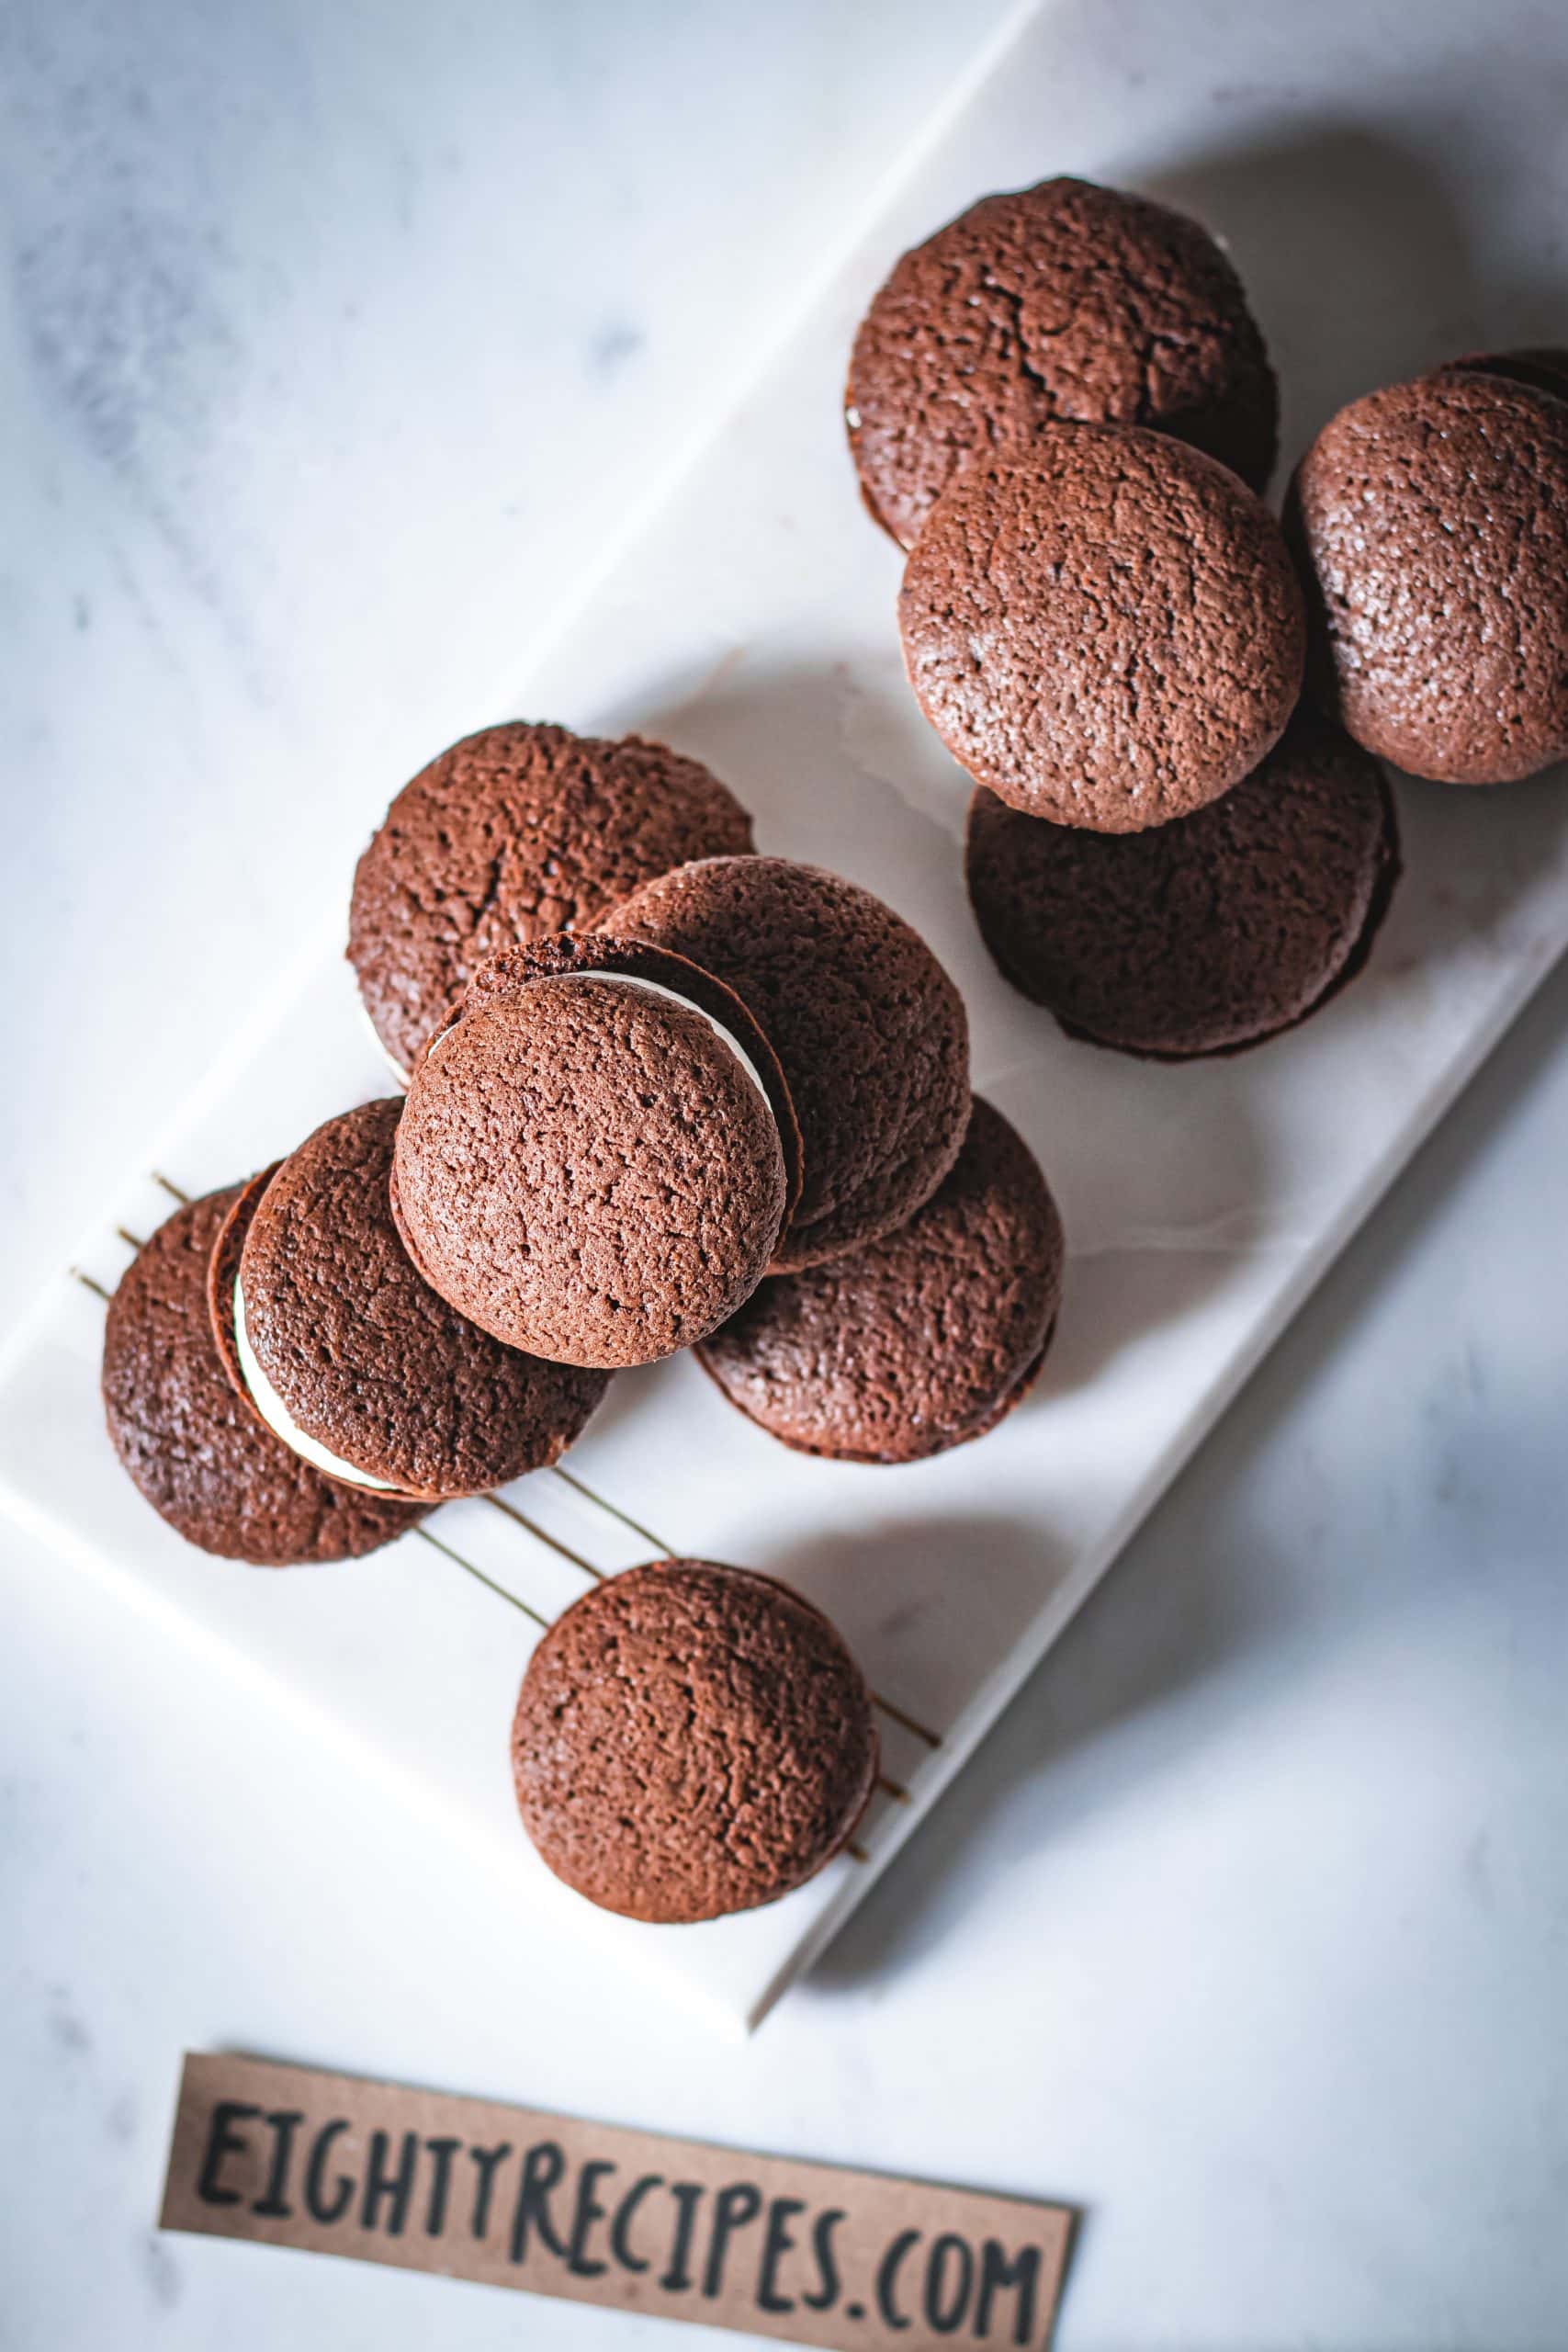
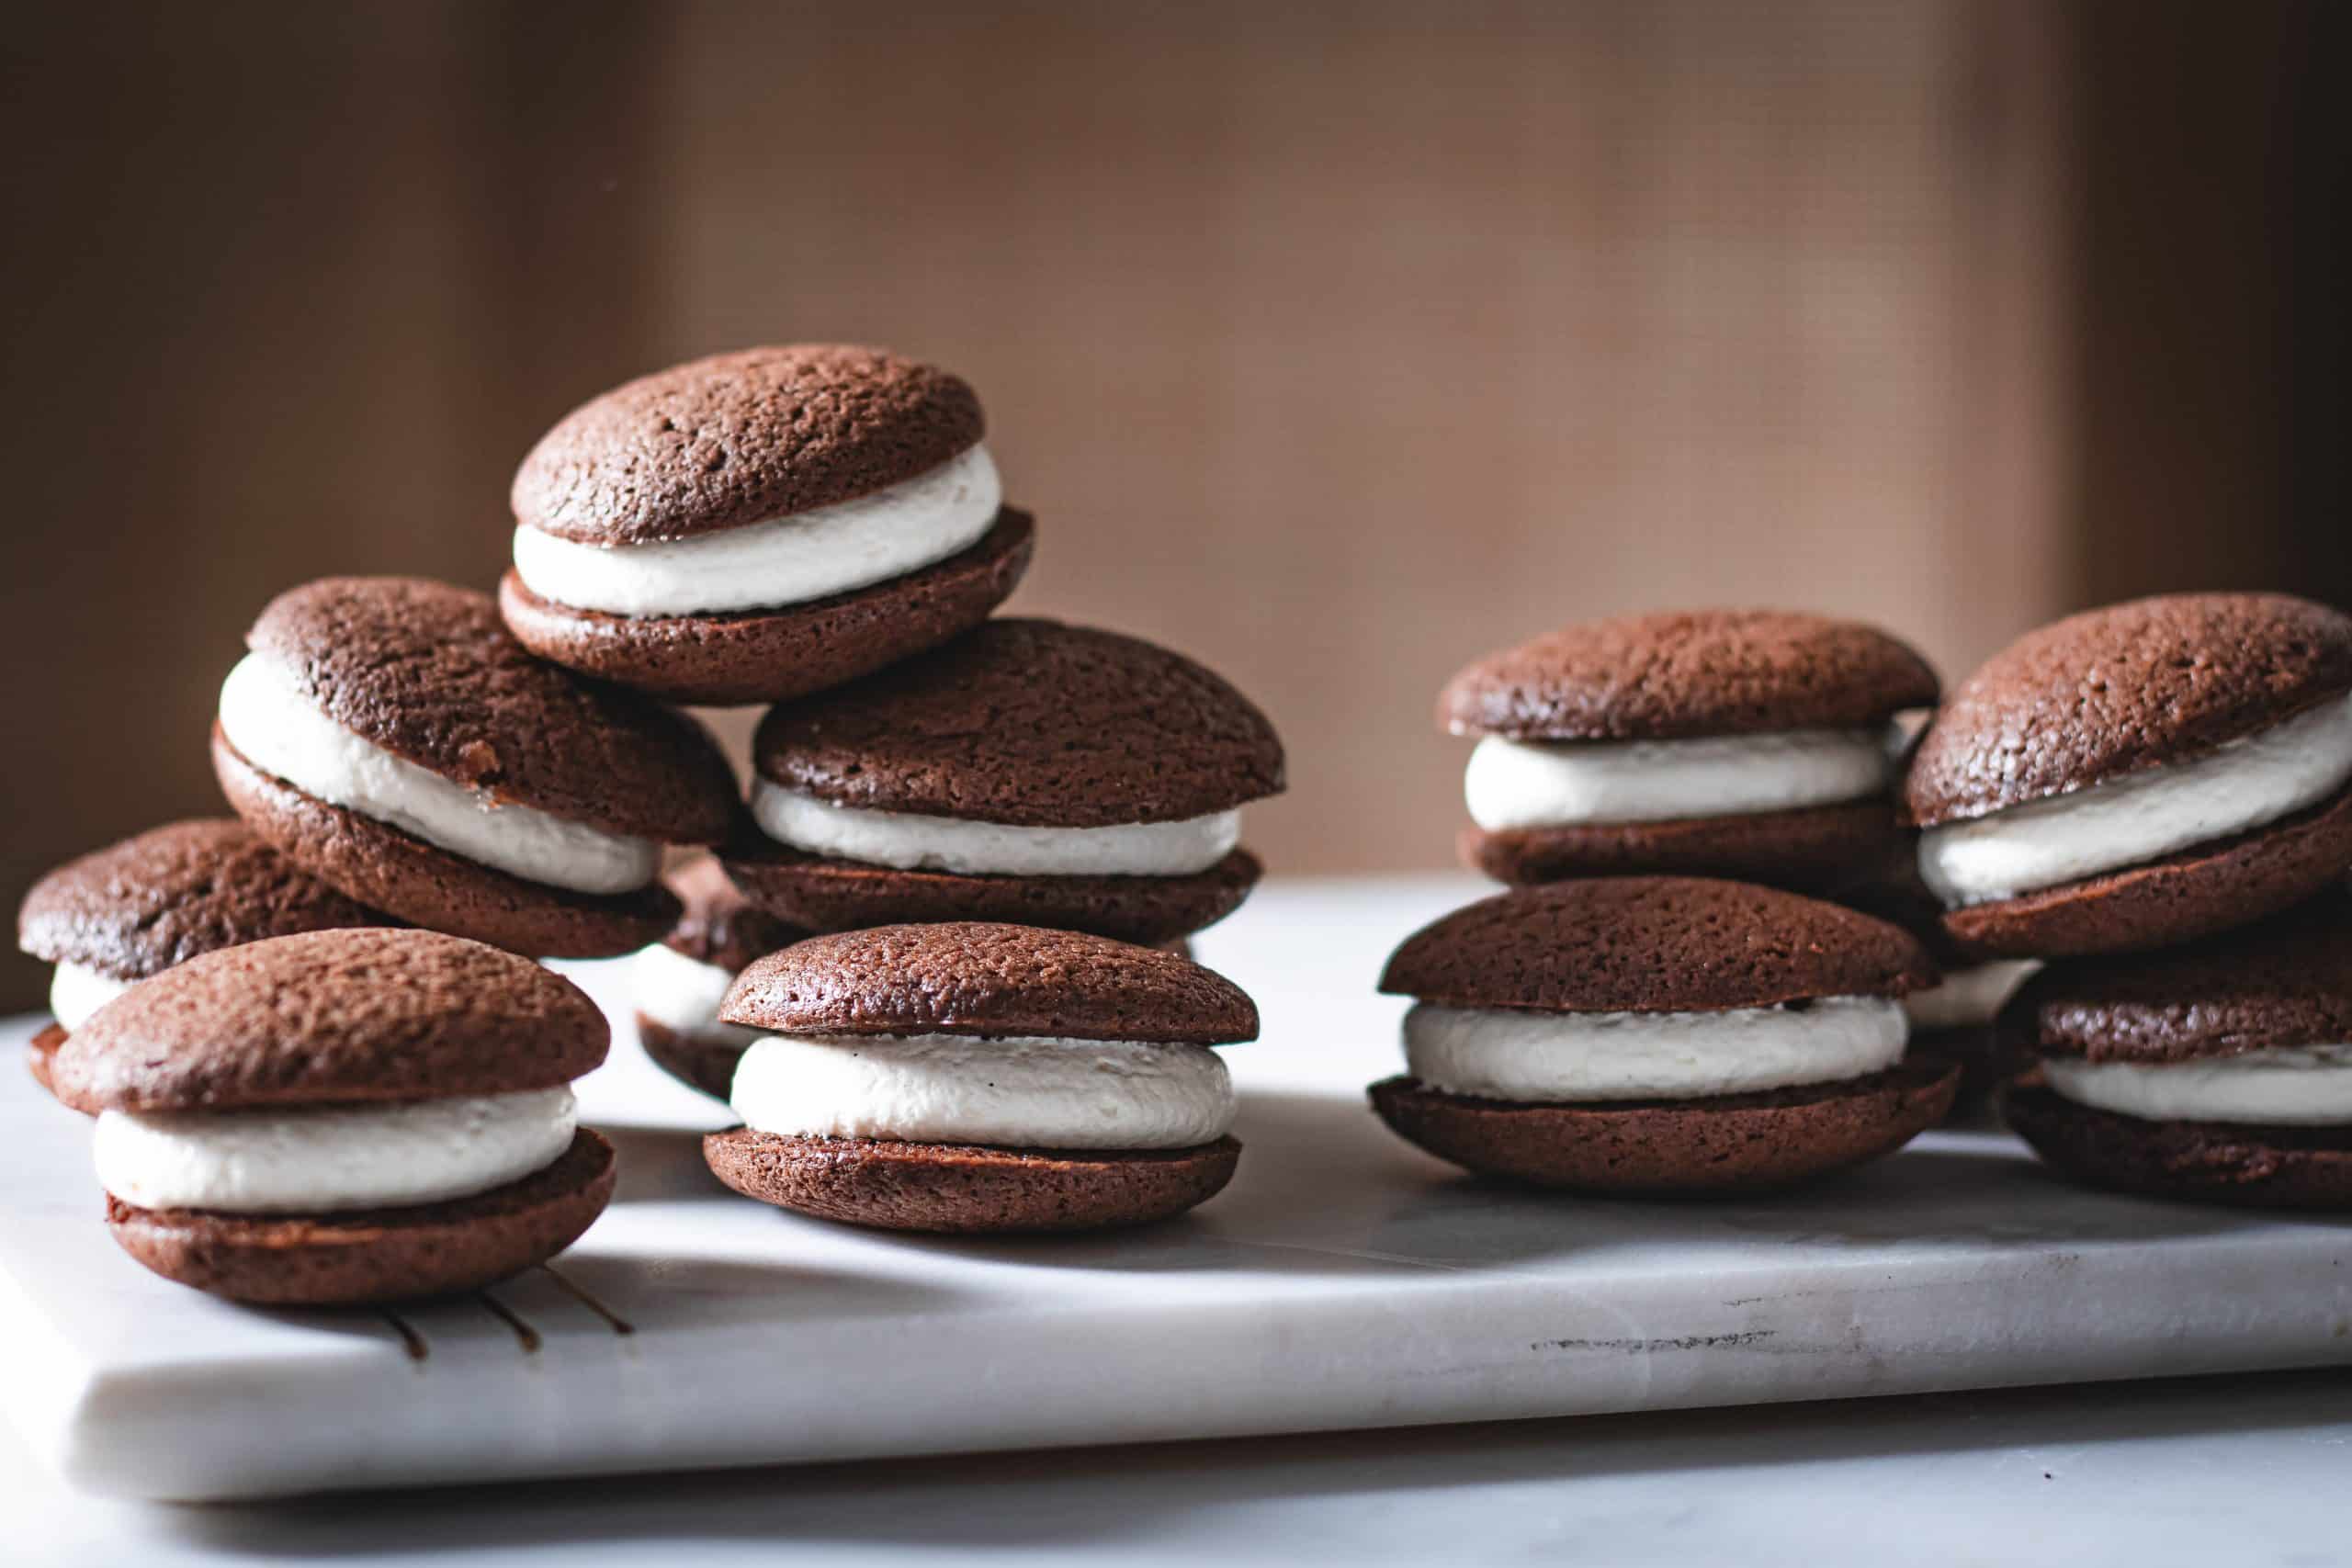
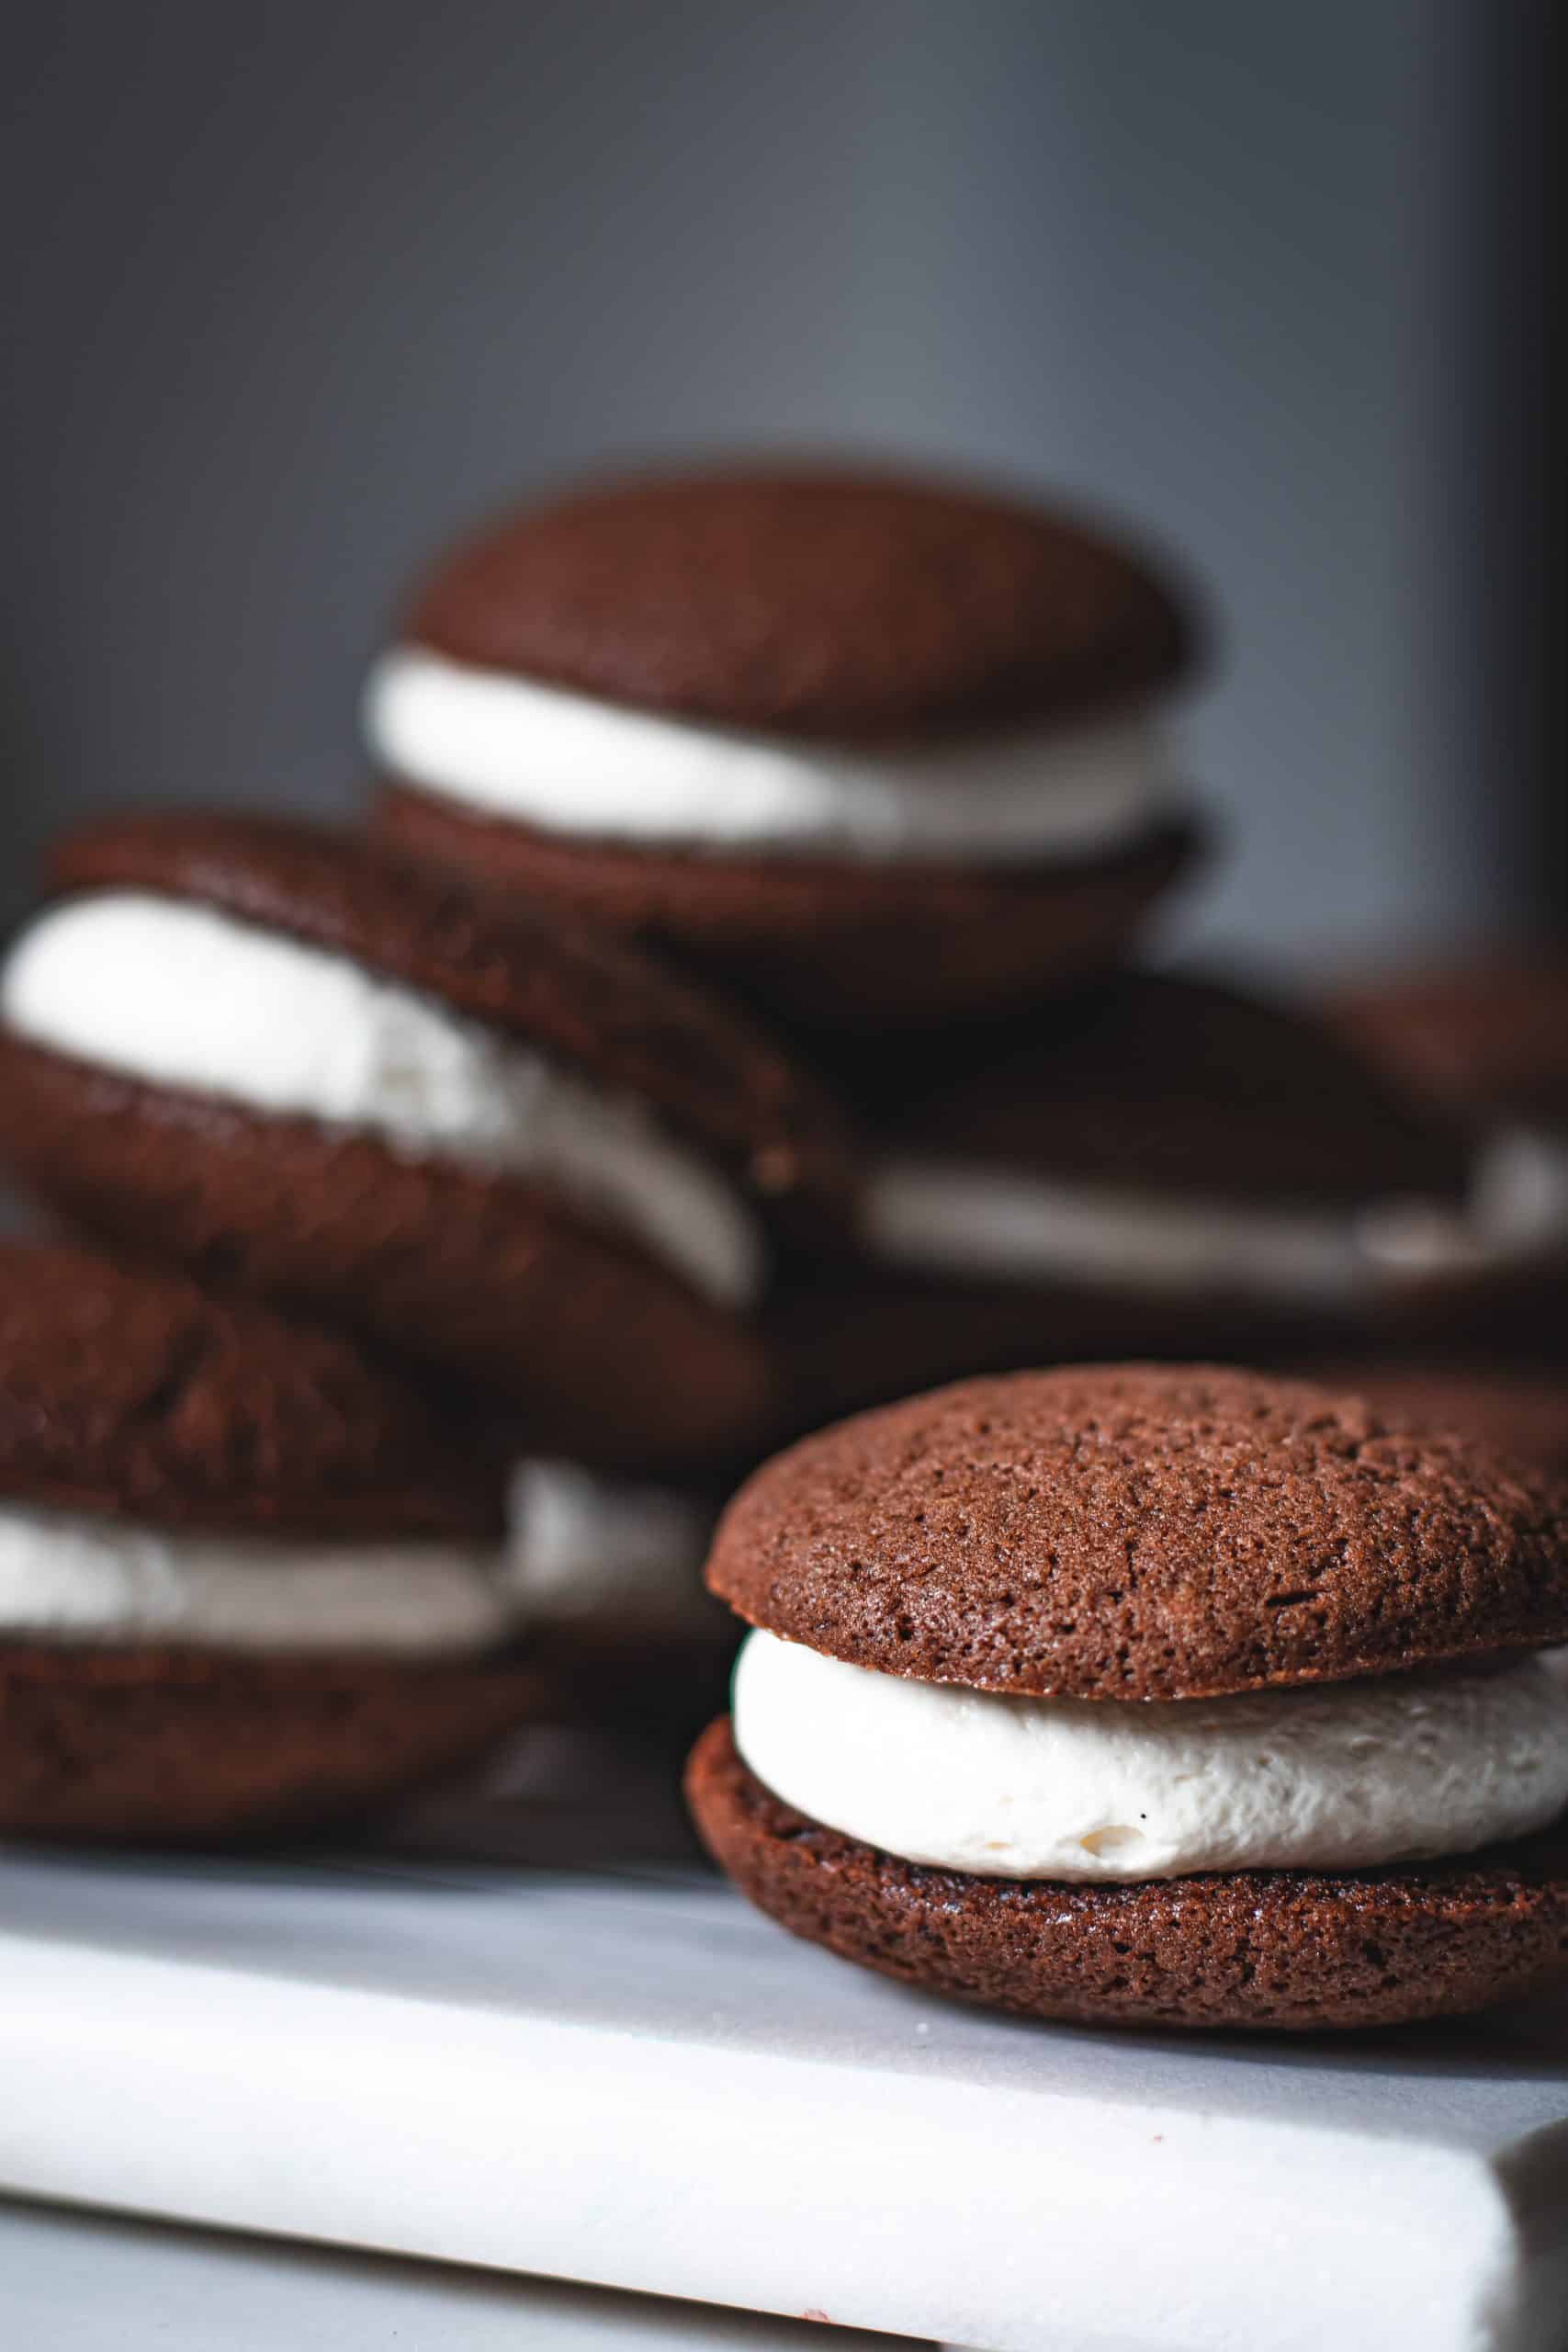
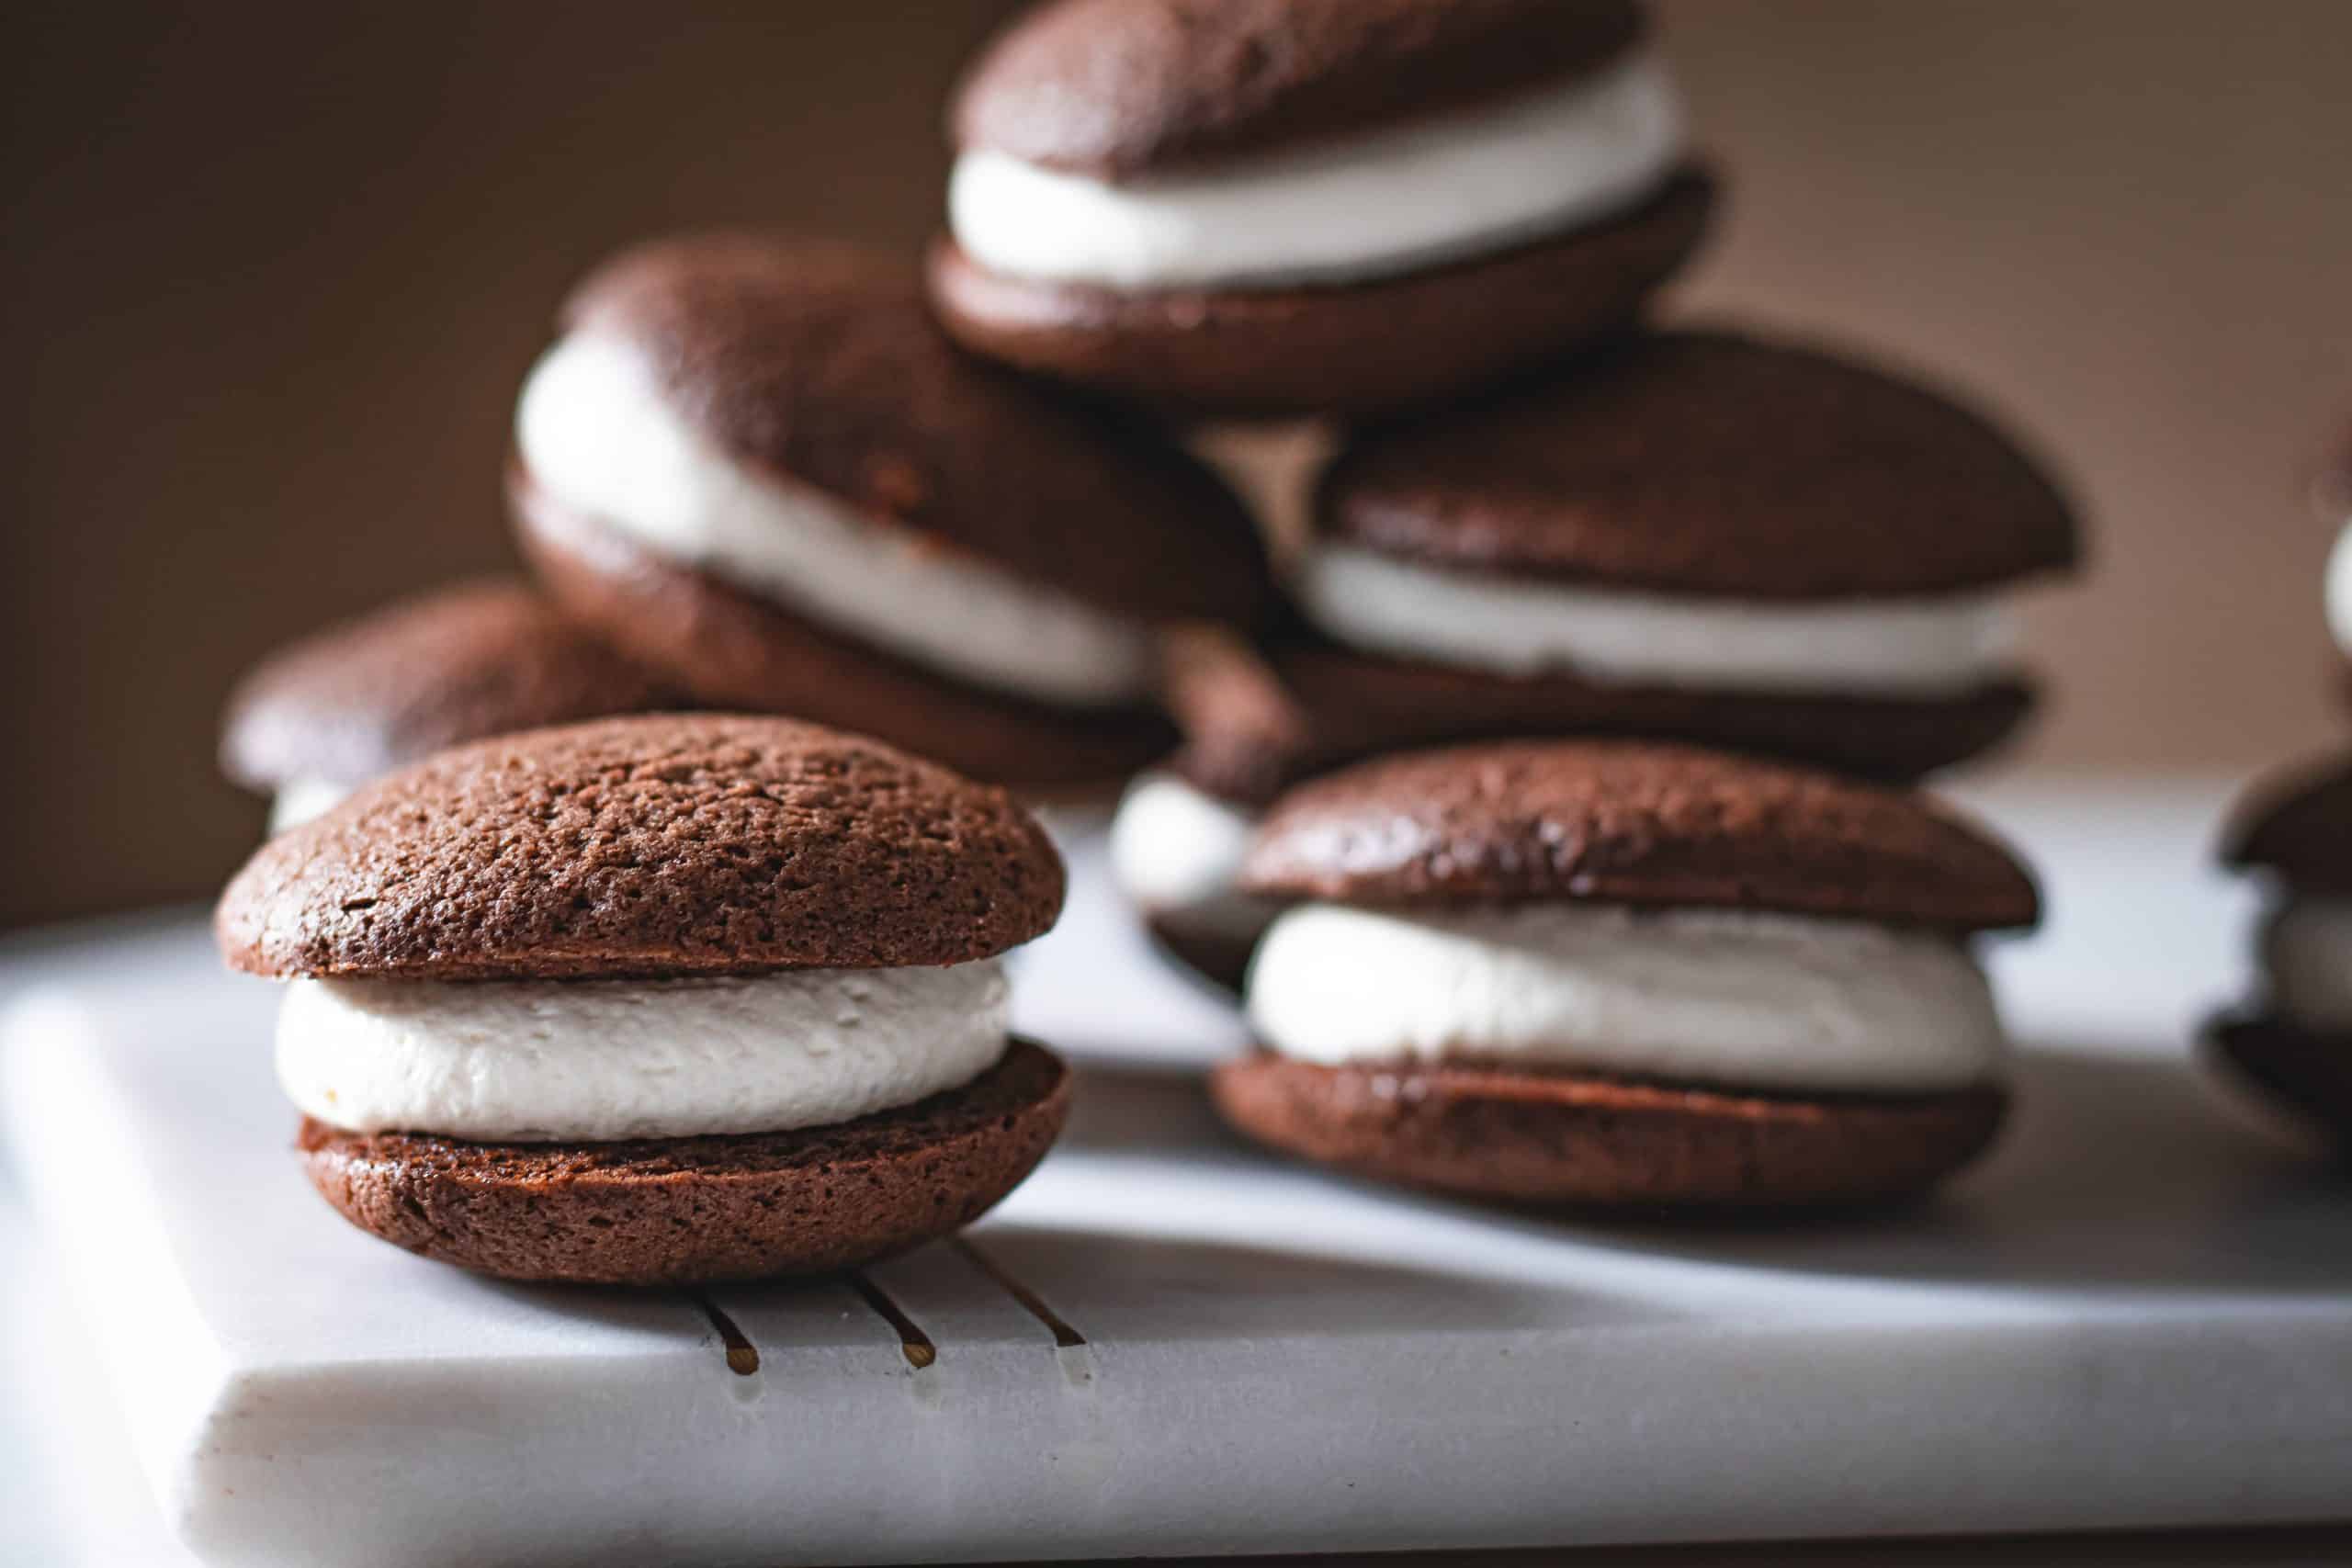
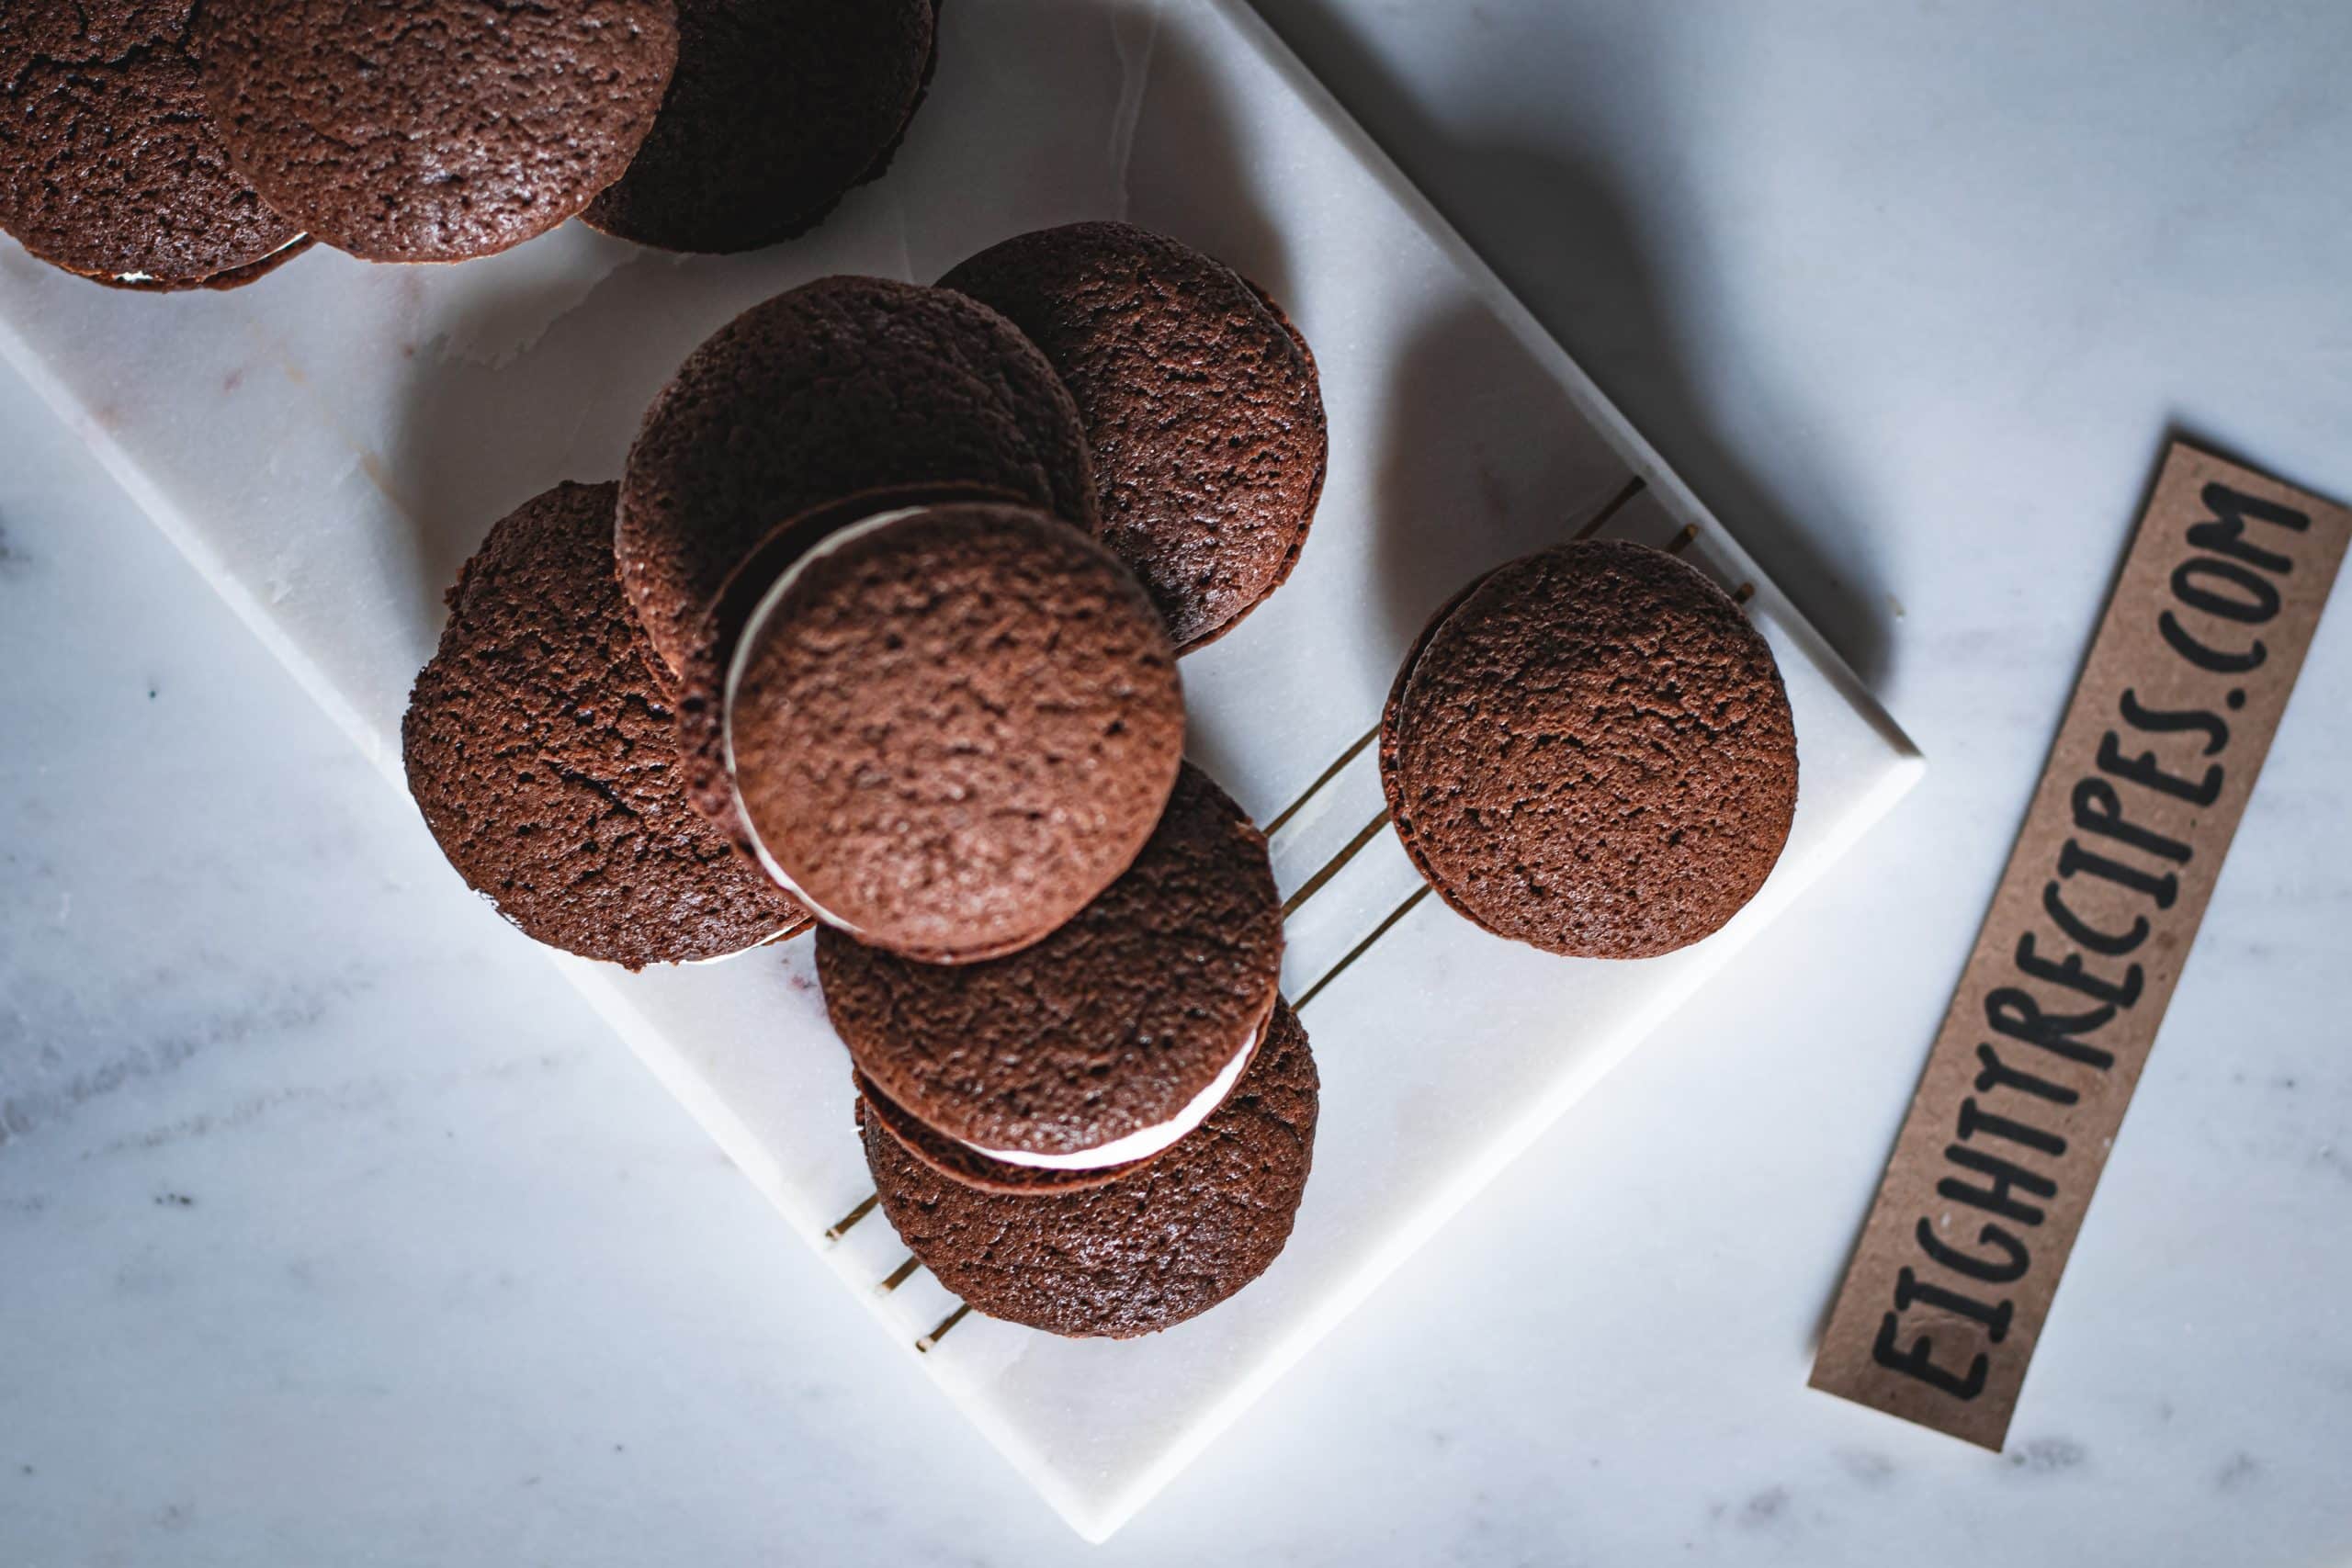
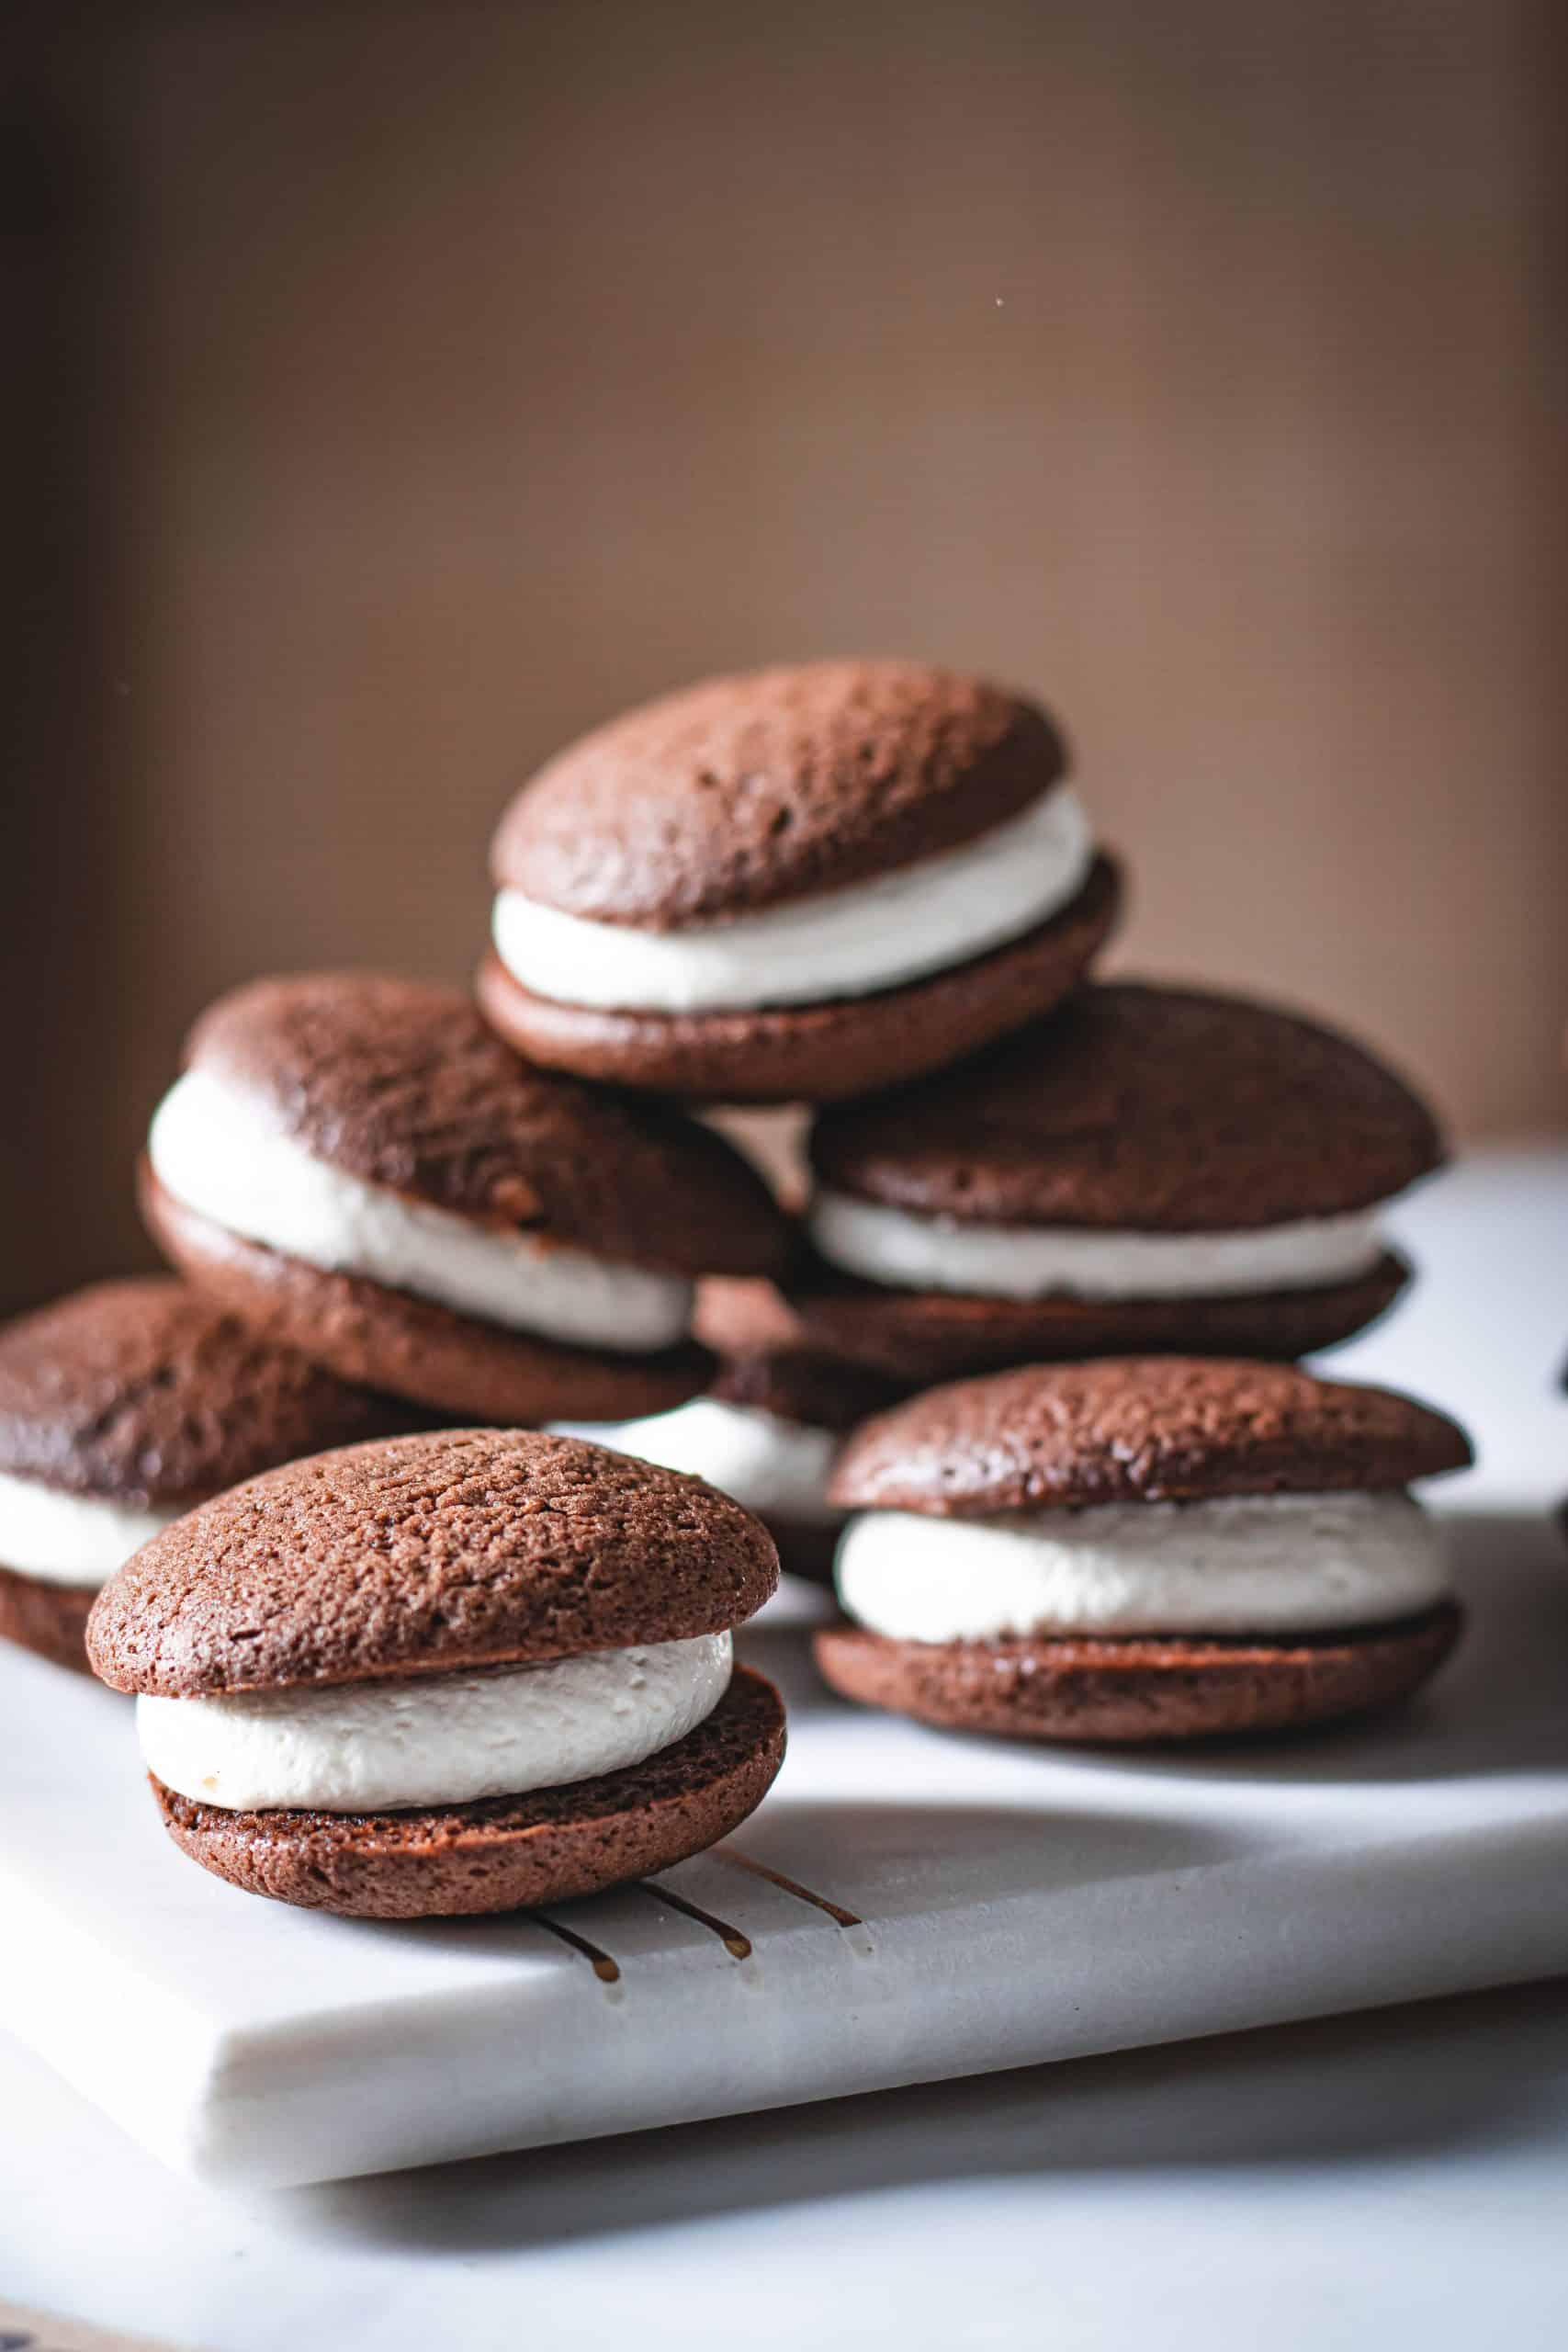
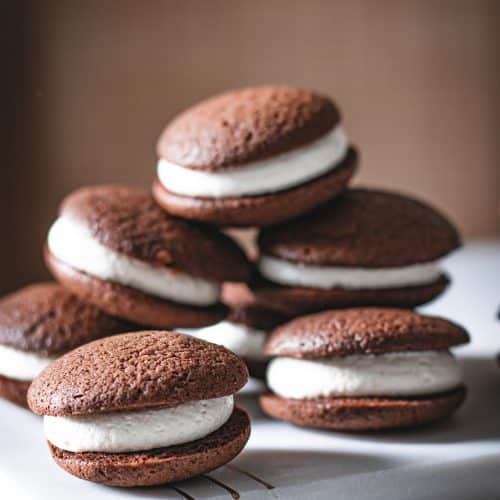
Whoopie Pies are definitely the most delicious treat of your dreams. They’re a chocolate cake-like cookie with an insanely fluffy, marshmallow-flavored filling that’s perfect for any occasion!
Quick Breakdown
What are Whoopie Pies?
Whoopie Pies are a type of cake that is made from two layers of cake, which are then filled with creamy buttercream. The cake is typically topped with a chocolate or vanilla frosting.

Pin it now to save for later!
What’s so great about Whoopie Pie Recipe?
There are many things that make Whoopie Pies so great, but some of the main reasons why they are so popular are because they are delicious and filling. Whoopie Pies can be enjoyed for breakfast, as an afternoon snack, or as a dessert. They also make a great dessert to take to a party or to give as a gift.
What do these Whoopie Pies taste like? Well when you bite into a whoopie pie, you’ll be treated to a cakey interior and a gooey, sweet cream cheese filling. These pies are often compared to the famous dessert cupcakes, but with a whoopie pie’s unique flavor profile. Some say that the whoopie pie’s flavor comes from the combination of two classic American desserts – cake and ice cream. Others say that the whoopie pie’s unique texture comes from the incorporation of the whipped cream into the mix. Whichever theory is correct, one thing is for sure – these pies are delicious!
Have you ever tried whoopie pies? Imagine an ice cream sandwich without the brain freezing!
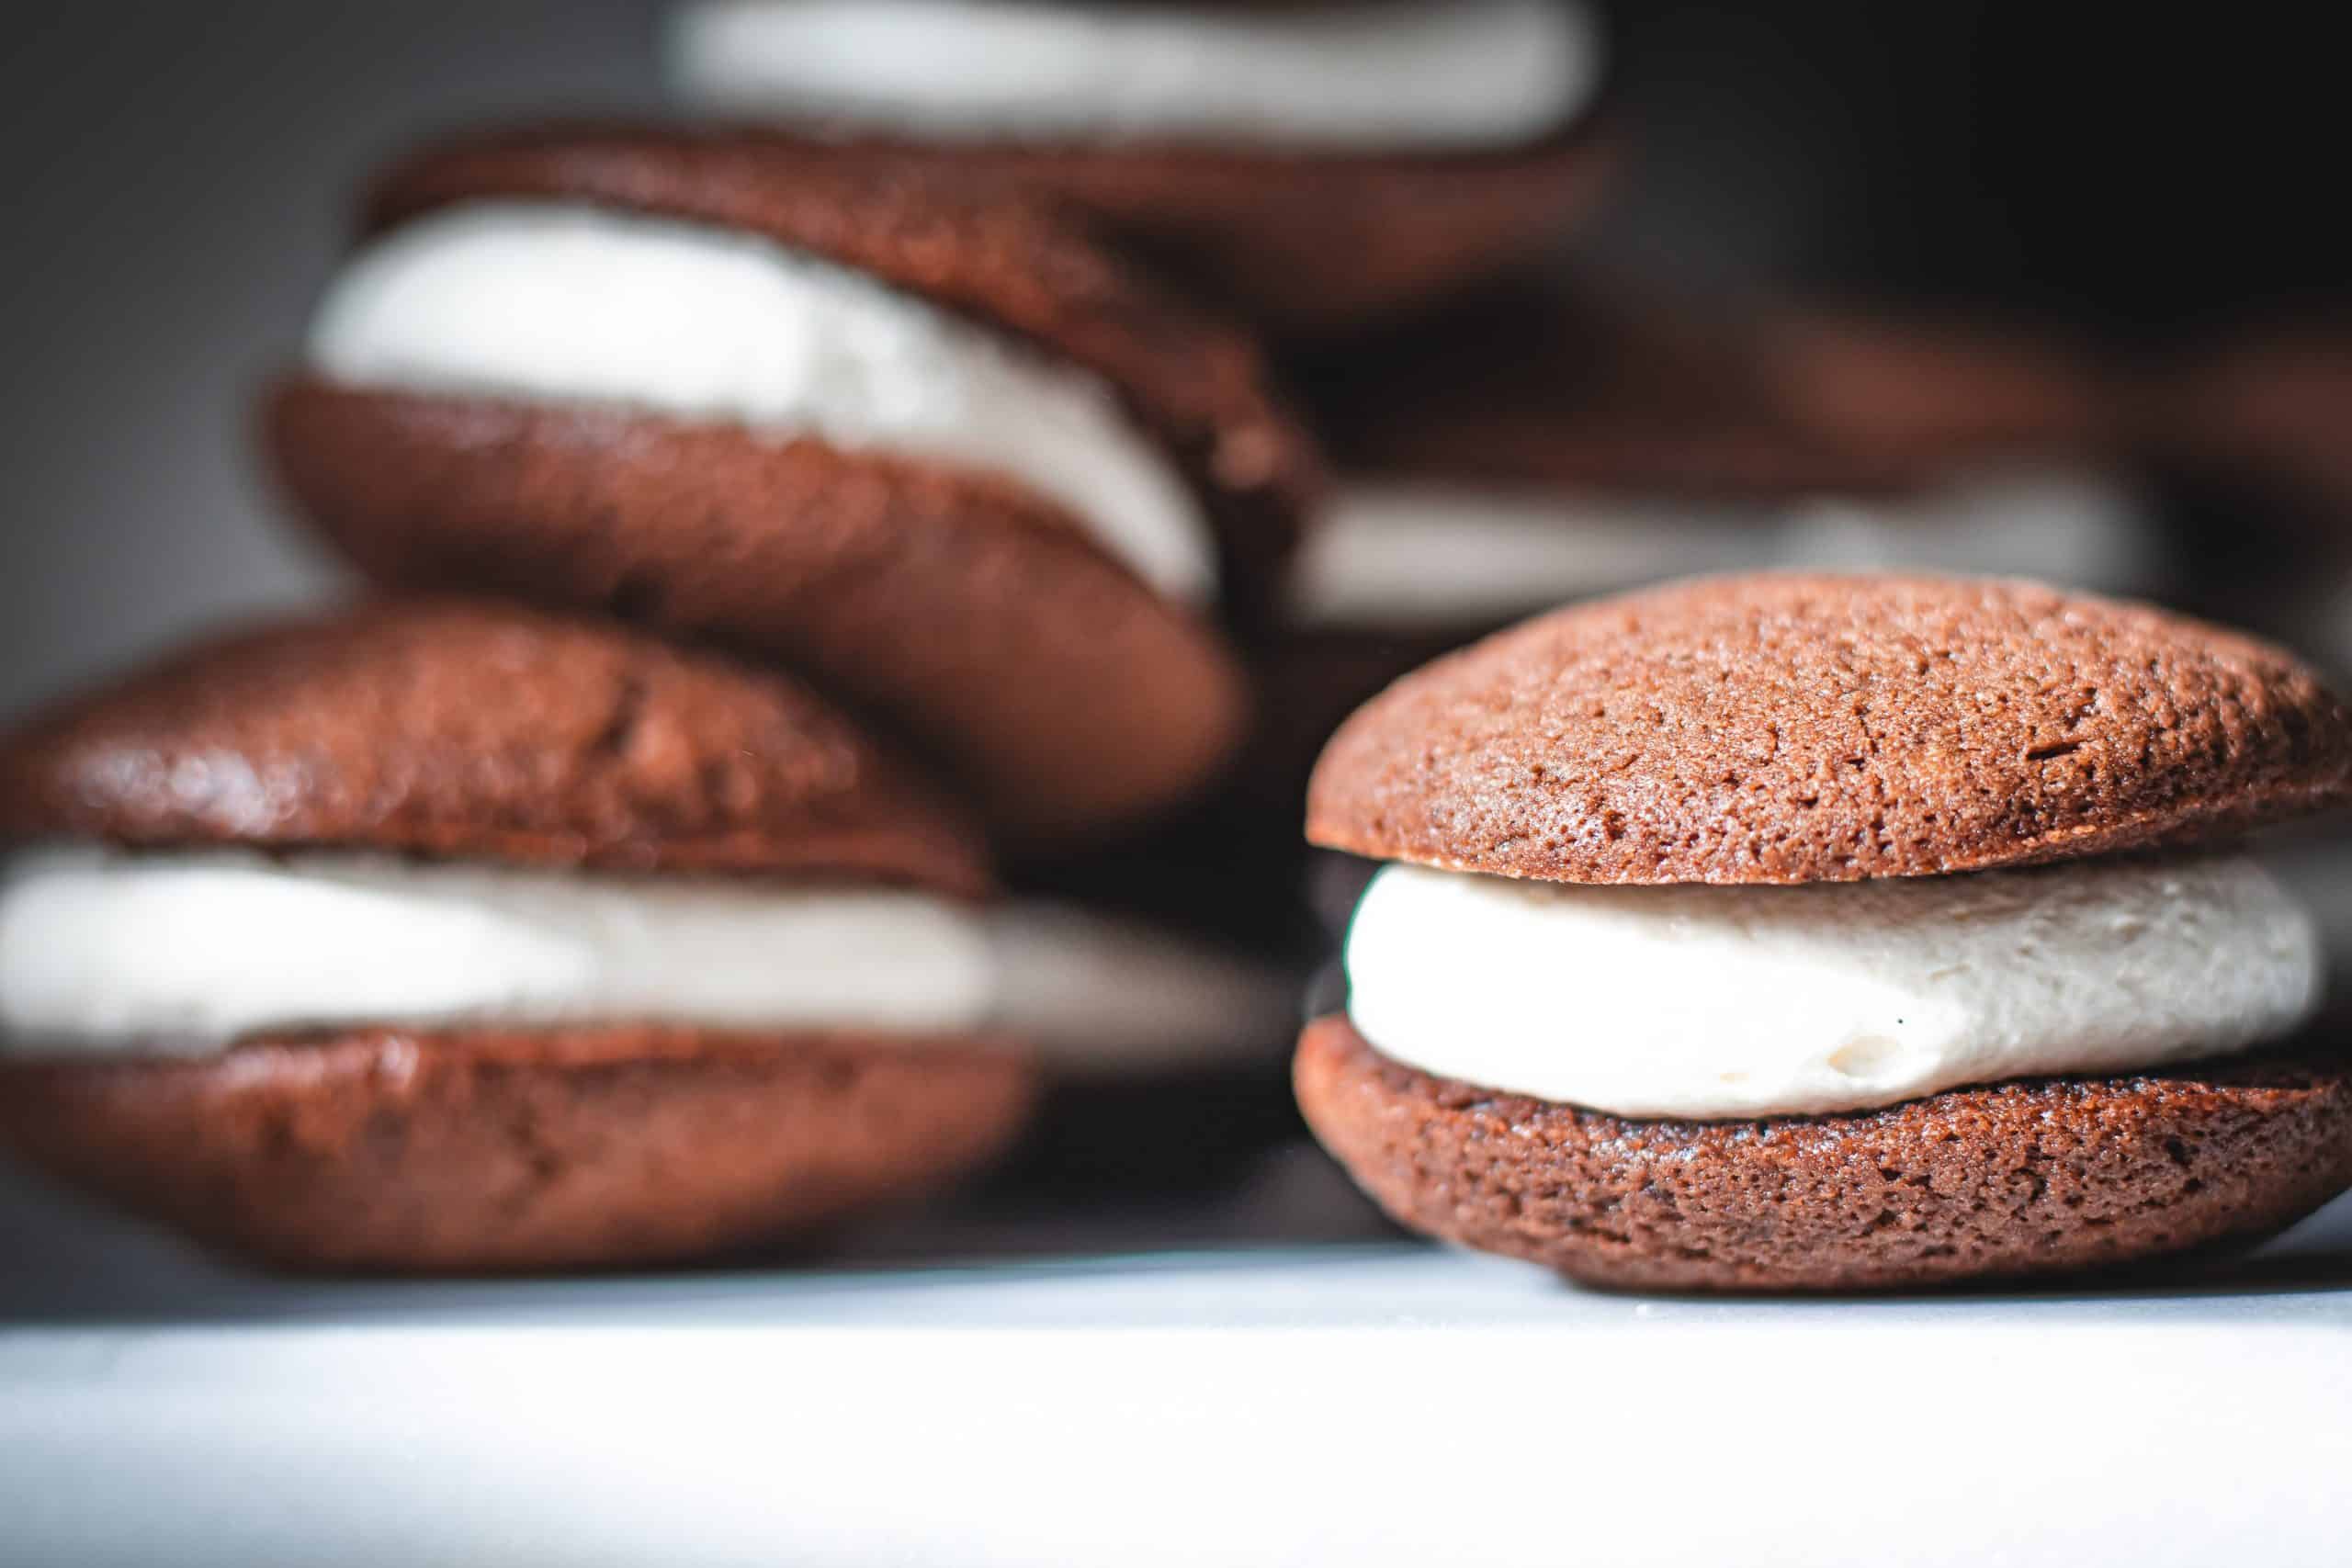
These delicious cookie sandwiches are full of a fluffy marshmallow filling that is both airy and light as well as sweet and decadent.
This whoopie pie consists of an outer soft chocolate cookie made with unsweetened dark cocoa and an inner filling made with marshmallow fluff and buttercream. The bitterness of the cocoa cookie mixed with the sweet fluffiness of the filling makes for one delicious whoopie pie.
A Note on Cocoa Powder
For the richest flavor and that signature deep color, I recommend using Dutch-process cocoa powder. Dutch-process cocoa has a higher fat content than the typical natural or unsweetened cocoa you might find on most grocery shelves, which means you’ll get a moister, more flavorful cookie. Plus, the buttermilk in this recipe works perfectly to activate the baking soda, ensuring your cookies bake up soft and tender.
If you have only natural cocoa powder on hand, don’t worry—you can still make these! Just know your whoopie pies might turn out a bit lighter in color and slightly drier in texture. If you want to experiment further, Dutch-process cocoa is easy to find at well-stocked grocery stores or specialty shops like Sur La Table, Williams Sonoma, or Penzeys, and it’s definitely worth seeking out for this recipe.
The result? A perfectly cakey, chocolaty exterior that’s the ideal match for the sweet, airy marshmallow filling. Whether you’re making these for a party or just as a special treat, the balance of flavors and textures will have everyone coming back for seconds.
This recipe does require an electric hand mixer or a stand mixer, but it is fairly easy to make and ideal for kids’ birthday parties or as a dessert after a Sunday BBQ with the family and friends.
You can make them beforehand and store them in the fridge until ready, although this would require you to resist the temptation of freshly made whoopee pie. Believe me, this is a tougher order than expected. There’s nothing quite like the smell of freshly baked cocoa cookies in the air.
Baking Tip: Measure Ingredients Carefully
When making this recipe, I like to weigh ingredients as this makes for a more precise prep. Measuring by weight helps ensure that your whoopie pies turn out soft and cakey—just as they should be. However, if you don’t have a digital kitchen scale handy, don’t worry! For dry ingredients like flour or cocoa powder, use the spoon and level method: gently spoon the ingredient into your measuring cup and level it off with the back of a knife. This helps avoid packing in too much and ending up with dense, tough whoopie pies.
However, if you’re working with the volume measurements and see your cookie batter is just a little too runny, don’t hesitate to add a bit more flour to make it thicker and more scoopable.
A little care at this stage makes all the difference between a pillowy soft whoopie pie and a chocolate hockey puck!
Also, if you’re a big chocolate lover, try switching the hot water for a hot espresso and make that chocolate batter just a tiny bit more chocolaty and bitter. Coffee goes great in chocolate recipes!
If you want a simplified recipe, just skip the filling and fill it with some whipped cream. Those whoopie pies will still turn out ever so tasty!
Cocoa Powder Choices: What to Expect
Let’s talk cocoa powder for a moment because yes—it makes a difference! If you reach for Dutch-process cocoa (think Valrhona or Droste), you’ll notice your whoopie pies turn out darker, richer, and more indulgent, almost like biting into a gourmet chocolate cloud. The extra cocoa butter in Dutch-process cocoa means you get ultra-moist, deeply flavored cookies that pair beautifully with sweet, fluffy marshmallow filling.
Now, if you only have natural unsweetened cocoa powder (the classic Hershey’s or Ghirardelli), your whoopie pies will bake up with a lighter color and a slightly more cake-like crumb. The flavor will be milder—still chocolatey, but less intense and not quite as fudgy. You might also notice they’re a little drier since there’s less fat in the mix.
In short:
- Dutch-process cocoa → deeper color, richer flavor, moister texture
- Natural cocoa → lighter color, milder taste, a touch drier
But don’t stress too much—whichever cocoa you scoop in, you’re in for a delicious whoopie treat (just with a slightly different twist).
What Kinds of Whoopie Pies Are There?
There are a lot of different kinds of whoopie pies, and each one has its own unique flavor and texture. Here are some of the most popular types:
- Chocolate whoopie pies: These pies are made with chocolate cake and chocolate frosting.
- Cherry whoopie pies: These pies are made with cherry filling and cream cheese frosting.
- Peanut butter whoopie pies: These pies are made with peanut butter cake and peanut butter frosting.
- Fruit whoopie pies: These pies are made with fruit filling and whipped cream or cream cheese frosting.
How to Store Whoopie Pies?
If you’re like most people, you probably think of whoopie pies as a festive dessert that can be enjoyed any time of year. But did you know that they can also be a great way to use up a leftover cake or pie filling? In this article, we’ll show you how to store whoopie pies so that they’ll stay fresh and delicious for a long time.
- Make sure the pies are well-frosted and cooled before storing them. This will help to keep the frosting from melting and turning the pie into a gooey mess.
- If you’re planning on storing your whoopie pies in the freezer, make sure to wrap them tightly in plastic wrap or place them in an airtight container so that they won’t thaw out too quickly. Alternatively, you can place them in an icebox or fridge. For best results, arrange your whoopie pies in a single layer on a baking sheet and pop them into the freezer for about an hour—just until they’re firm enough not to stick together. Once they’ve set, transfer them to a large zip-top bag or an airtight container and stash them in the freezer for up to a month. When you’re ready to enjoy, simply thaw the pies for a few hours in the fridge or let them come to room temperature on the counter. Either way, you’ll have soft, delicious whoopie pies ready to brighten up your day!
- If you’re storing your whoopie pie on the counter, make sure to cover them with a layer of foil or plastic wrap so that they don’t get sticky and gross. And lastly, make sure to store them in a cool, dark place so that they’ll stay fresh for as long.
How to Thaw Frozen Whoopie Pies
Thawing your frozen whoopie pies is as effortless as enjoying them. When you’re ready to indulge, simply take your pies out of the freezer and let them sit at room temperature for a couple of hours, or pop them in the fridge to thaw overnight. Both methods work perfectly—just be sure to keep them in their airtight container or wrapped up so they don’t dry out. Once they’ve softened, you’ll have perfectly delicious whoopie pies ready to serve, just as moist and tasty as the day you made them.
How Long Does Marshmallow Filling Last?
Wondering how long that tasty marshmallow filling will stay good for? Once you’ve whipped up a batch, simply transfer any leftovers to an airtight container.
- In the fridge: The marshmallow filling will stay fresh for up to 1–2 weeks.
- In the freezer: If you want to save it for later, you can freeze it for about a month! Just be sure it’s well-sealed to keep the texture light and dreamy.
When you’re ready to use the filling again, allow it to thaw in the fridge if frozen. For best results, let it come to room temperature and give it a quick whisk or stir to bring back its fluffiness.
How to Transport Whoopie Pies Without the Smoosh
If you’re planning to take your whoopie pies on the road—whether it’s to a picnic, a bake sale, or just to make your coworkers jealous—keeping them intact and picture-perfect is a must. Here’s how to make sure your treats arrive at their destination looking bakery-fresh:
- Chill Before the Trip: Popping your whoopie pies into the fridge for an hour or two before you leave will help firm them up. This little trick makes the cookies less likely to smoosh or squish when they’re on the move.
- Pack with Care: Use an airtight container and separate layers with wax or parchment paper—no adventurous sliding or frosting catastrophe en route. If you’re traveling in warmer weather, consider a little ice pack tucked into your bag; you want chilled pies, not a puddle of frosting.
- Serve Slightly Chilled: Whoopie pies are actually extra delicious when served cool—the filling is fudgy, the cake is tender, and you won’t have to worry about sticky fingers.
Follow these steps and your whoopie pies will survive the journey with flying colors—and maybe even steal the show.
Tips for an Amazing Whoopie Pies:
If you’re thinking about making whoopie pies, but are unsure of where to start, these tips will help you make the best pies possible.
- Start with quality ingredients. Whoopie pies are all about the ingredients, so make sure you use quality ingredients when you make them. Good whoopie pie ingredients include cream cheese, sugar, and flour.
- Preheat your oven before you start baking. This will help your pies come out evenly and quickly.
- Use a round cutter to create perfect circles for your whoopie pies. This will help ensure that they come out looking their best.
- Fill your whoopie pie with your favorite filling combinations. Some popular fillings for whoopie pies include chocolate cake, vanilla cake, and strawberry cake. Experiment to see what combinations work best for you and your guests!
Why Use Unsalted Butter for Whoopie Pies?
You might be wondering why just about every whoopie pie recipe calls for unsalted butter. The answer is simple—using unsalted butter gives you full control over the salt content in your baked goods. Salted butter can vary from brand to brand, and by opting for unsalted, you can ensure your pies turn out perfectly balanced every time.
Plus, make sure your butter is at the right temperature before you start mixing—ideally, it should be cool, but soft enough to yield slightly when pressed. This makes it much easier to cream with sugar, helping you achieve those tender, airy cakes whoopie pies are famous for. Keep your butter a bit on the cool side, especially if your kitchen tends to run warm, and you’ll be set up for baking success!
This is the best whoopie pie that will have your family asking for more!
- Yields/Serves: 24-30 whoopie pies (varies according to cookie pie size)
- Prep Time: 40 minutes.
- Cooking Time: 30 minutes.
- Total Time: 1 hour and 10 minutes.
Here is the list of ingredients for this Homemade Whoopie Pie Recipe:
Pies:
- 2 cups (283g) of all-purpose flour
- ½ cup (45g) unsweetened cocoa powder
- 1 tsp baking soda
- ½ tsp salt
- 1 cup (200g) light brown sugar
- ½ cup (120ml) buttermilk
- ½ cup (120ml) vegetable oil
- 1 large egg
- 1 ½ tsp vanilla extract of vanilla bean paste
- ½ cup (120ml) hot water
Why Use Buttermilk in Whoopie Pies?
Buttermilk isn’t just here for flavor—it’s the secret behind those irresistibly soft, tender whoopie pie cakes. Its subtle tang adds depth, while the acidity teams up with baking soda to give your pies a light, perfectly fluffy texture. So yes, you really do want buttermilk in the mix!
Now, before you grab that carton of regular milk and vinegar, know this: while homemade substitutes can work in a pinch, they simply can’t replicate the rich, creamy qualities real buttermilk brings to the party. For truly classic whoopie pies, reach for real buttermilk if you can. Your taste buds—and your guests—will thank you.
Can You Substitute Natural Cocoa Powder for Dutch-Process?
Absolutely—if you find yourself out of Dutch-process cocoa powder, you can still make delicious whoopie pies with natural cocoa powder. Just keep in mind, there are some small tweaks in flavor and texture to expect.
Dutch-process cocoa is known for its deeper color, richer flavor, and added moisture—all excellent qualities for a classic, soft whoopie pie. Its extra fat content creates a tender crumb that pairs beautifully with that fluffy marshmallow filling.
If you use natural cocoa powder instead, your pies may turn out a bit lighter in color and slightly drier in texture. They’ll still taste great, but you might notice the flavor isn’t quite as deep. Rest assured, the buttermilk in this recipe works with the baking soda, no matter which cocoa you choose, so there’s no need to swap in baking powder.
To sum up:
- Dutch-process cocoa = darker color, richer flavor, more moisture
- Natural cocoa powder = lighter, possibly drier, but still delicious
Go ahead and use what you have on hand—your whoopie pies will still be a hit with family and friends!
Whoopie pie Filling:
- 1 cup (200g) unsalted butter, softened, at room temperature
- 2 ¼ (270g) powdered sugar, sifted
- 1 tsp vanilla extract or vanilla bean paste
- 10 oz (285g) marshmallow fluff
What’s the Difference Between Marshmallow Creme and Marshmallow Fluff?
Ever wondered if there’s any real difference between that jar of marshmallow creme you spotted at the grocery store and classic marshmallow fluff? Here’s what to know before mixing up your whoopie pie filling:
- Texture Talks: Marshmallow creme (like Jet-Puffed) is usually a touch softer and a bit more spreadable than traditional marshmallow fluff. If you opt for creme instead of fluff, you might notice your filling turns out just a little looser.
- How to Fix: No worries—just add a bit more powdered sugar until your filling reaches the thick, fluffy texture you want for sandwiching those pies.
Pick whichever is easiest to find—both work deliciously well, but small adjustments will guarantee picture-perfect, spill-free whoopie pies.
Equipment:
- Cookie sheets or baking sheets
- Parchment paper
- Hand mixer or standing mixer
- 2 pastry bags (optional but makes the work easier)
How to Prepare This Whoopie Pie Cake Recipe?
STEP 1: Preheat the oven to 190ºC/375ºF and set oven racks to the upper and lower third of the oven.
STEP 2: Line 2 cookie sheets with parchment paper and set them aside. You will need to bake two or three times depending on the size of your cookie sheets.
STEP 3: In a medium bowl, combine the flour, unsweetened cocoa powder, baking soda, and salt. Stir until well combined and set aside.
STEP 4: In a large mixing bowl mix in the brown sugar, buttermilk, vegetable oil, egg, and vanilla extract of vanilla bean paste and whisk until well combined.
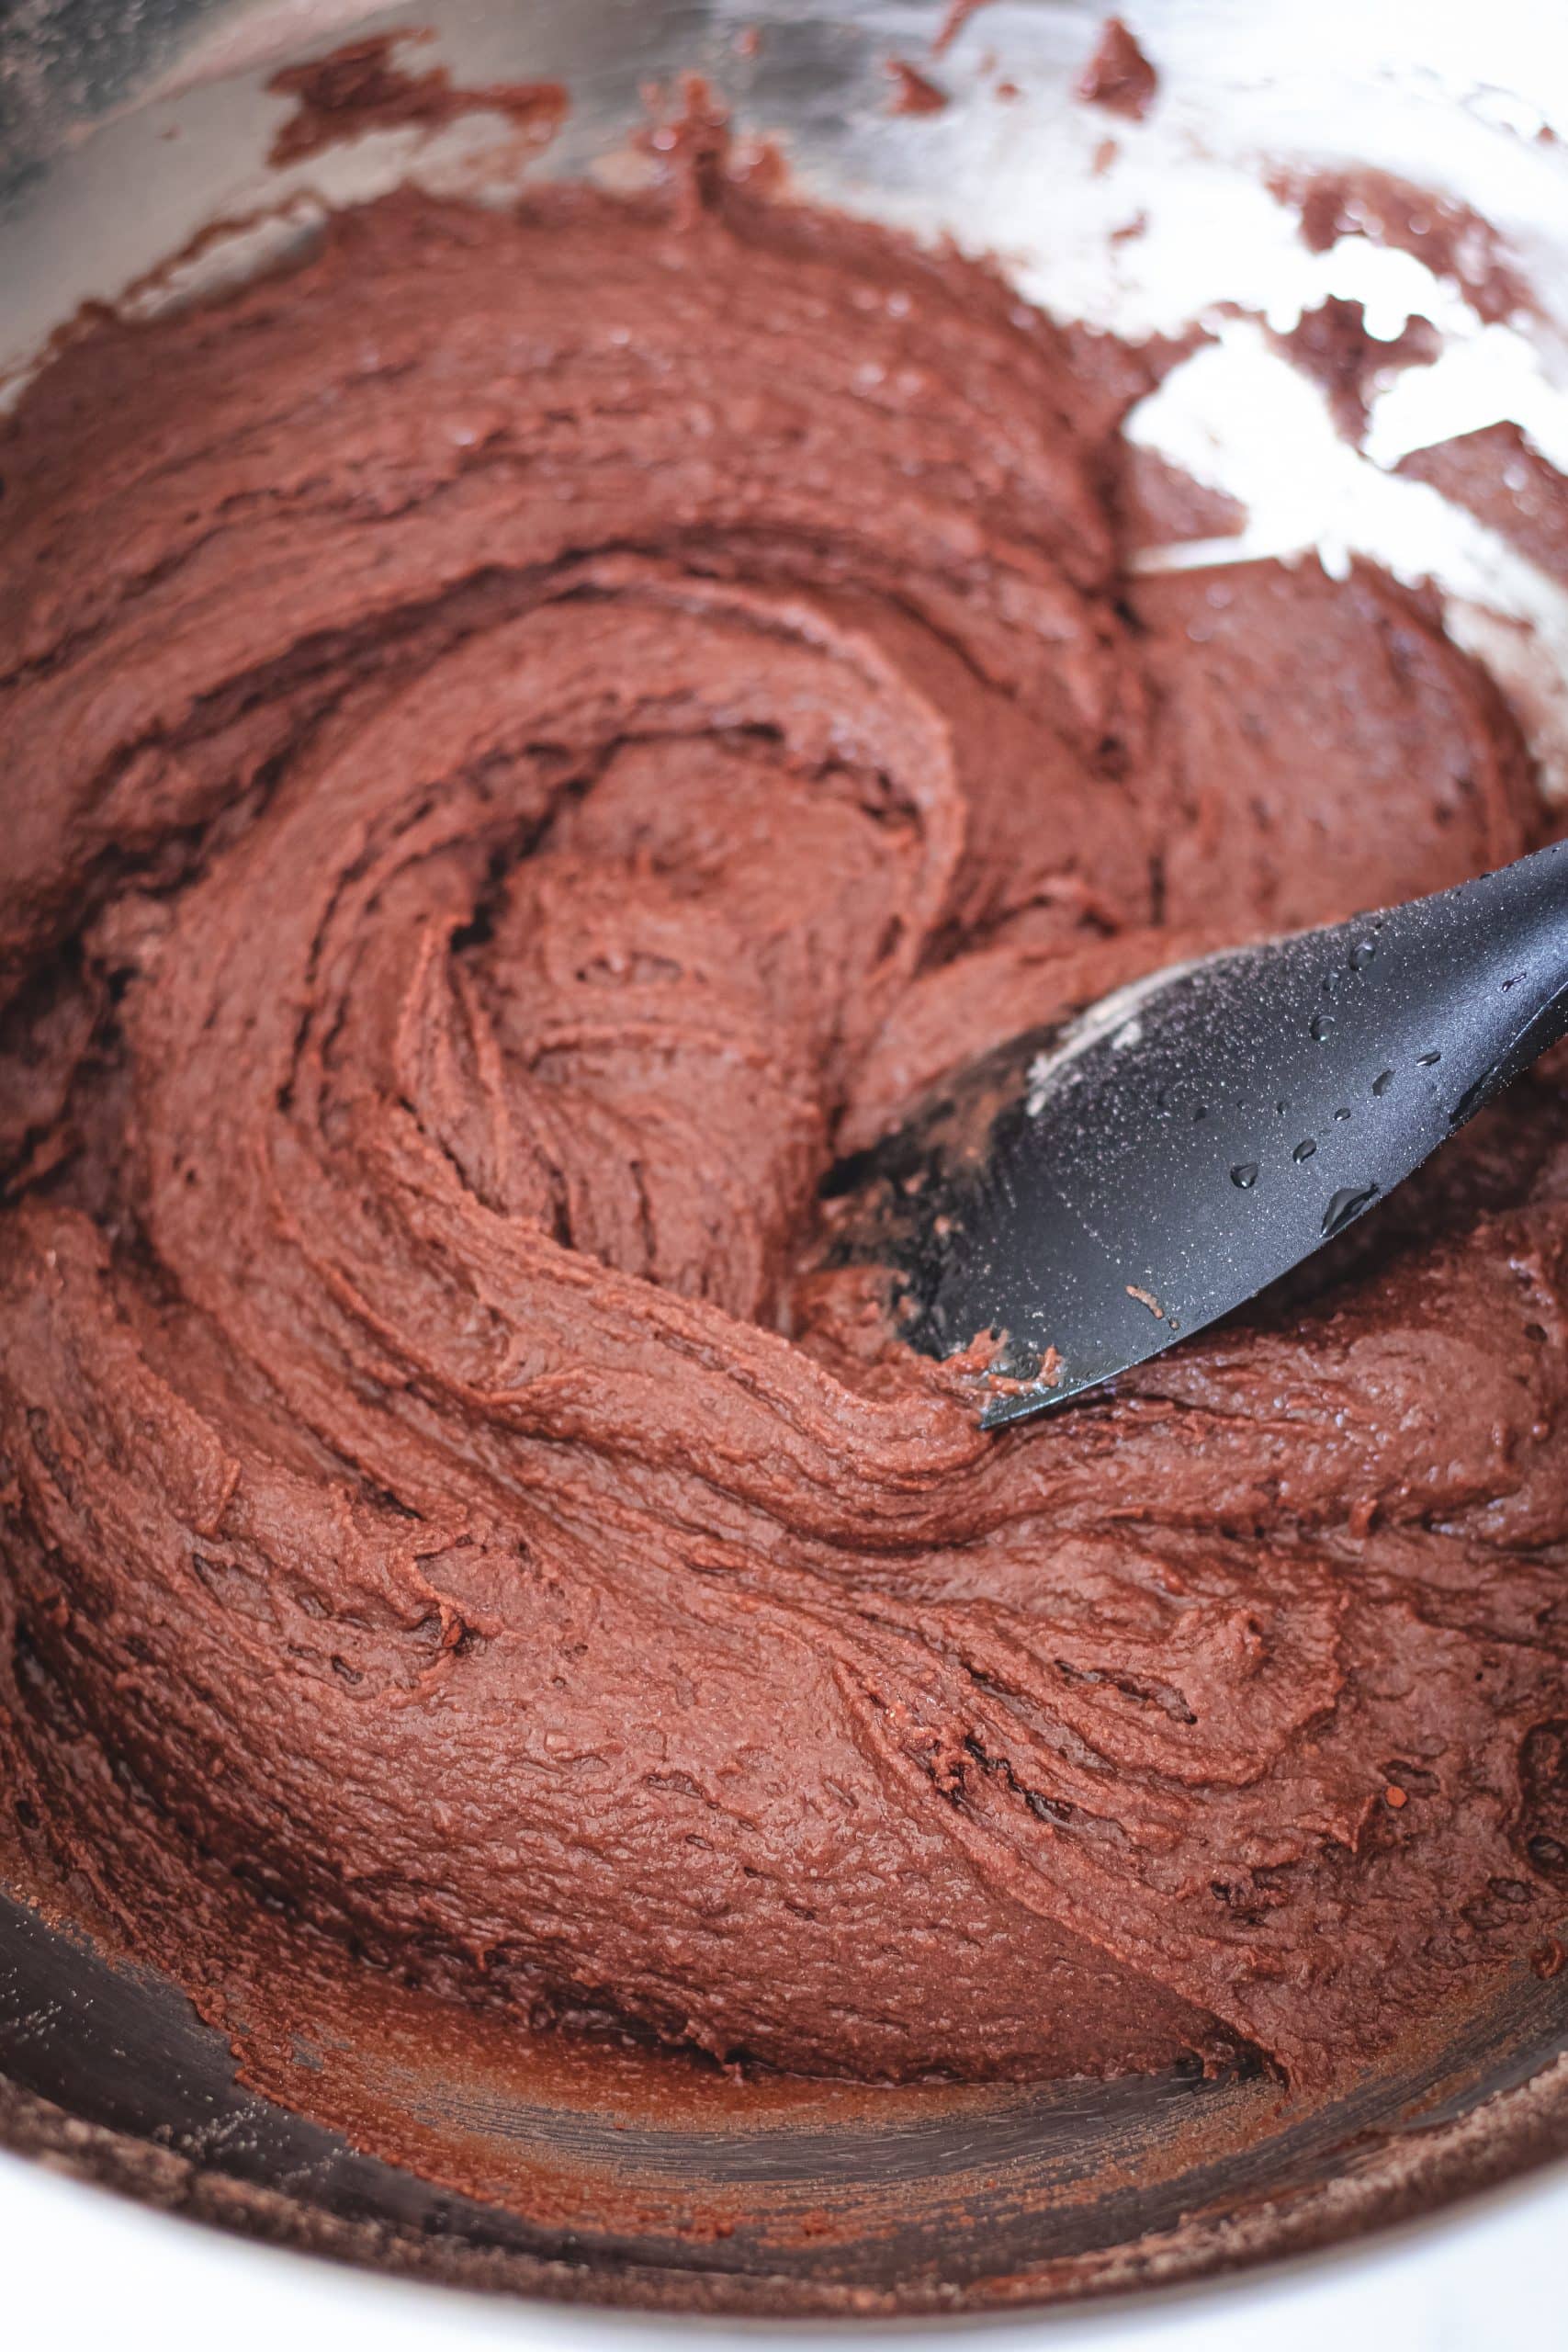
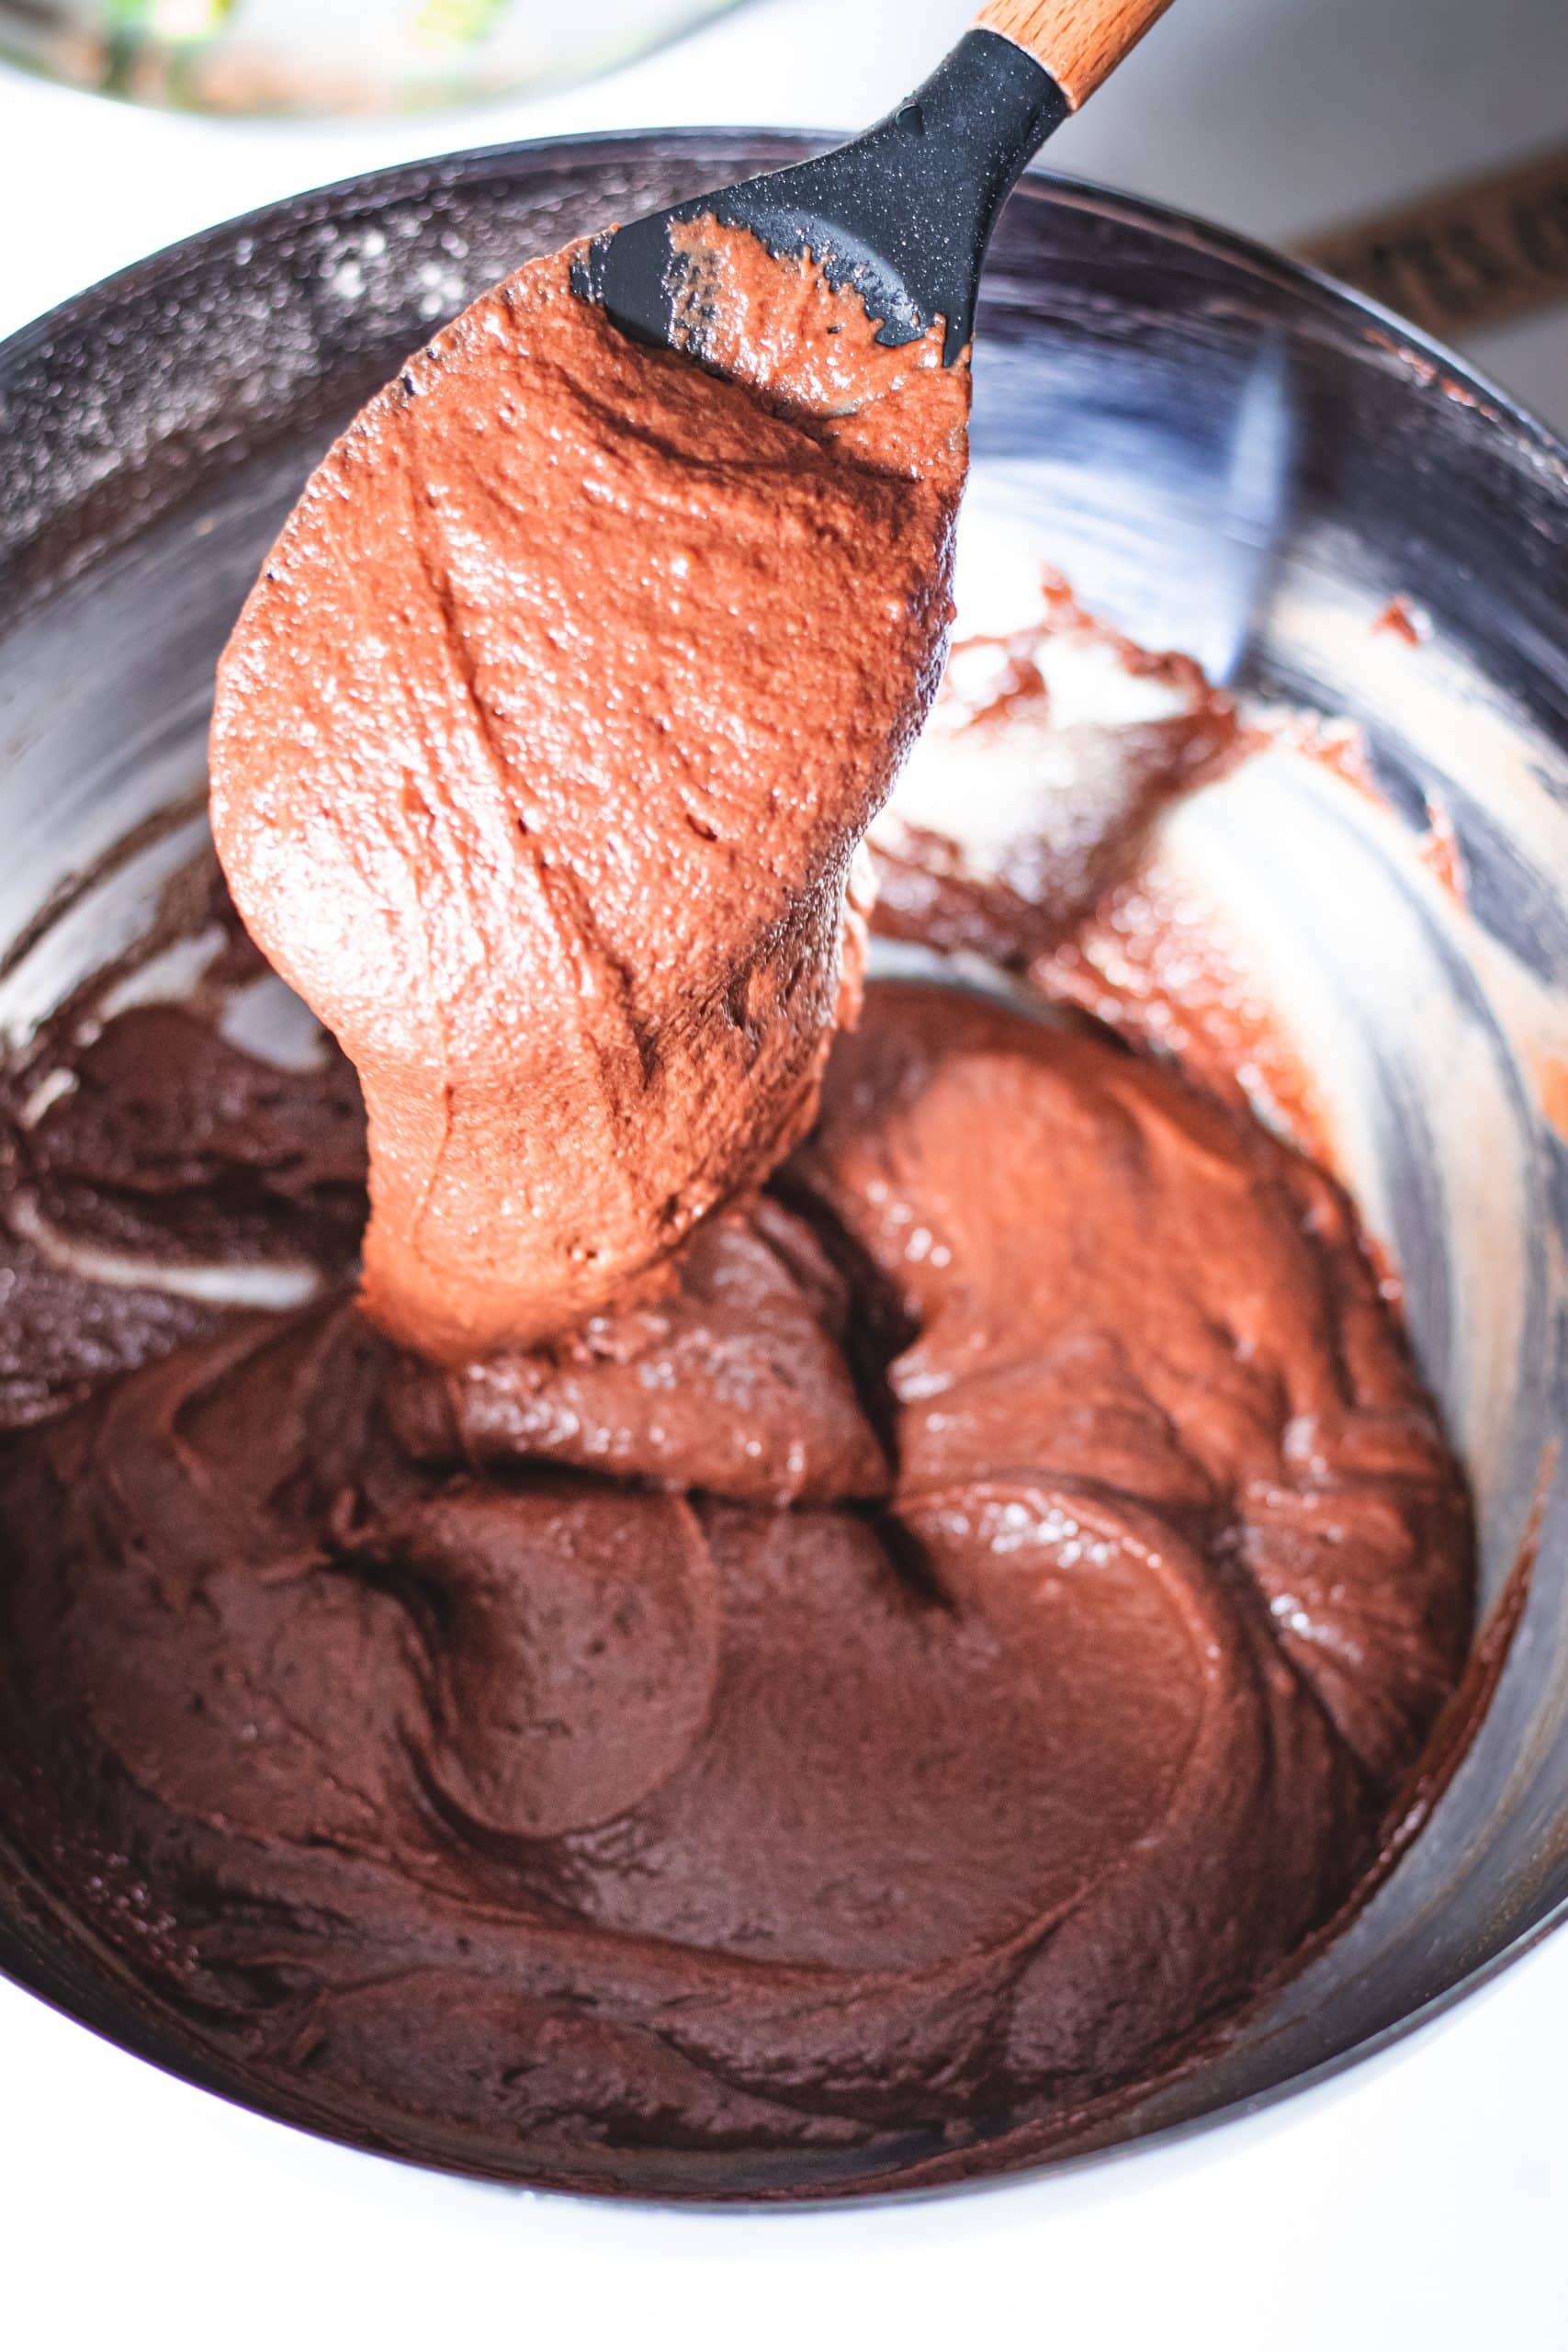
STEP 5: Gradually add the dry ingredients to the wet batter mixing until smooth. At this point, it should look like a thick brownie batter.
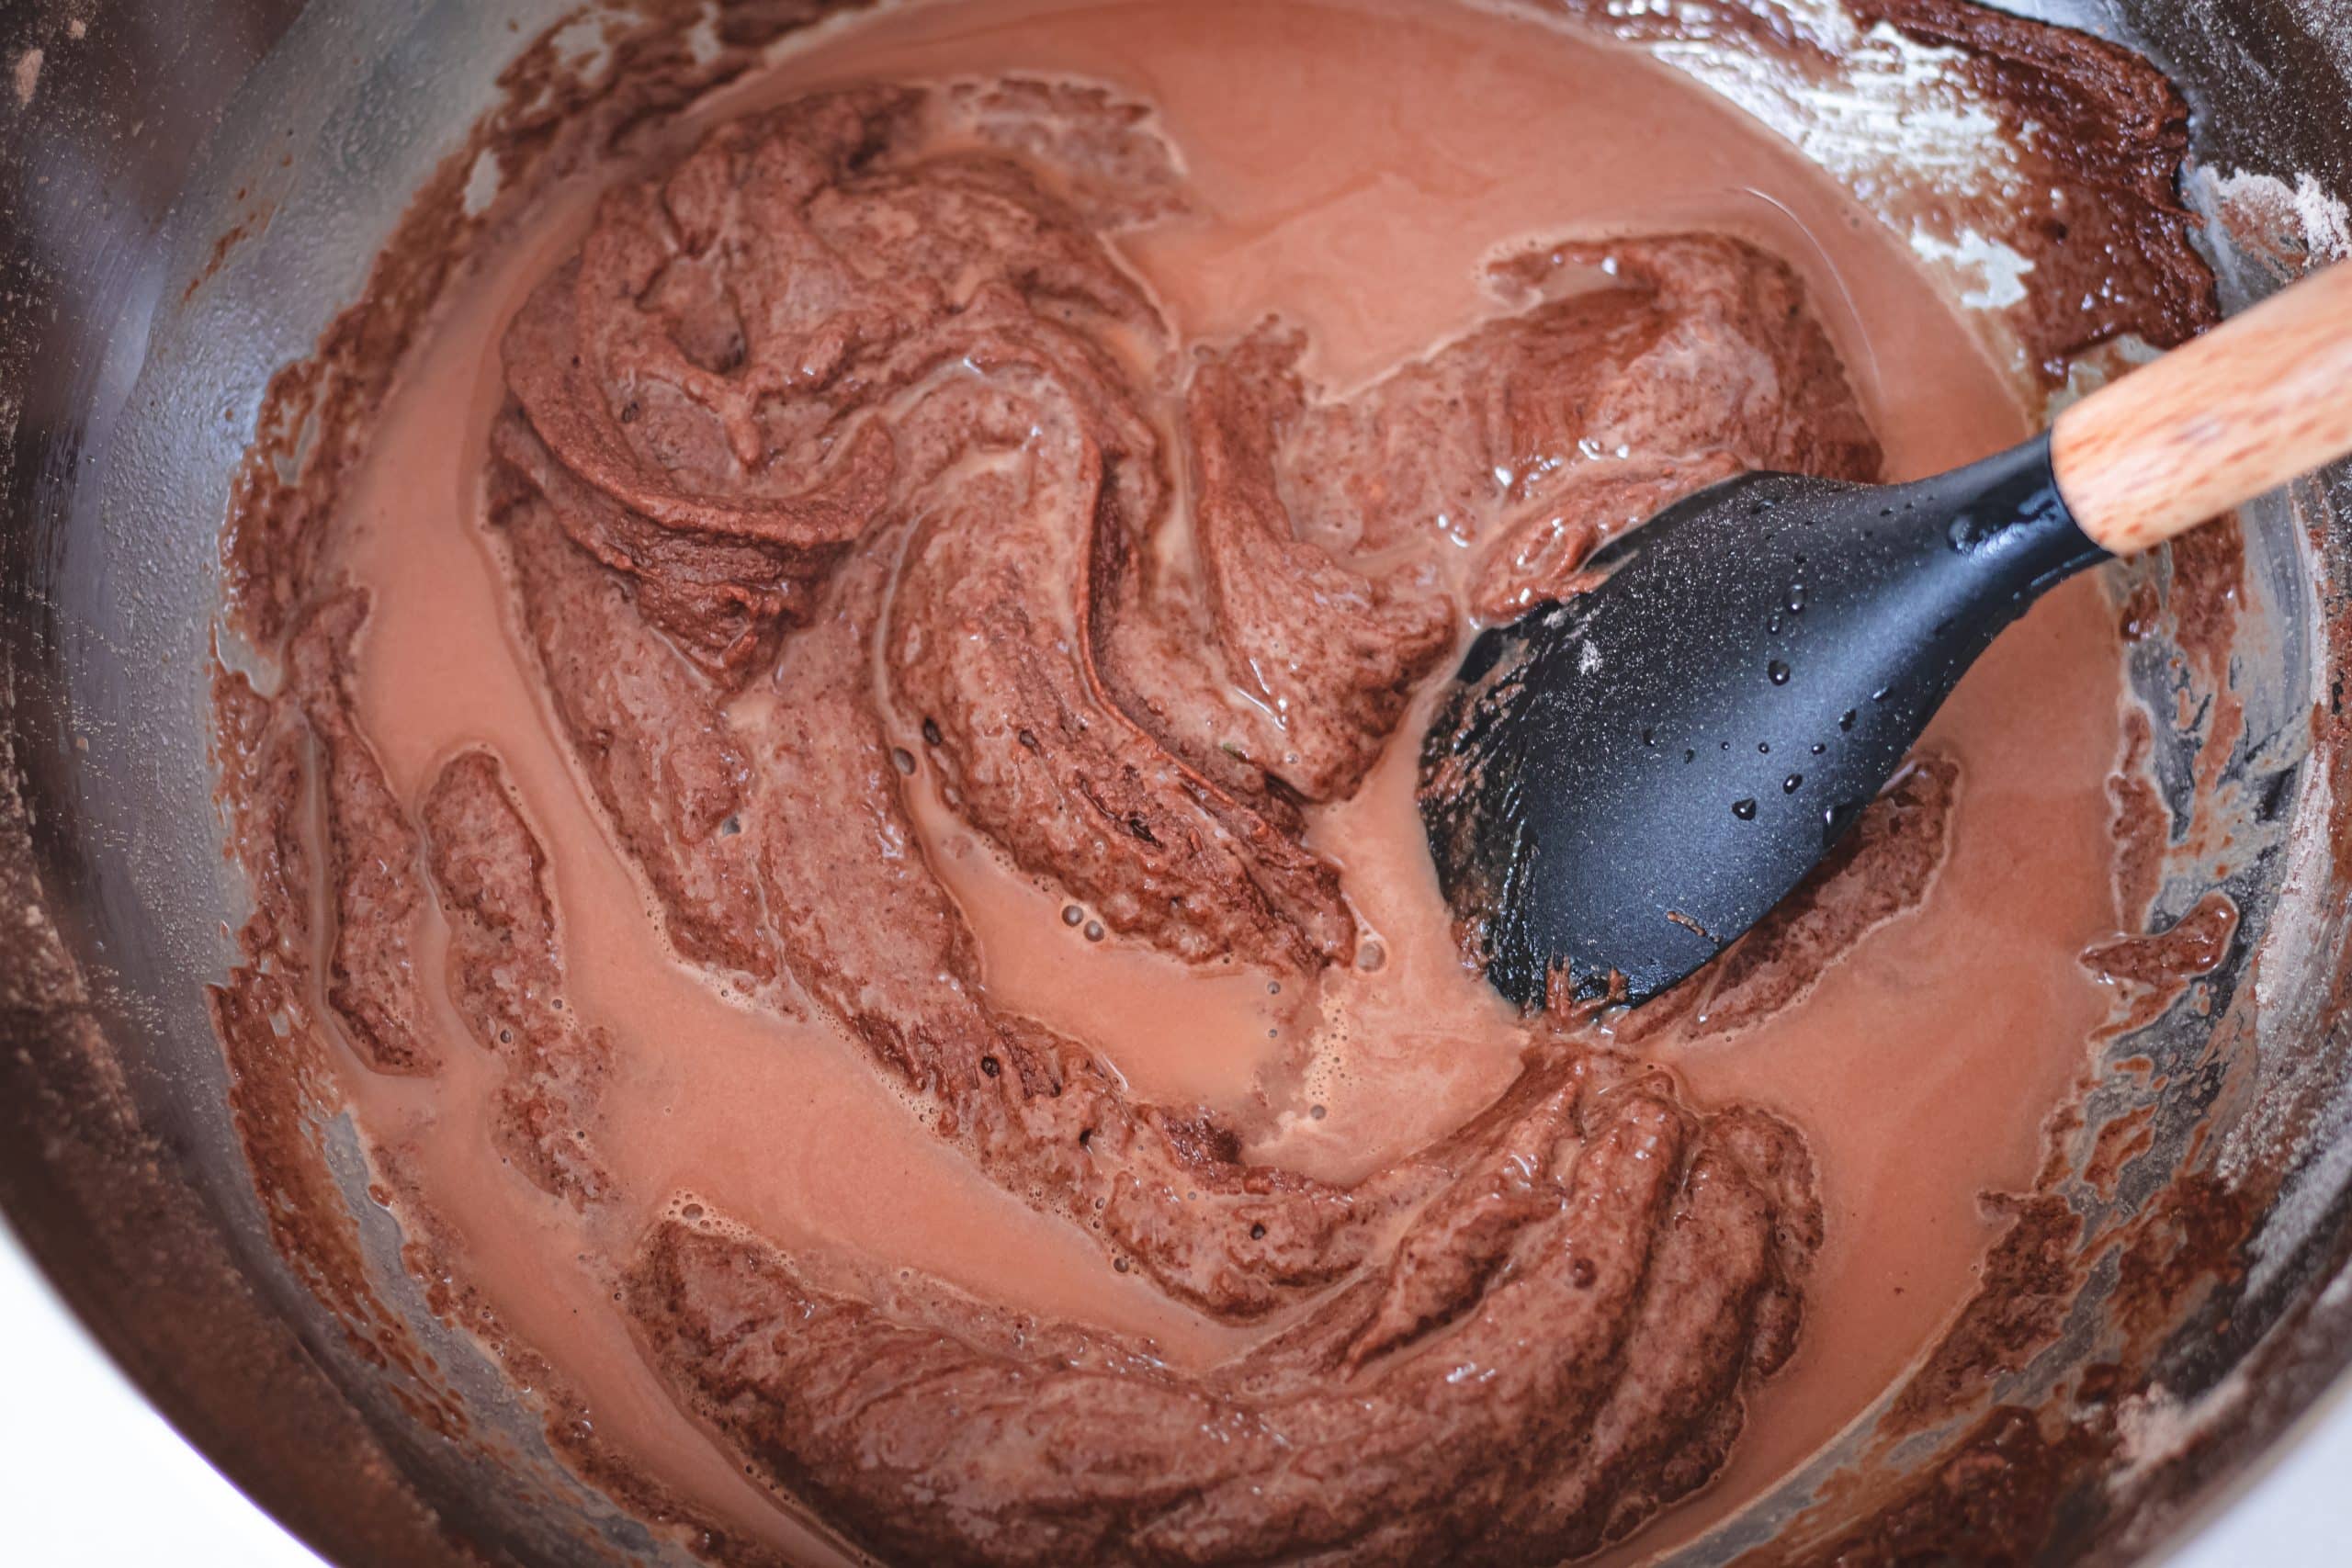
STEP 6: Add the hot water and continue to mix until smooth. The consistency should change a bit making it smooth and velvety.
STEP 7: Transfer the cookie pie batter to the lined cookie sheets with the help of an ice cream scoop or with a pastry bag (ziplock bags also work) if you feel like this will be easier. You want to drop a 1 ½ tbsp scoop of batter at a time, leaving at least 2in (5cms) in between each scoop/pie. They should be really spaced out.
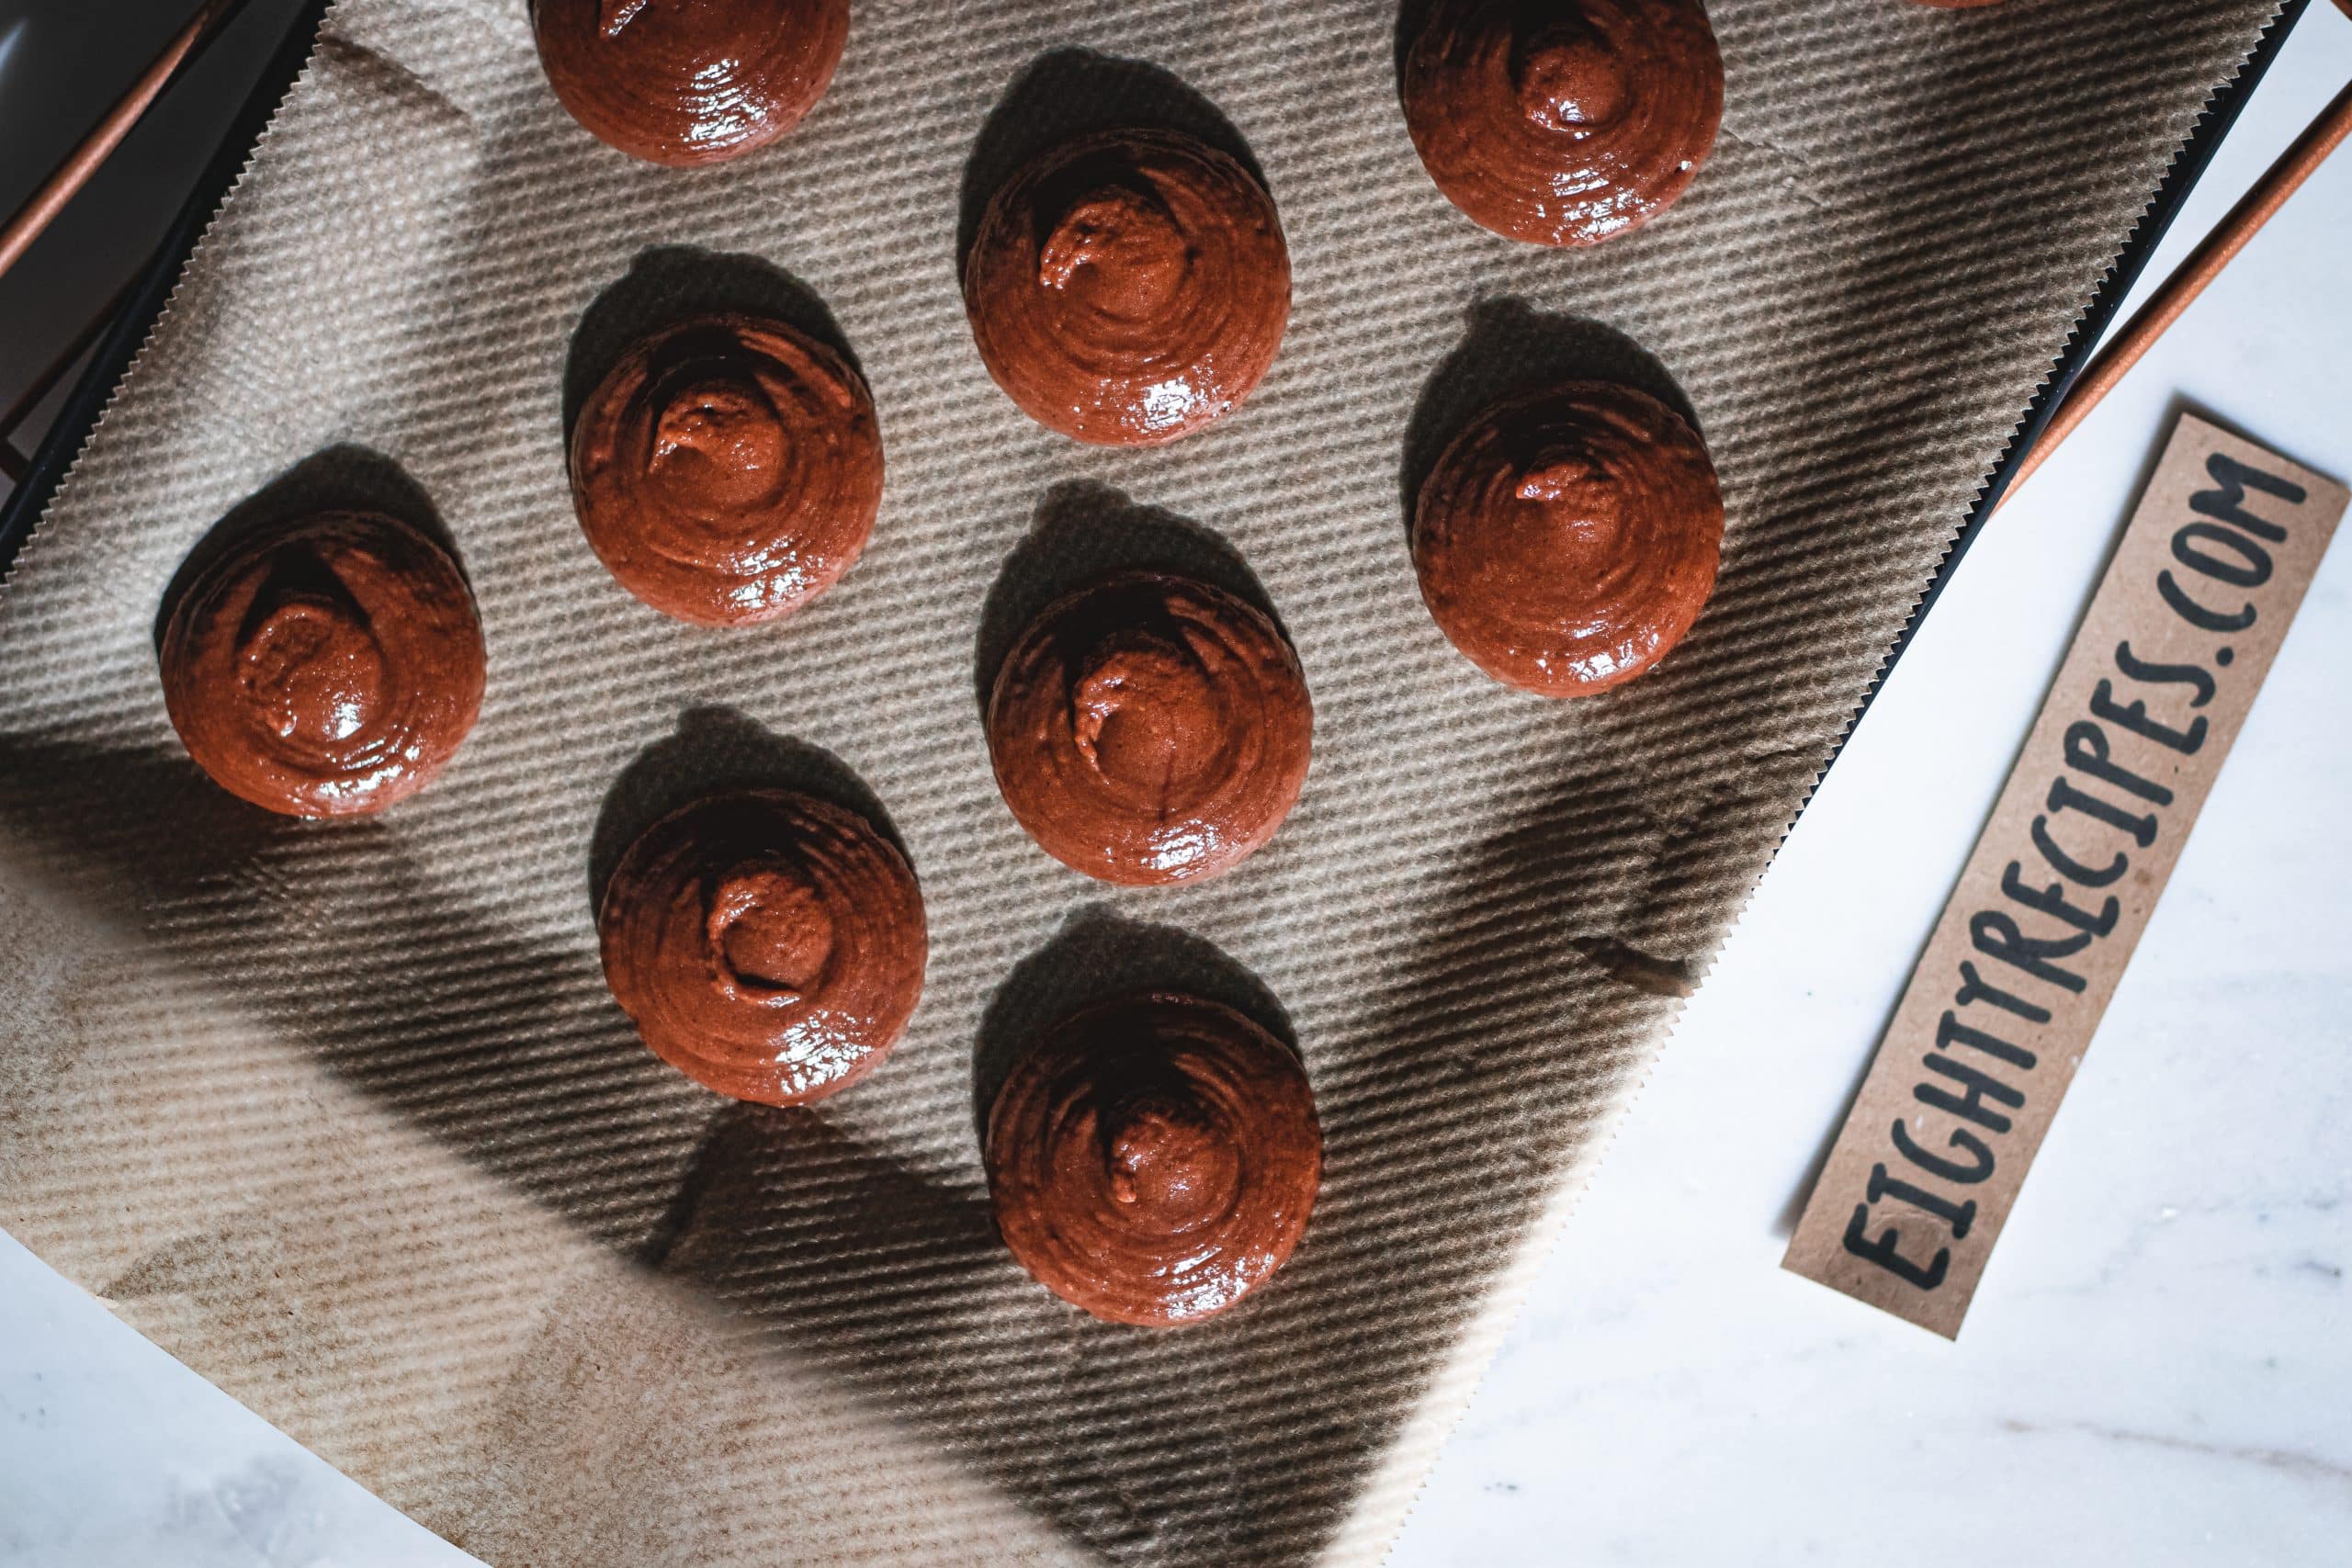
STEP 8: Bake the first two sheets for 4 minutes, then rotate them (the lower cookie sheet will go to the first rack and the first rack cookie sheet will go to the lower rack) and bake for 4 additional minutes. The center of the cookies should spring back when touched.
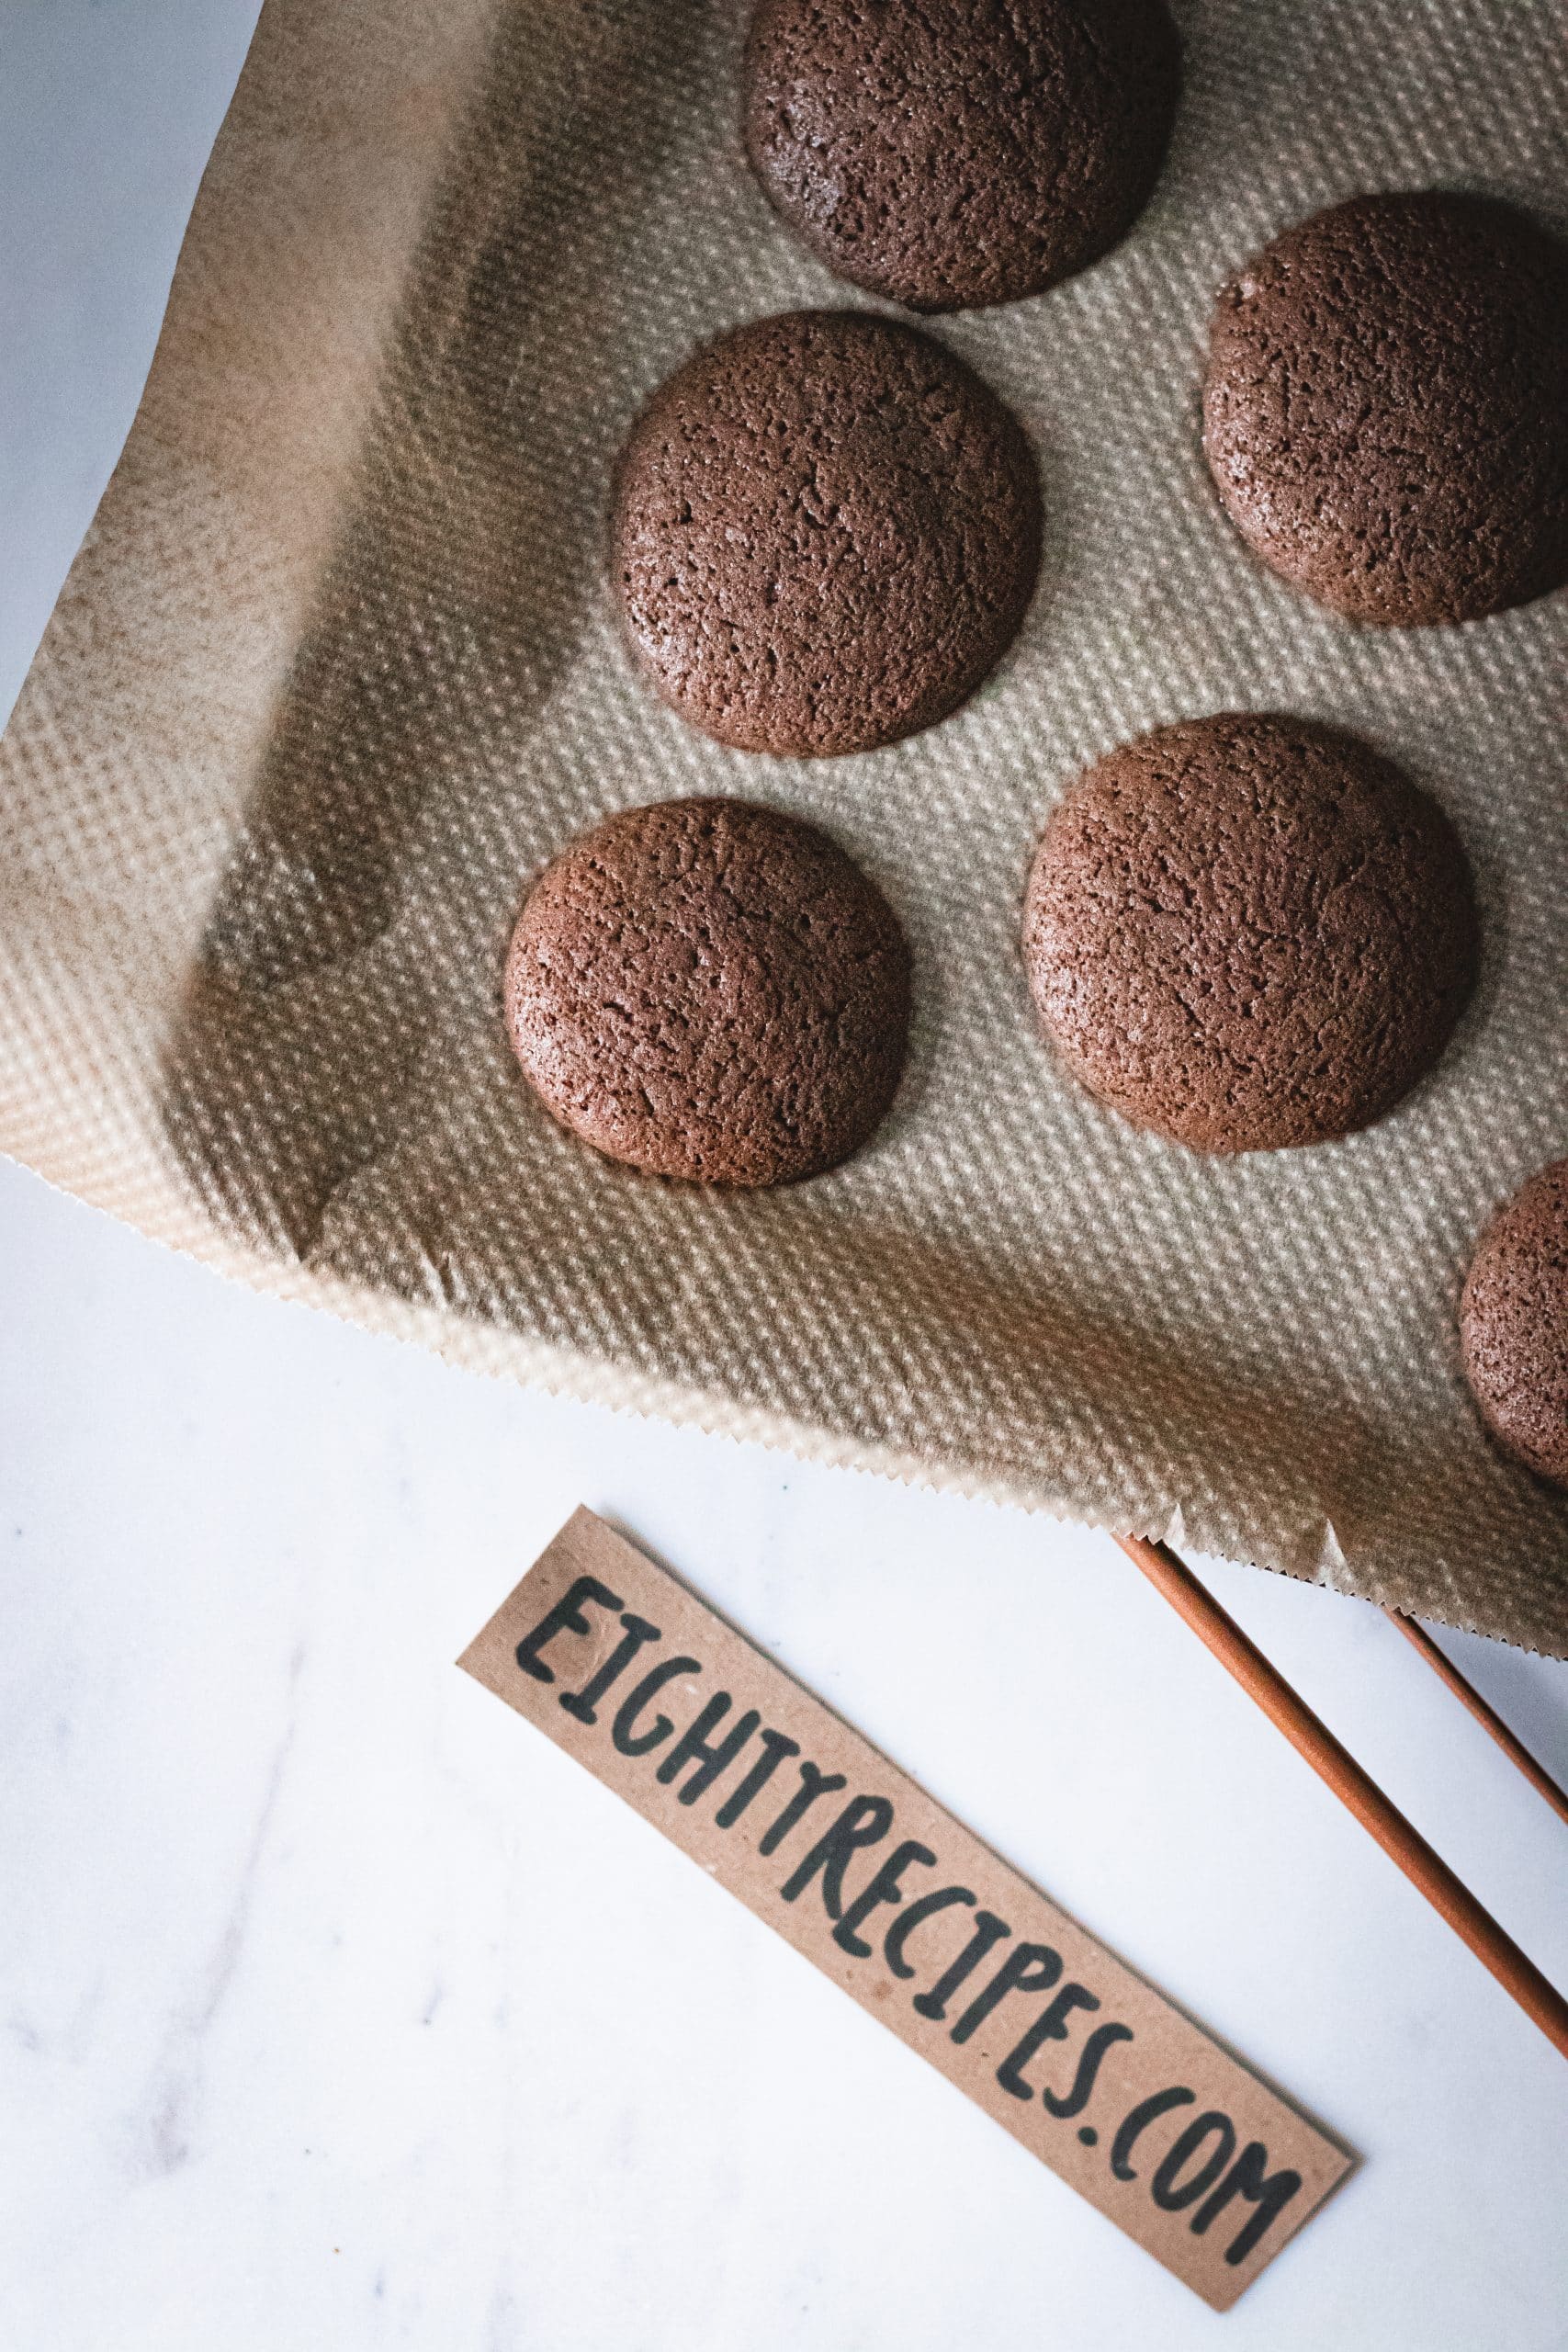
STEP 9: Remove from the oven and allow cookie pies to cool before moving the parchment paper off the cookie sheet or attempting to pick them up. They are really soft and fluffy and will become manageable once completely cooled down.
STEP 10: Repeat step 8 and 9 until all the cookie pie batter is baked.
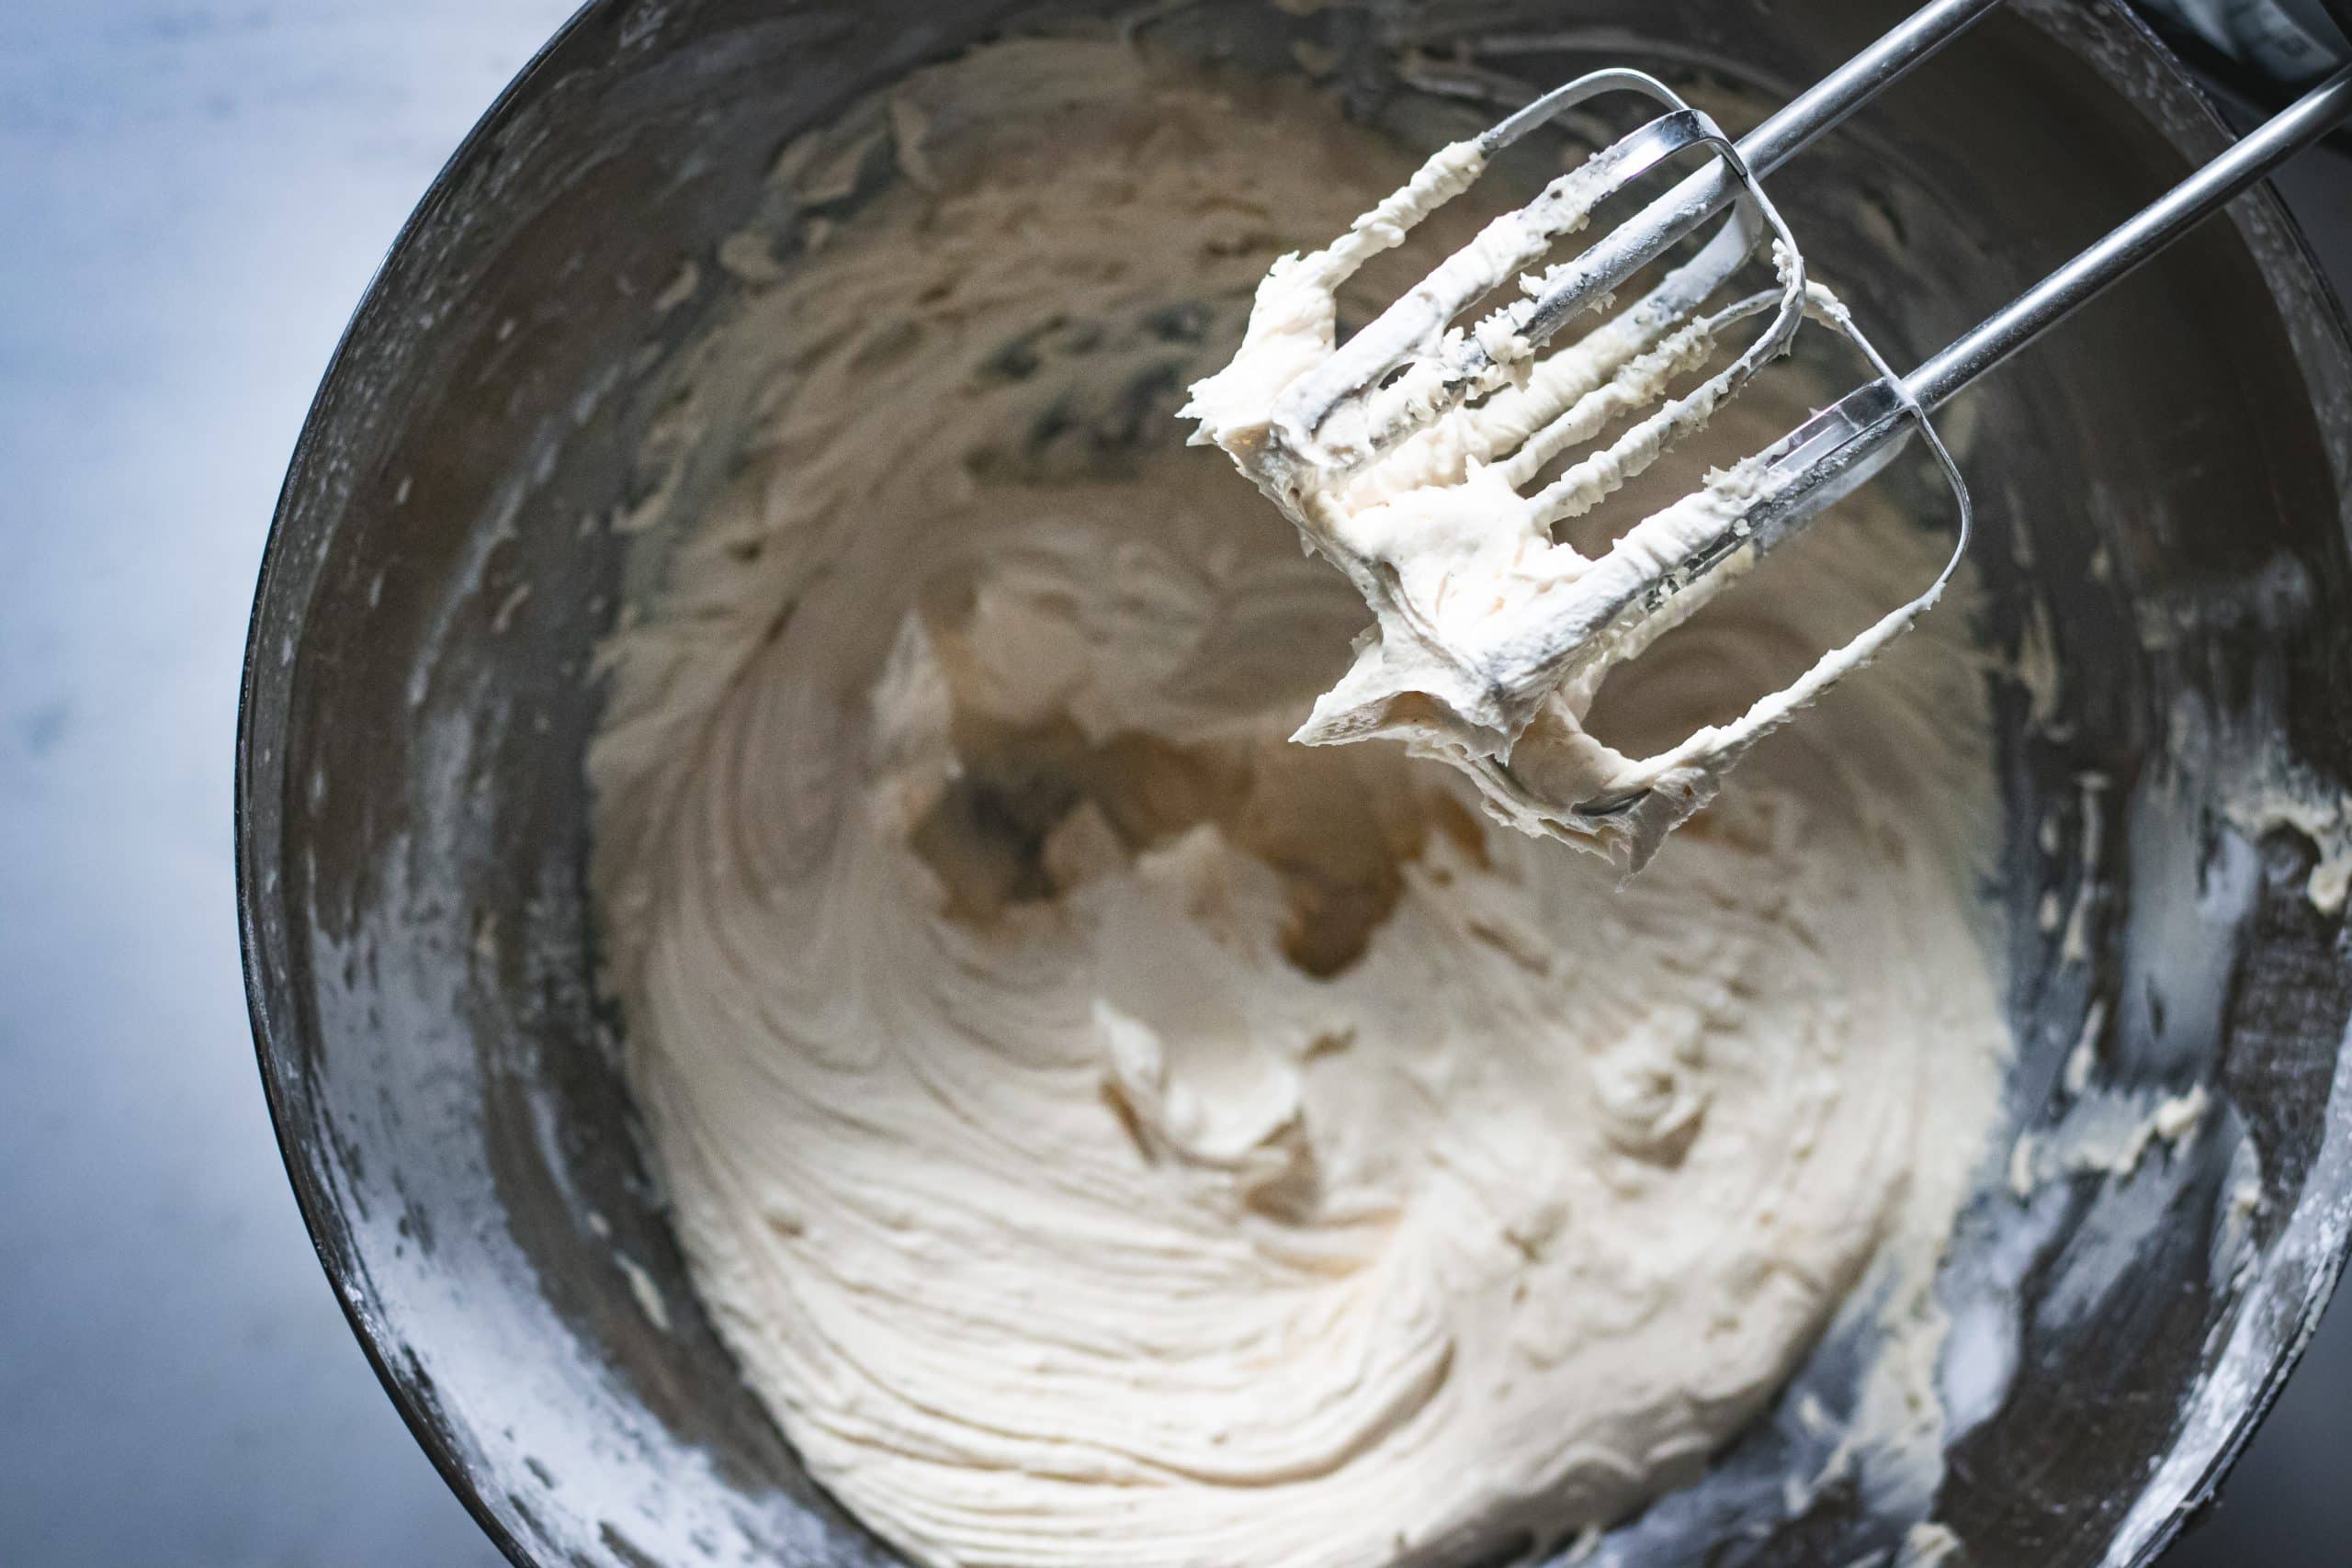
STEP 11: While the cookie pies cool down completely, make the filling. In a large bowl (if using a hand mixer) or in the bowl of a standing mixer, add the softened, room temperature butter and whip until creamy and fluffy.
STEP 12: Add the powdered sugar, vanilla extract, or vanilla bean paste and whisk until airy. The mix should start to whiten as you whip.
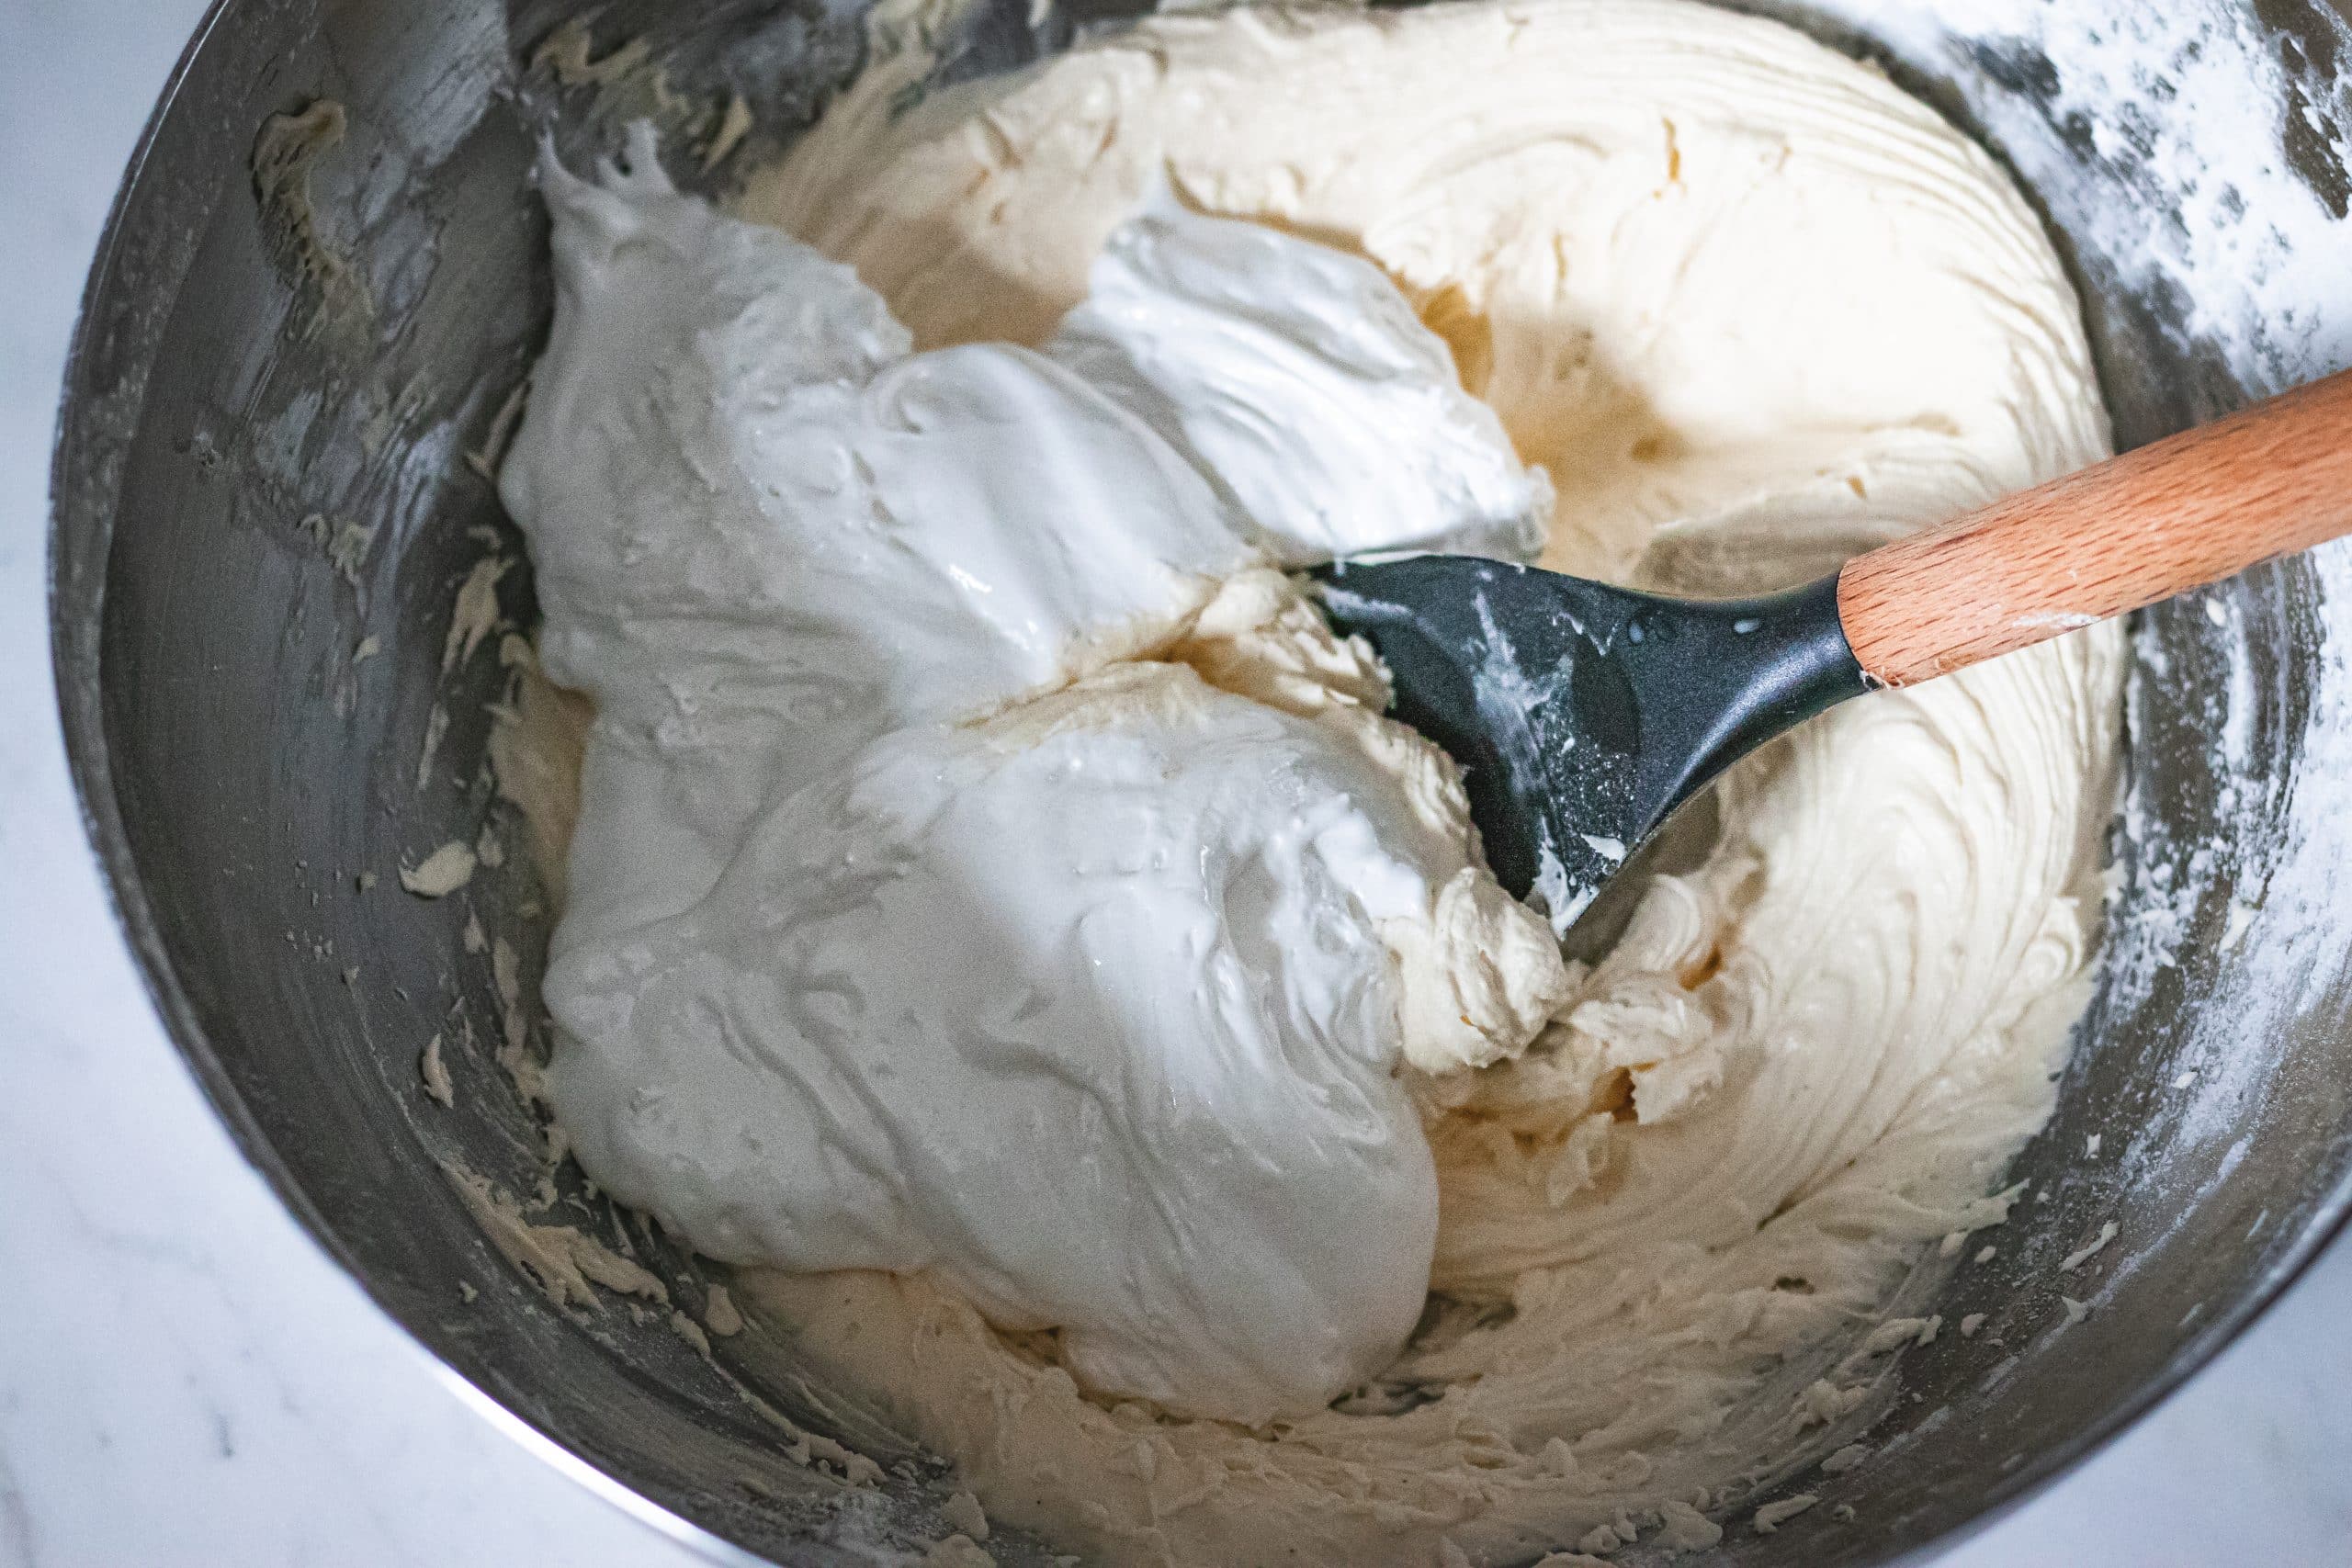
STEP 13: Once airy and fluffy, add the marshmallow fluff and fold it into the mixture. Add to a pastry bag and fill the whoopie pie making them into tiny little cookie sandwiches.
Notes:
*Store these in an airtight container in the fridge
Variations of the whoopie pie filling recipe:
There are so many variations of whoopie pies, that it can be tough to decide on the perfect filling recipe. Here are a few of our favorites:
Chocolate whoopie pies: Add a little dark chocolate to the batter for an extra rich flavor.
Cherry: Add a few pitted cherries to the batter for a fruity twist.
Peanut Butter filling and Jelly: Combine peanut cream butter and jelly for a classic combo that everyone will love.
And this version that’s come with a creamy filling (buttercream filling).
The possibilities are endless! So what’s your favorite whoopie pie filling? Let us know in the comments below!
Adjusting the Filling’s Consistency
If your marshmallow filling ends up a bit too runny or just not as thick as you’d like, don’t worry—it’s an easy fix! Here are a few simple tweaks you can make right in your kitchen:
- Add More Powdered Sugar: Marshmallow creme tends to be slightly thinner than marshmallow fluff, so you might find you need to add a tablespoon or two more powdered sugar until the mixture thickens to your liking.
- Check Your Butter Temperature: If the butter was too soft or a little too warm, the filling can turn out looser. Butter should be soft but still hold its shape—not melty.
- Chill and Rewhip: If it’s still on the softer side, pop the filling into the fridge for an hour or two to let it firm up. Once it’s chilled, give it another quick whip—this helps it hold its shape for sandwiching.
- Mix Again: After thickening, a quick mix (especially with a whisk attachment) can bring the filling back to an airy, luscious consistency.
These small changes can result in a satisfyingly sturdy filling that holds perfectly between each cookie sandwich, no mess or drips!
What to Do with Leftover Marshmallow Filling
Got a little extra marshmallow filling on your hands? No worries! Simply store any leftovers in an airtight container—pop it in the fridge, where it’ll happily stay fresh for up to 1–2 weeks, or stash it in the freezer for about a month.
When you’re ready to use it again, just defrost it in the fridge overnight, let it come to room temperature, and give it a quick whip with your hand mixer—it’ll be as good as new!
You can also use leftover filling as a sweet dip for strawberries, as a spread between graham crackers for an instant s’mores treat, or even dollop a little on top of hot cocoa for some extra flair.
Check out the printable recipe below and let me know what you think about this homemade whoopie pie (comments below).
To receive our daily recipes you can follow us on Facebook, Pinterest, and Instagram.
Ingredients
Pies:
- 2 cups 283g of all-purpose flour
- ½ cup 45g unsweetened cocoa powder
- 1 tsp baking soda
- ½ tsp salt
- 1 cup 200g light brown sugar
- ½ cup 120ml buttermilk
- ½ cup 120ml vegetable oil
- 1 large egg
- 1 ½ tsp vanilla extract of vanilla bean paste
- ½ cup 120ml hot water
Whoopie pie Filling:
- 1 cup 200g unsalted butter, softened, at room temperature
- 2 ¼ 270g powdered sugar, sifted
- 1 tsp vanilla extract or vanilla bean paste
- 10 oz 285g marshmallow fluff
Equipment:
- Cookie sheets or baking sheets
- Parchment paper
- Hand mixer or standing mixer
- 2 pastry bags optional but makes the work easier
Instructions
- STEP 1: Preheat the oven to 190ºC/375ºF and set oven racks to the upper and lower third of the oven.
- STEP 2: Line 2 cookie sheets with parchment paper and set them aside. You will need to bake two or three times depending on the size of your cookie sheets.
- STEP 3: In a medium bowl, combine the flour, unsweetened cocoa powder, baking soda, and salt. Stir until well combined and set aside.
- STEP 4: In a large mixing bowl mix in the brown sugar, buttermilk, vegetable oil, egg, and vanilla extract of vanilla bean paste and whisk until well combined.
- STEP 5: Gradually add the dry ingredients to the wet batter mixing until smooth. At this point, it should look like a thick brownie batter.
- STEP 6: Add the hot water and continue to mix until smooth. The consistency should change a bit making it smooth and velvety.
- STEP 7: Transfer the cookie pie batter to the lined cookie sheets with the help of an ice cream scoop or with a pastry bag (ziplock bags also work) if you feel like this will be easier. You want to drop a 1 ½ tbsp scoop of batter at a time, leaving at least 2in (5cms) in between each scoop/pie. They should be really spaced out.
- STEP 8: Bake the first two sheets for 4 minutes, then rotate them (the lower cookie sheet will go to the first rack and the first rack cookie sheet will go to the lower rack) and bake for 4 additional minutes. The center of the cookies should spring back when touched.
- STEP 9: Remove from the oven and allow cookie pies to cool before moving the parchment paper off the cookie sheet or attempting to pick them up. They are really soft and fluffy and will become manageable once completely cooled down.
- STEP 10: Repeat step 8 and 9 until all the cookie pie batter is baked.
- STEP 11: While the cookie pies cool down completely, make the filling. In a large bowl (if using a hand mixer) or in the bowl of a standing mixer, add the softened, room temperature butter and whip until creamy and fluffy.
- STEP 12: Add the powdered sugar, vanilla extract, or vanilla bean paste and whisk until airy. The mix should start to whiten as you whip.
- STEP 13: Once airy and fluffy, add the marshmallow fluff and fold it into the mixture. Add to a pastry bag and fill the whoopie pie making them into tiny little cookie sandwiches.
Notes
Conclusion:
The Ultimate Best Whoopie Pies are the perfect dessert for any occasion! Whether you’re looking for a sweet snack to take to a party or an excellent dessert to serve to guests, these pies are sure to please. Not only are they delicious, but they’re also easy to make – so you can have them on hand whenever the mood strikes you.
CHECK OUT THESE AWESOME, EASY RECIPES:
- 30 Best Simple Lettuce Salad Recipes
- Freekeh: What Is It?, How To Cook It, Why Is Freekeh Good For You?
- Homemade Chicken And Dumplings Casserole